Rust Server Management Tool
v1.7.2 Server ManagerAn all-in-one app to manage your Rust Server.
For PowerShell users❤️ : iex (irm https://rsmt.dev/rsmt)
Features & Tools
Various tools to manage your Rust Server.
Server Installation
Allows easy installation, updates, and patches for Rust dedicated servers, including Oxide installation, updates, and plugin management. All done instantly via a button, simple. 🚀
Server Configuration
Grants complete control over the server variables, commands and parameters. Play however, whenever, wherever you want to. Absolutely no command-line hassle. 💻
Plugin Management
Install your plugins one time, then never worry about updates again. Update plugins simply at the click of a button.
Official downloads only from UMod API. 🔄
Backup & Restore
Choose between world/player data, Oxide data, or the entire server. Restore from backups, keep custom servers and worlds, or host old custom versions. Updating recommended if restoring.
Archivable, your server, your choice. ❤️
RCON Tool (remote-connect tool)
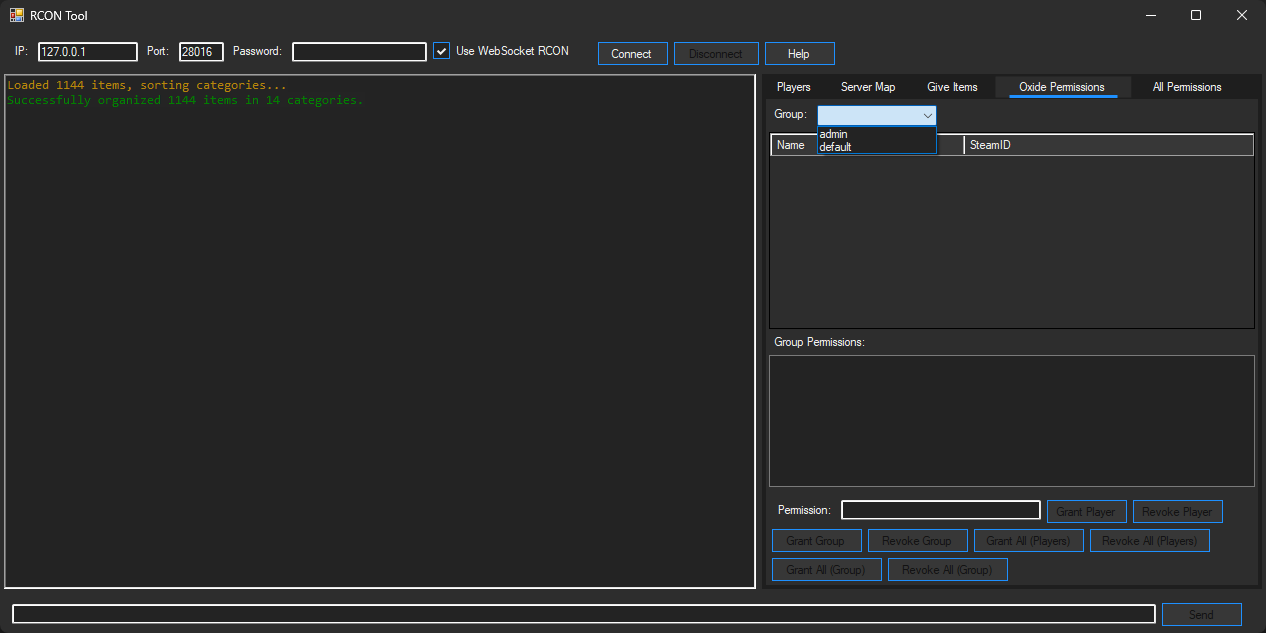
Remotely connect to your server. Command auto-completion + Oxide permissions included.
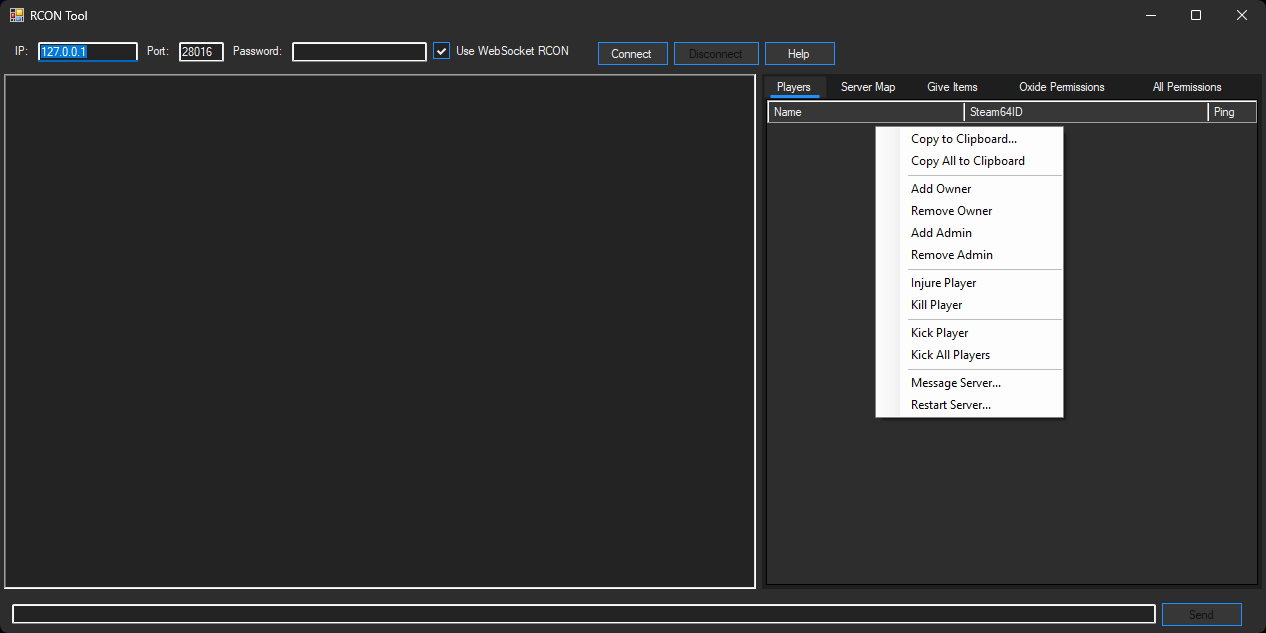
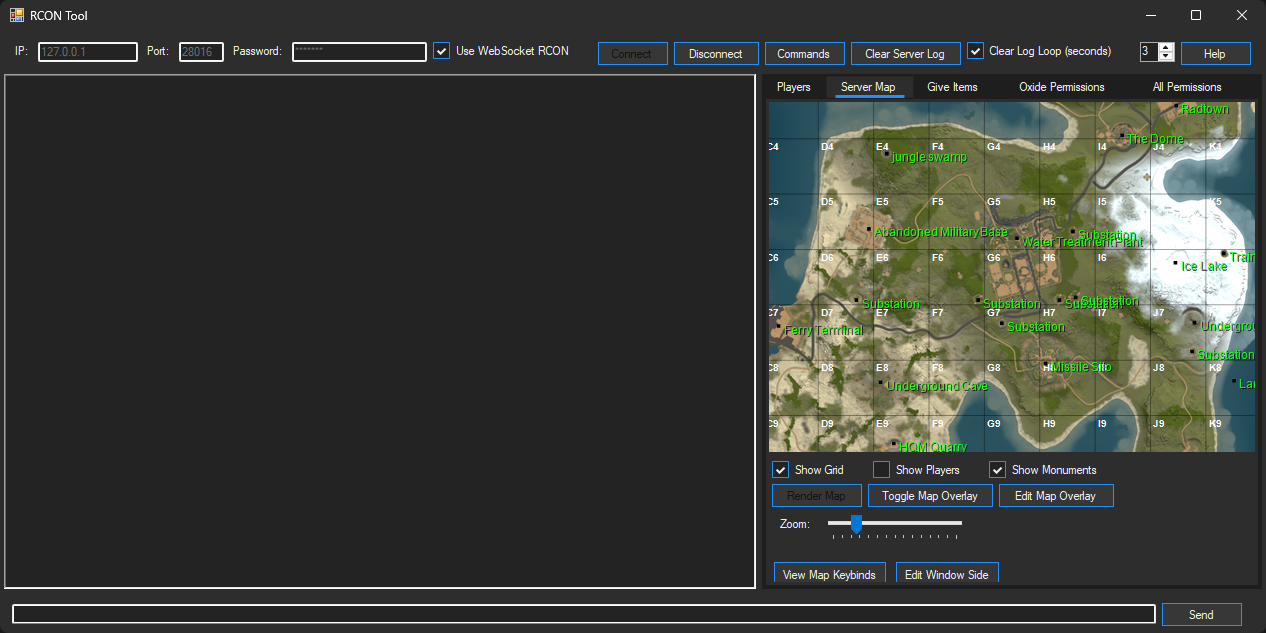
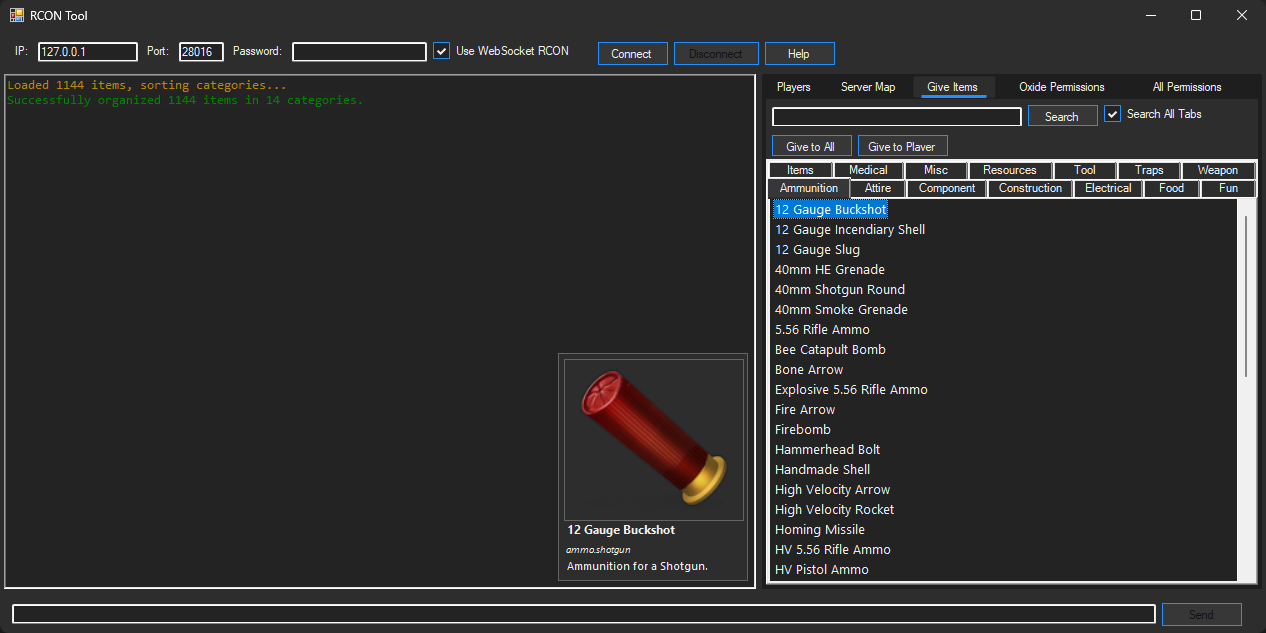
Kick & view player Steam64ID or Name, message server, view map overlay with hotkeys, give items for players or whole server. 🌐
Skin Downloader
Find, view, and save any Skin for any item in Rust, including Twitch and Paid Skins.
Fetch Skin Names/IDs, view an HTML page for fetched results, save Skin Names/IDs, and download Skins for client and server use. 🎨
Video Demo
In-depth video on key features.
* Note; This is a demo & may not be up-to-date.Downloads & Releases
Latest Rust Server Management Tool and Skin Resources.
Rust Server Management Tool Updates
Skin Updates
User Guide
Complete guide to using the Rust Server Management Tool.
Main Window
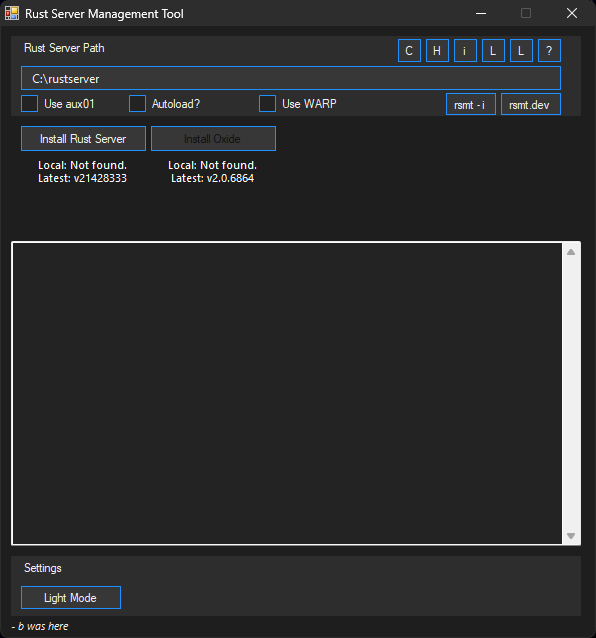
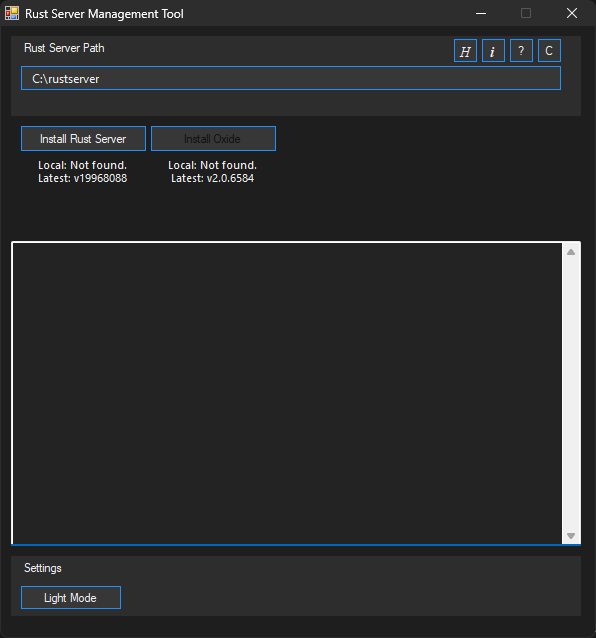
This is the main window of the application with a live log to track installations, updates, and changes.
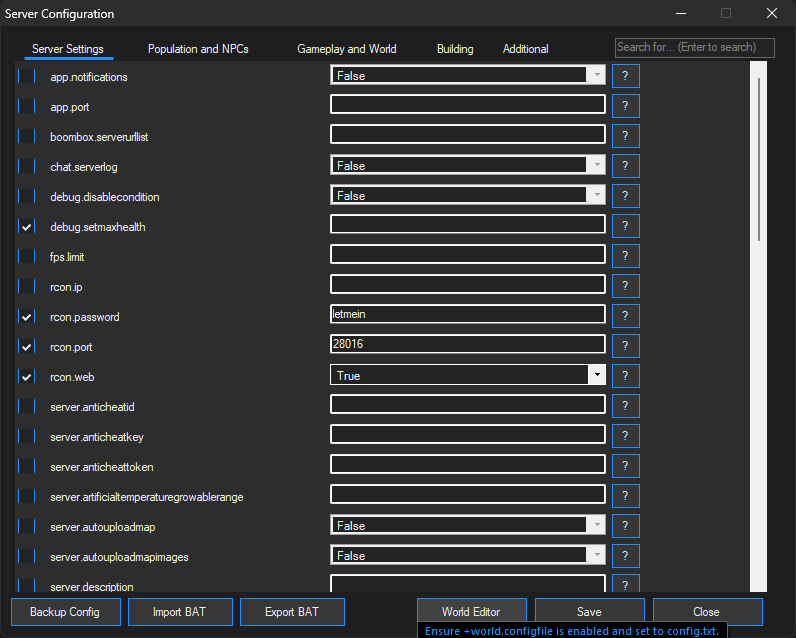
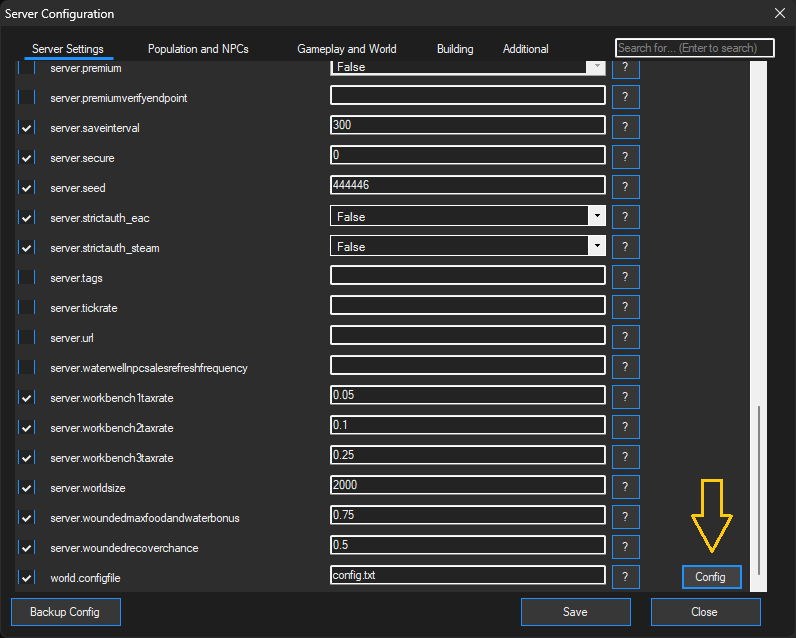
Server Configuration
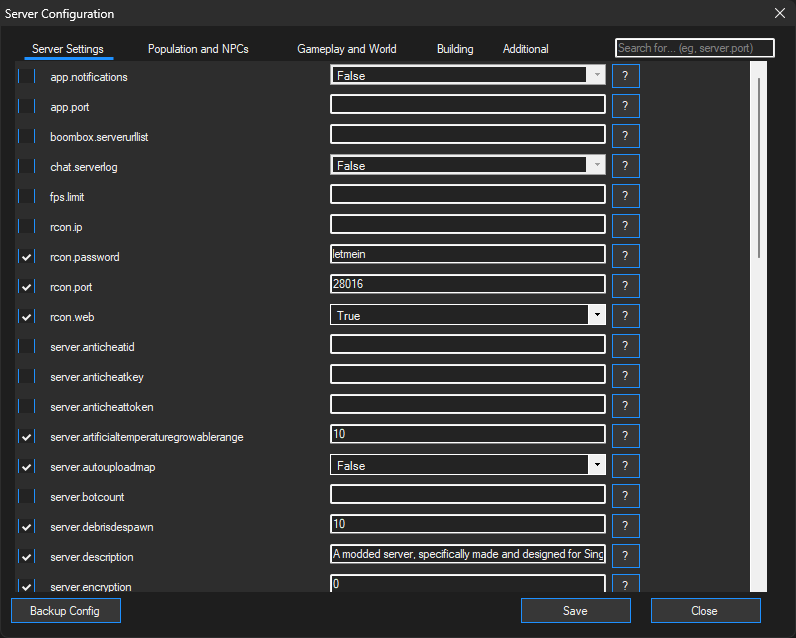
Complete control over your server configuration with an intuitive interface.
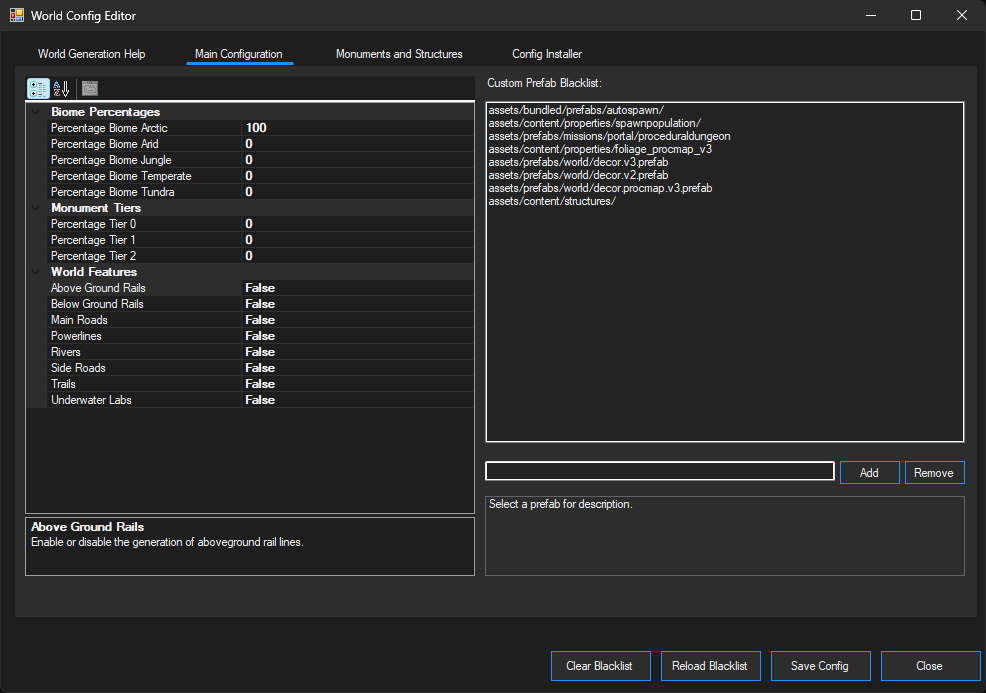
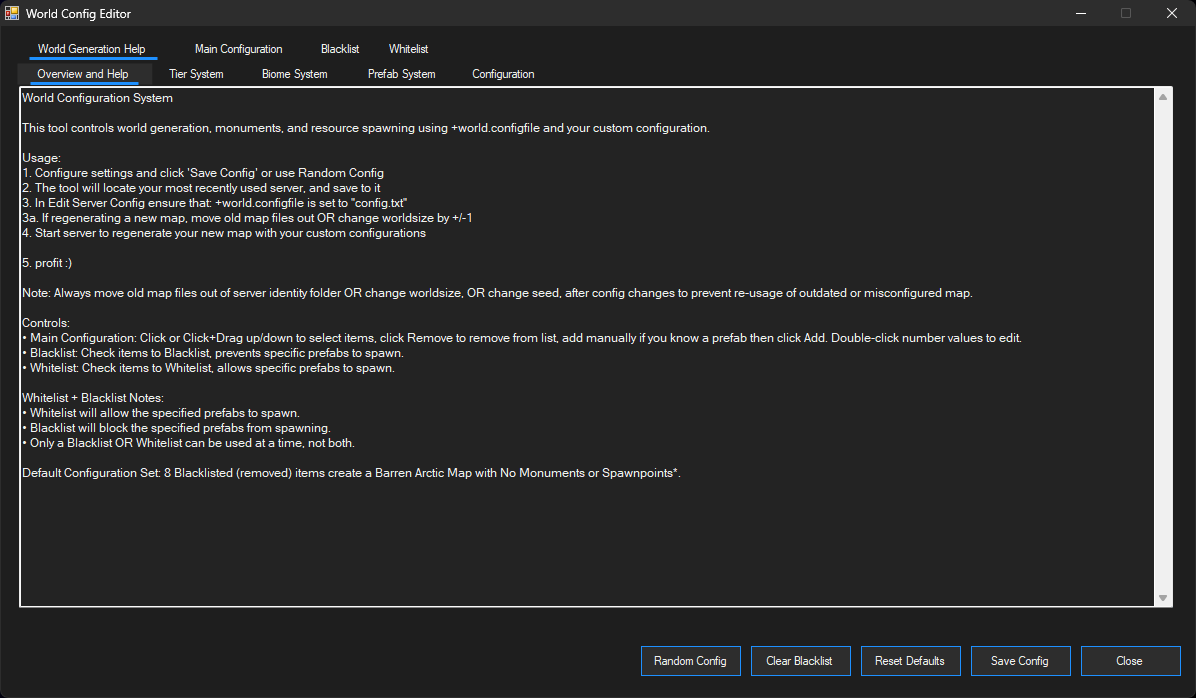
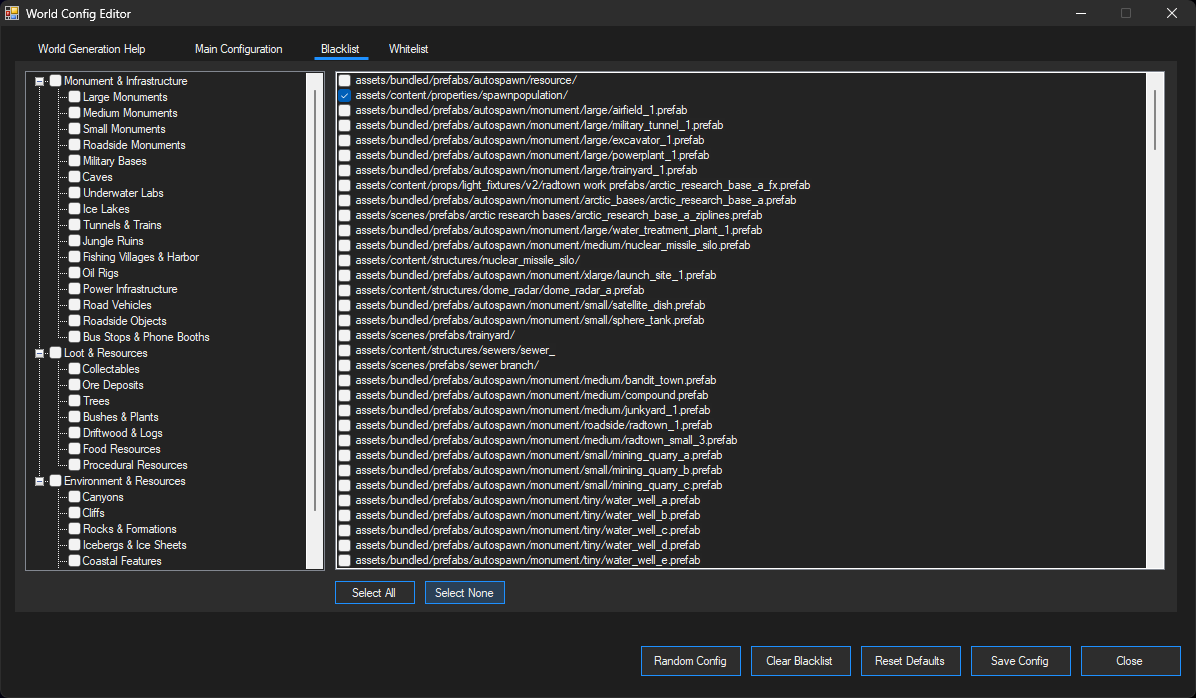
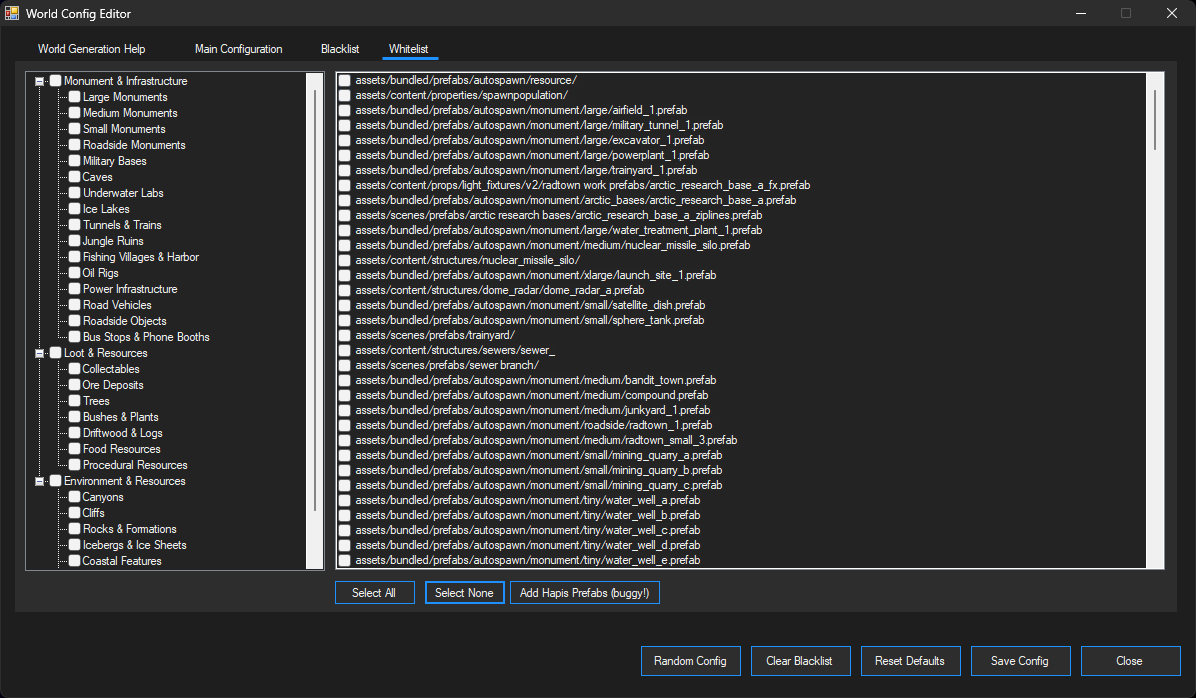
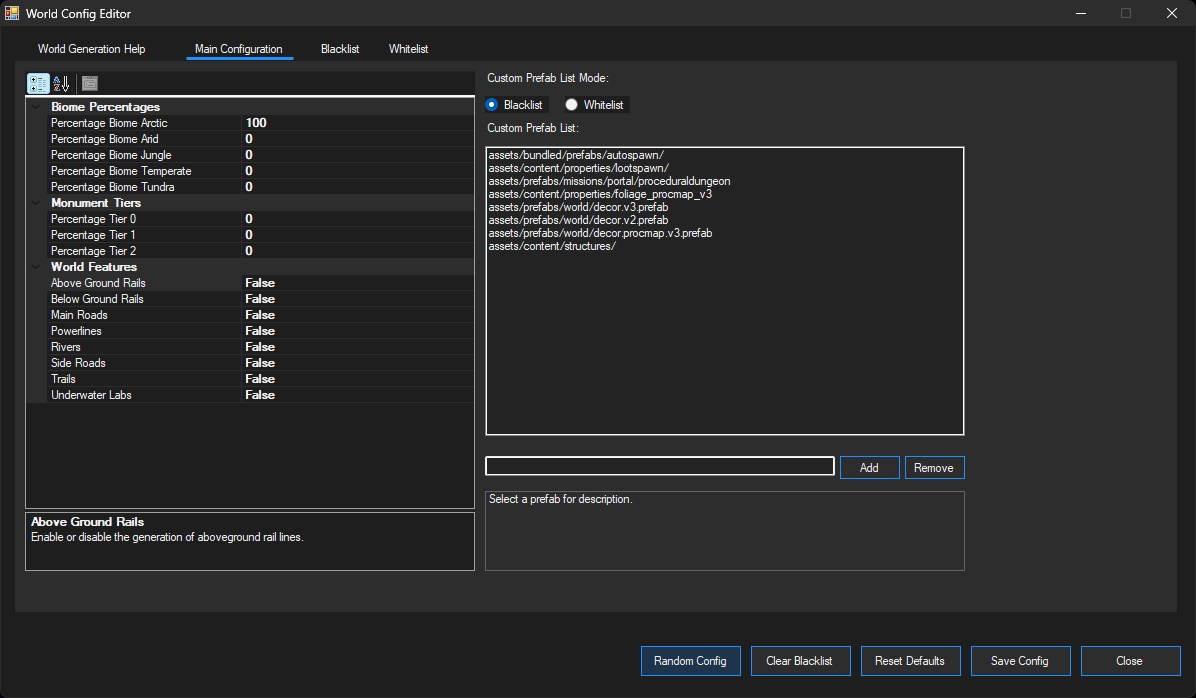
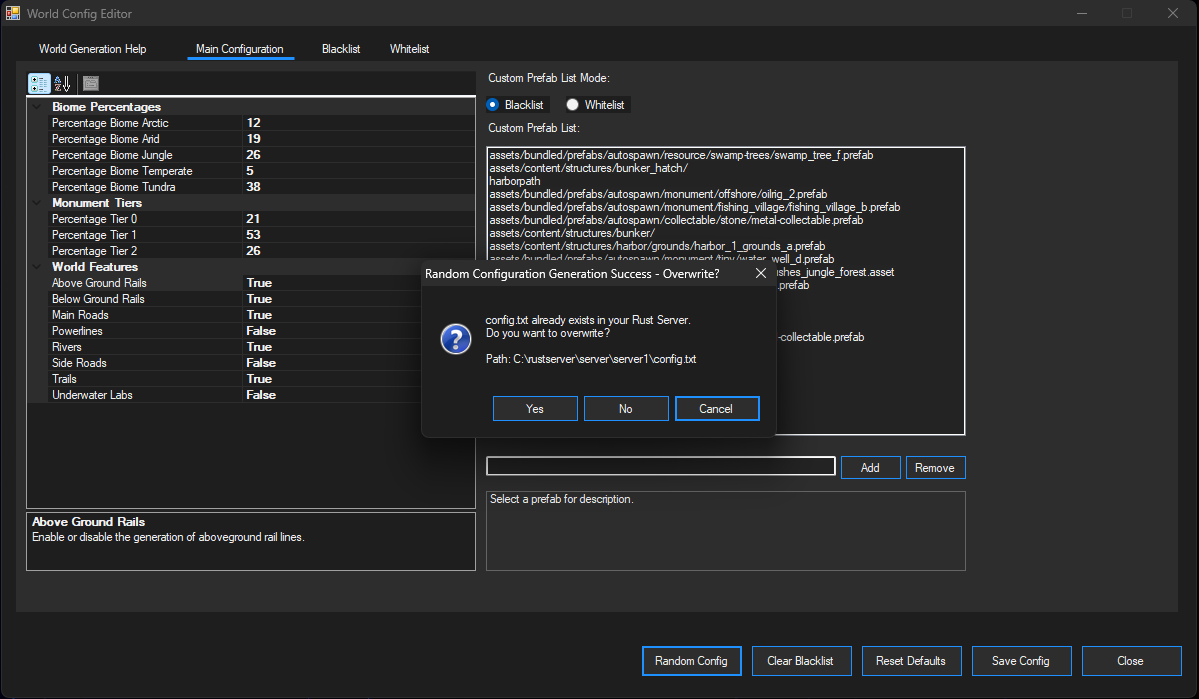
World Config Editor
Allows for specification of biomes, removal of monuments, roads, etc.
Full control over how the server creates a map tailored to your constraints.
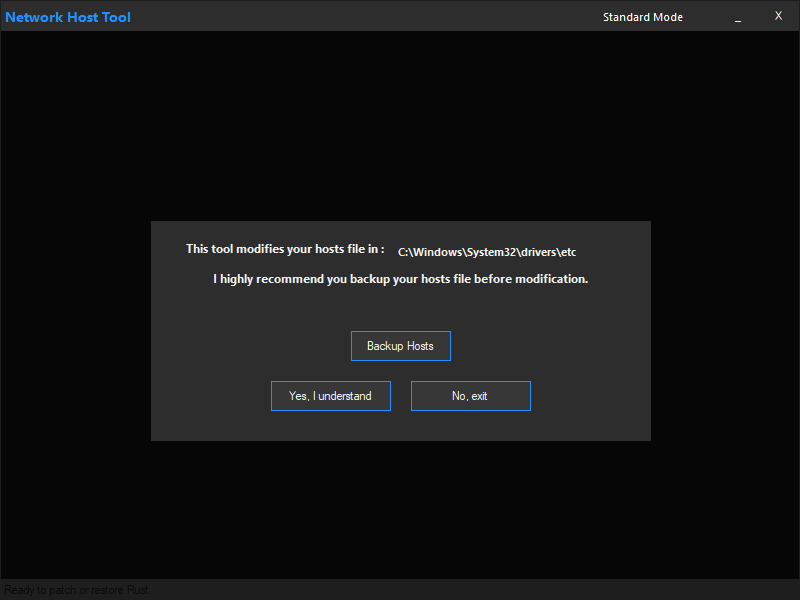
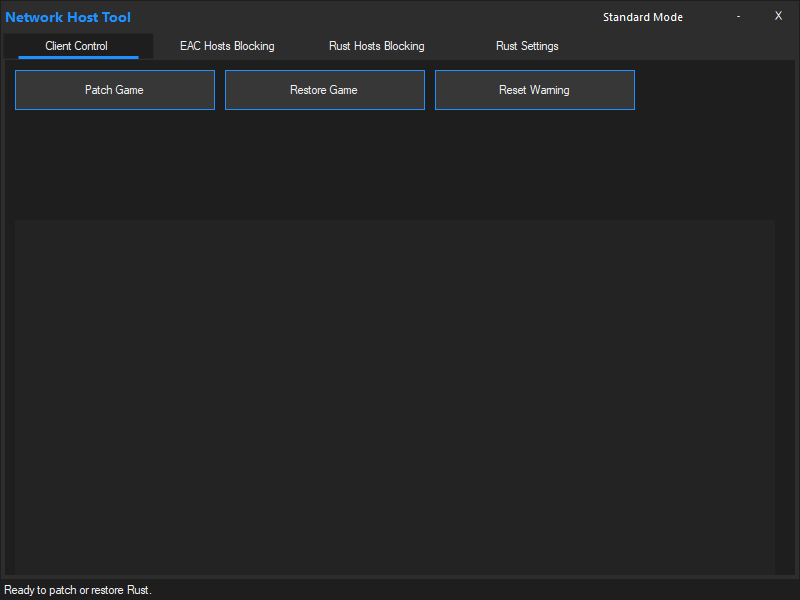
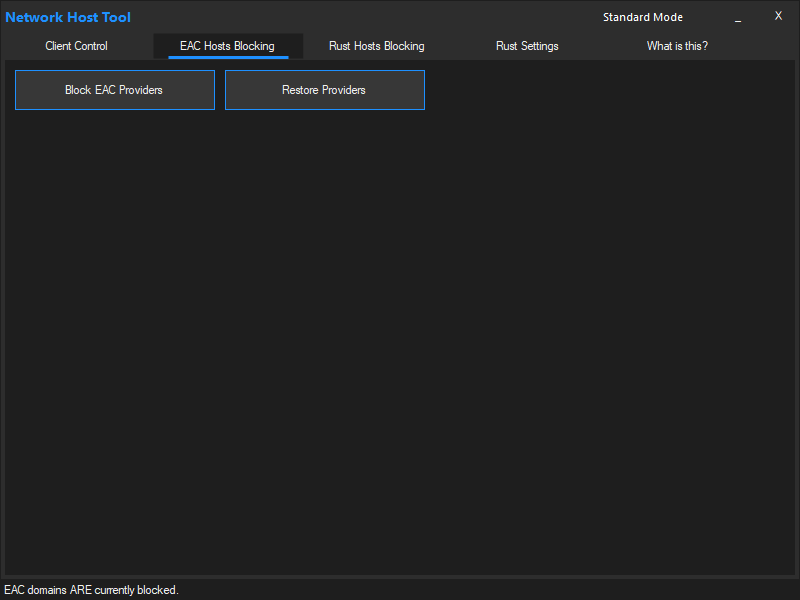
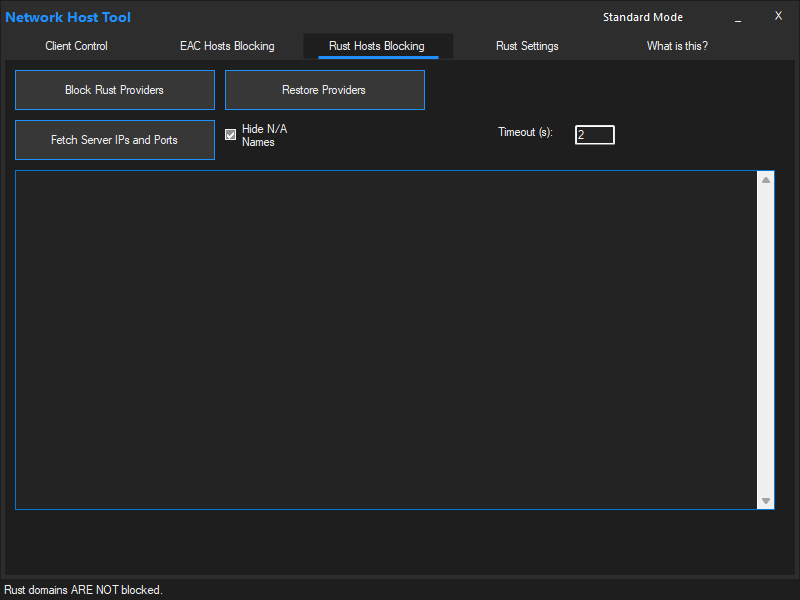
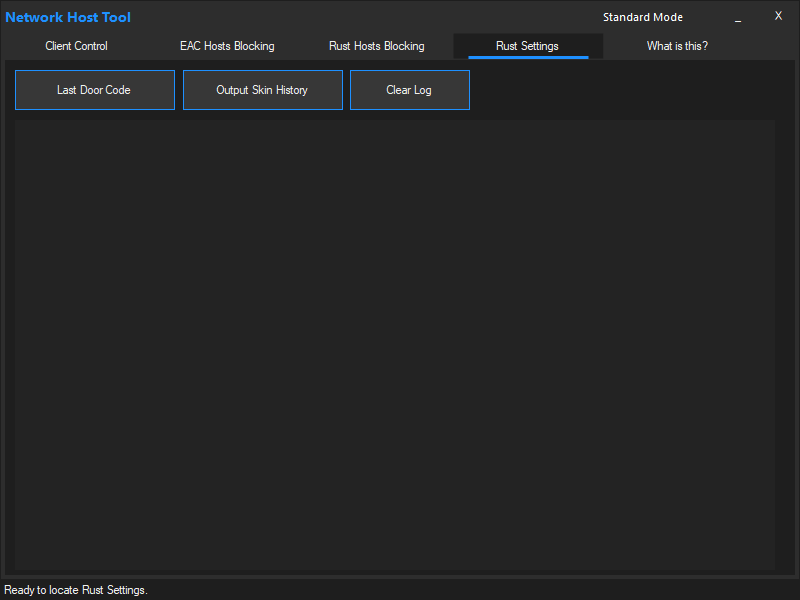
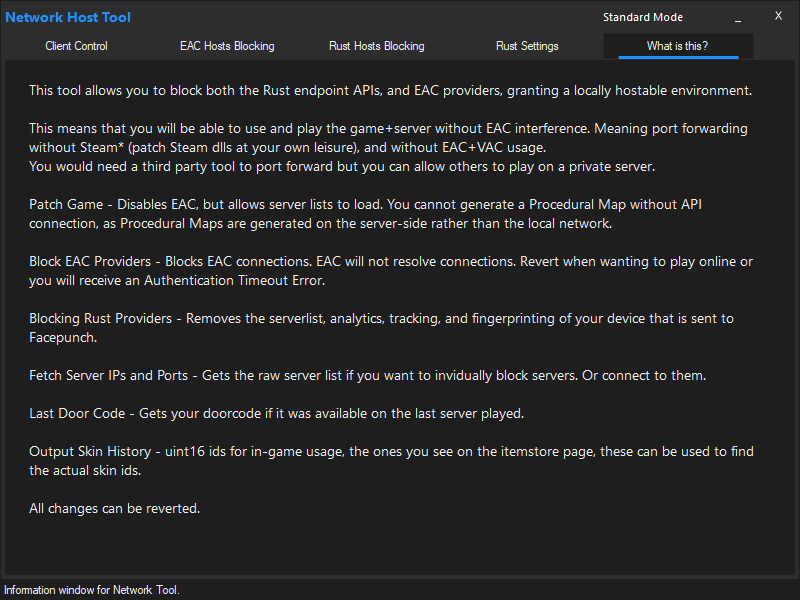
Network Tool
Tool to allow modifications to play your server without extra processes or unauthorized intrusions.
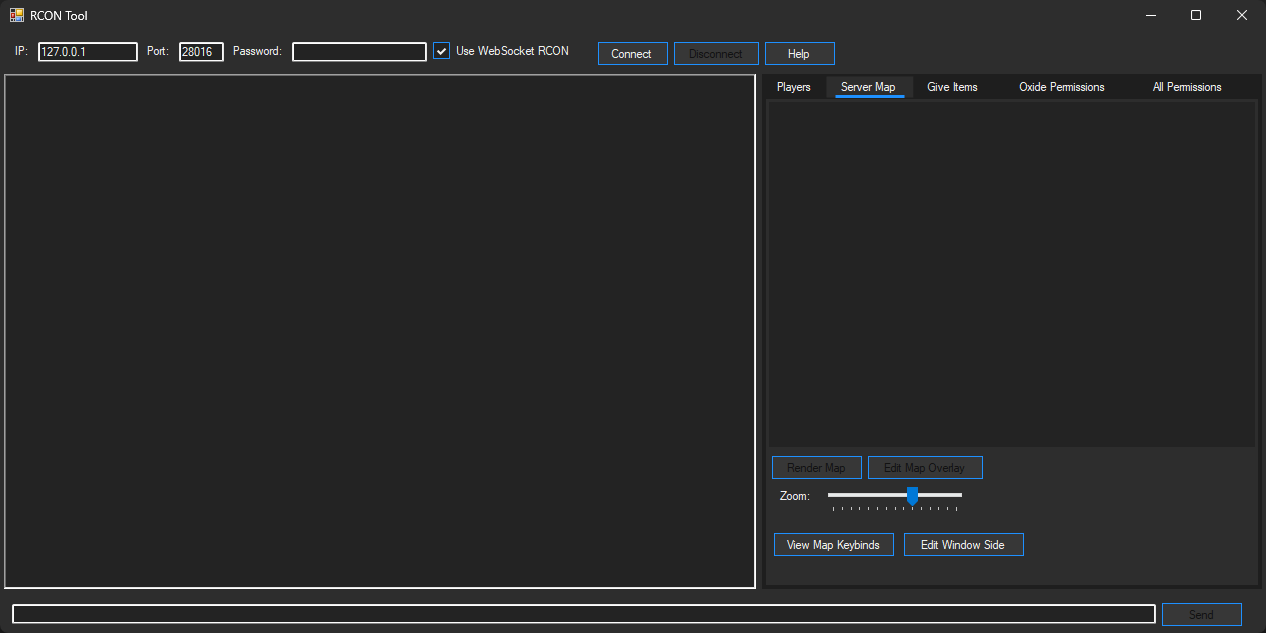
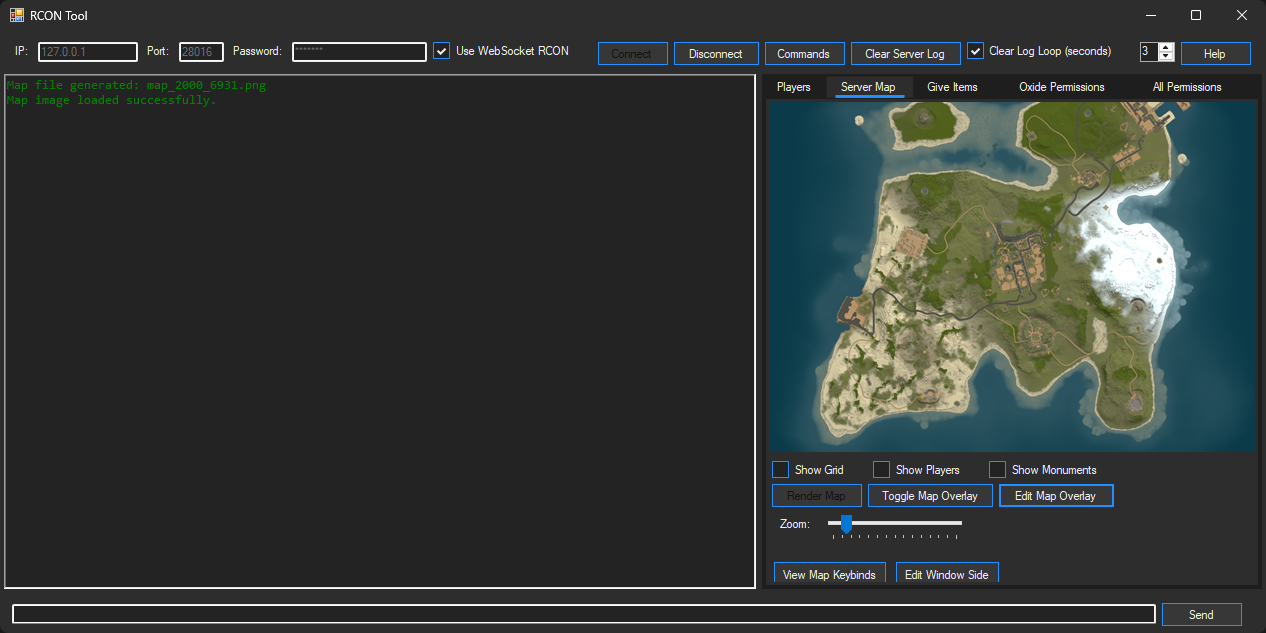
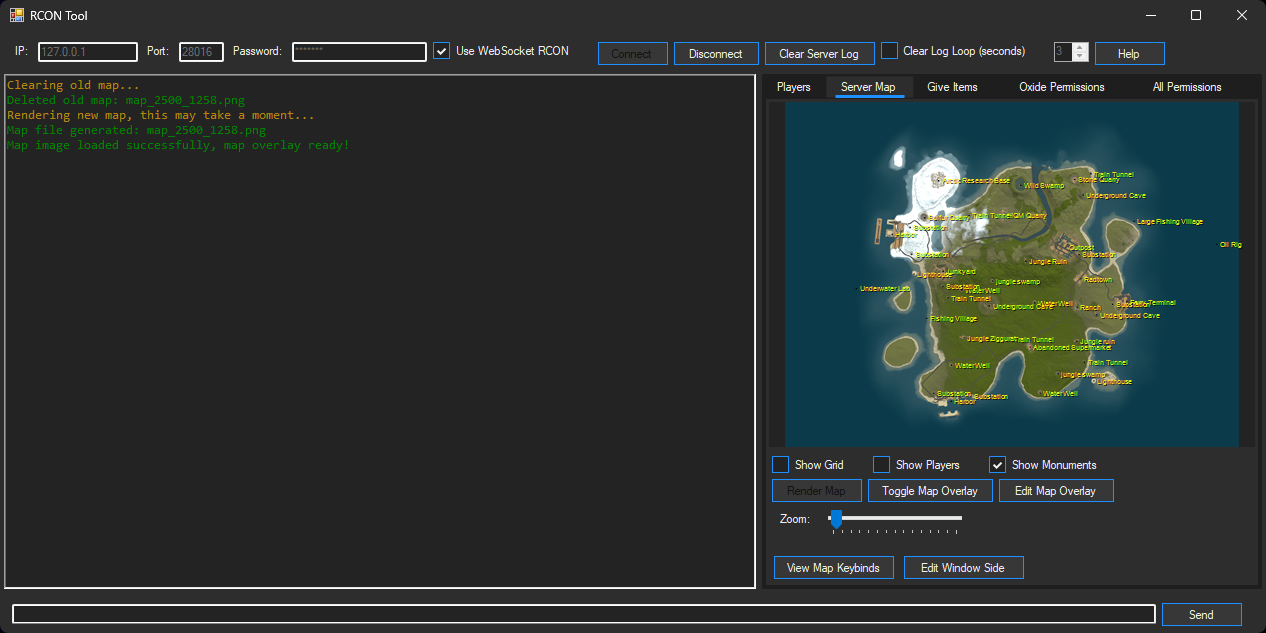
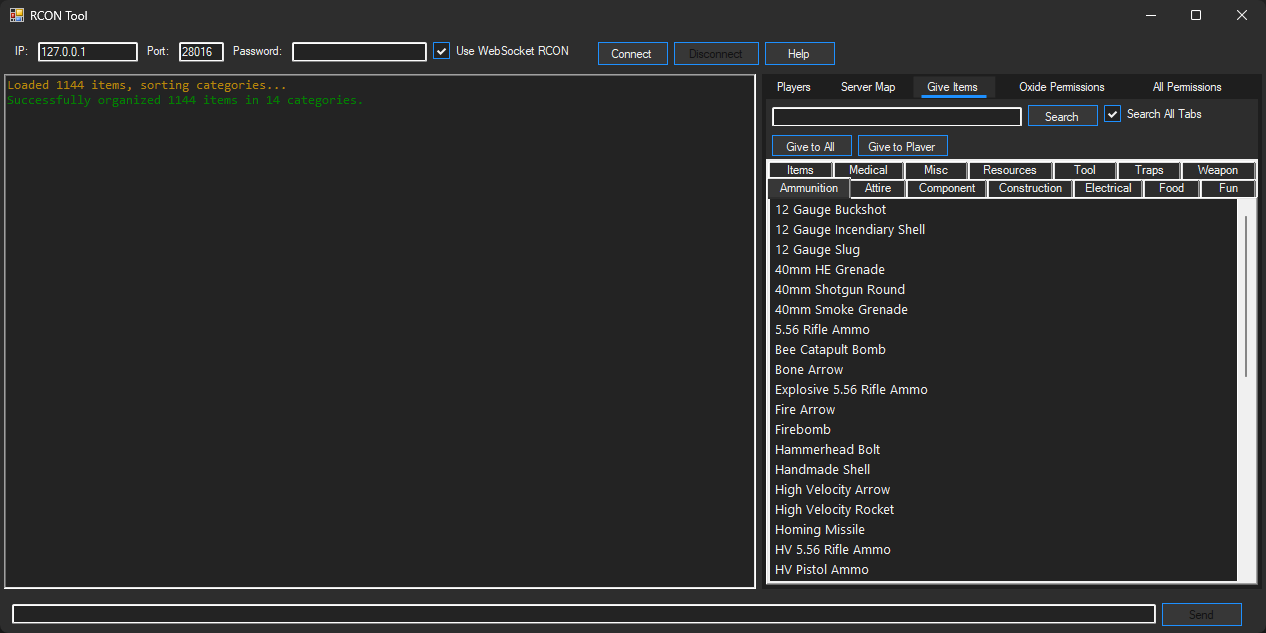
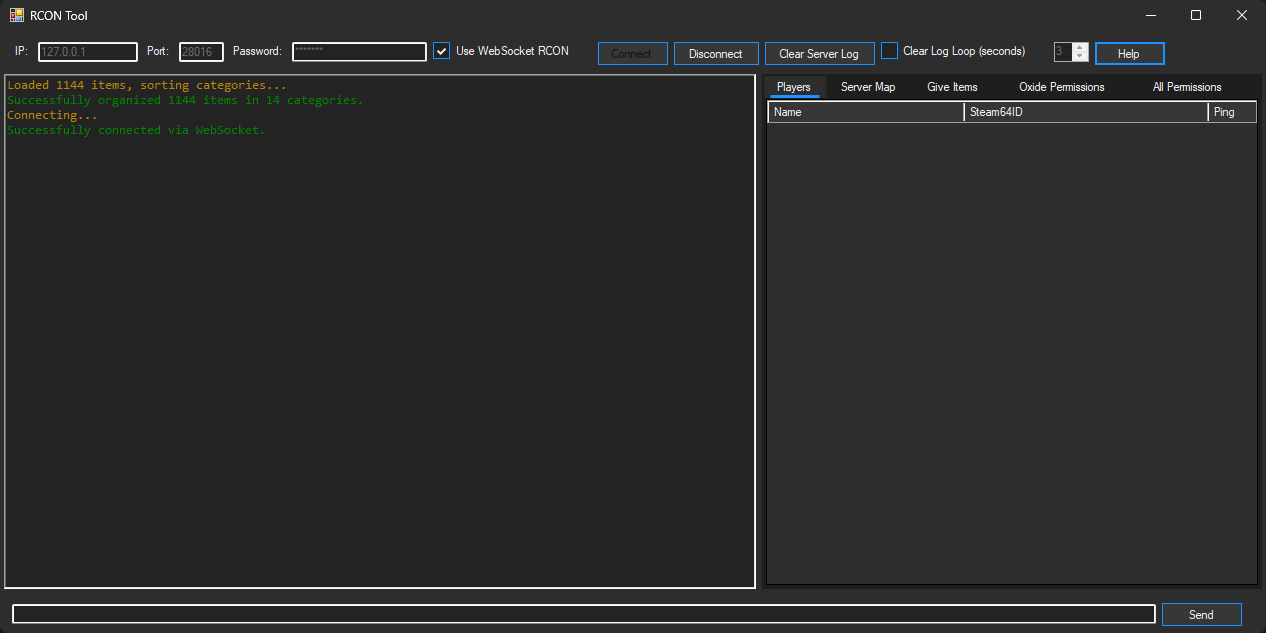
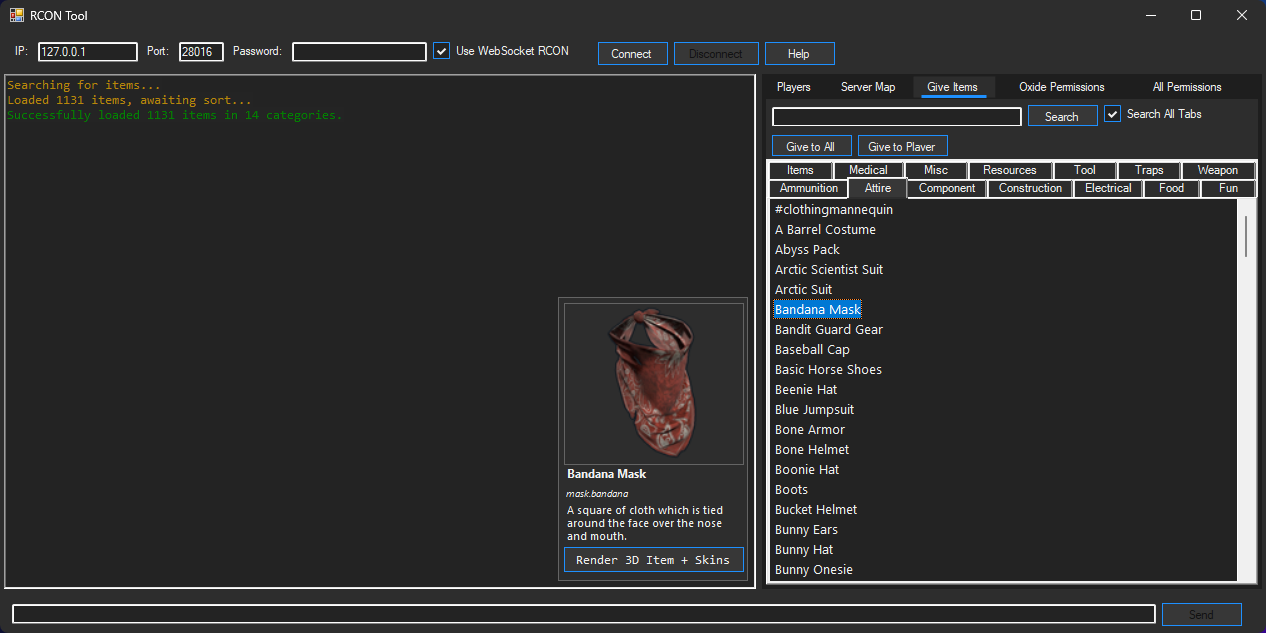
RCON Tool
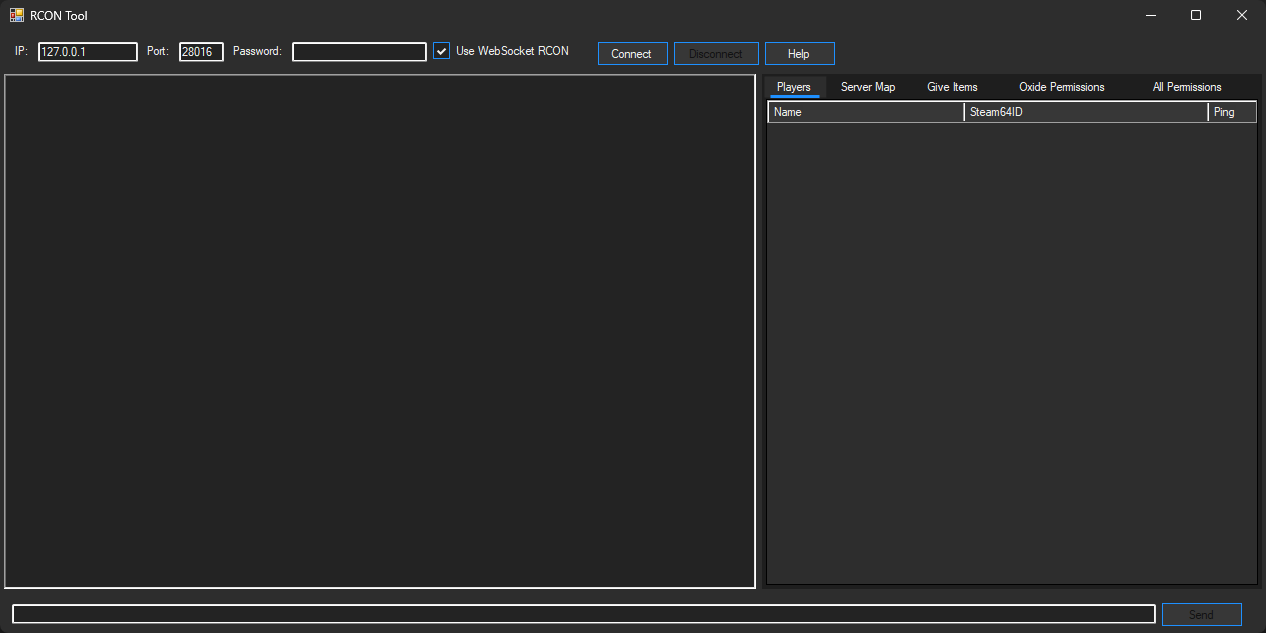
Monitor server output and player status in real-time with full RCON support.
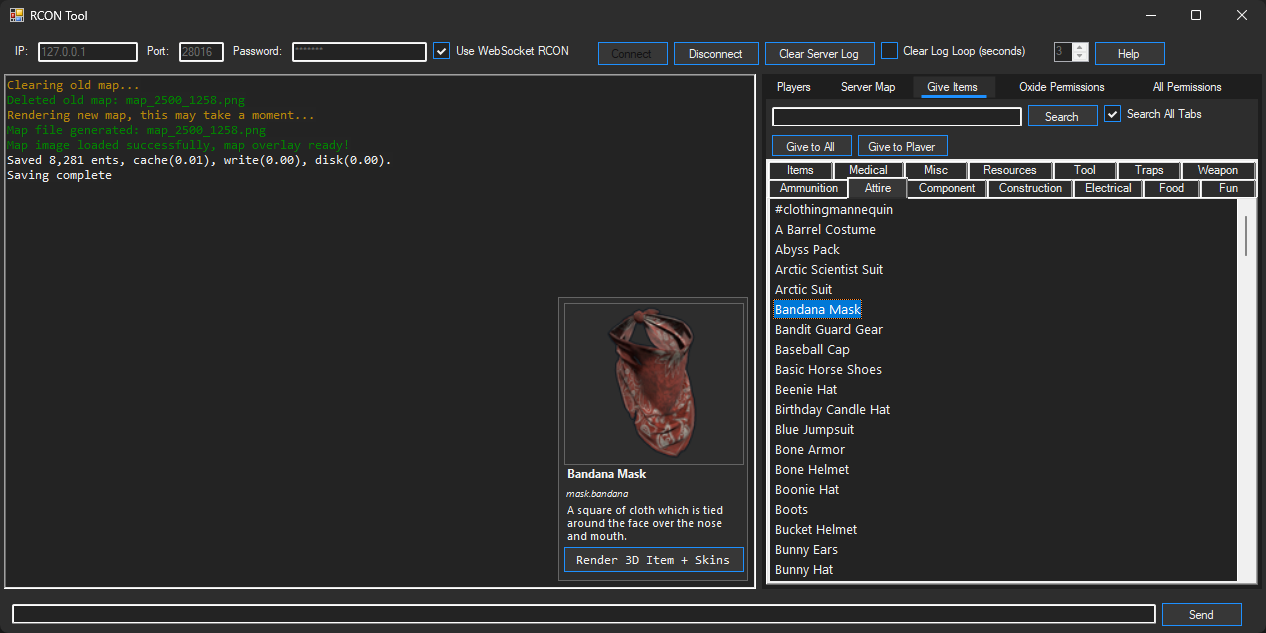

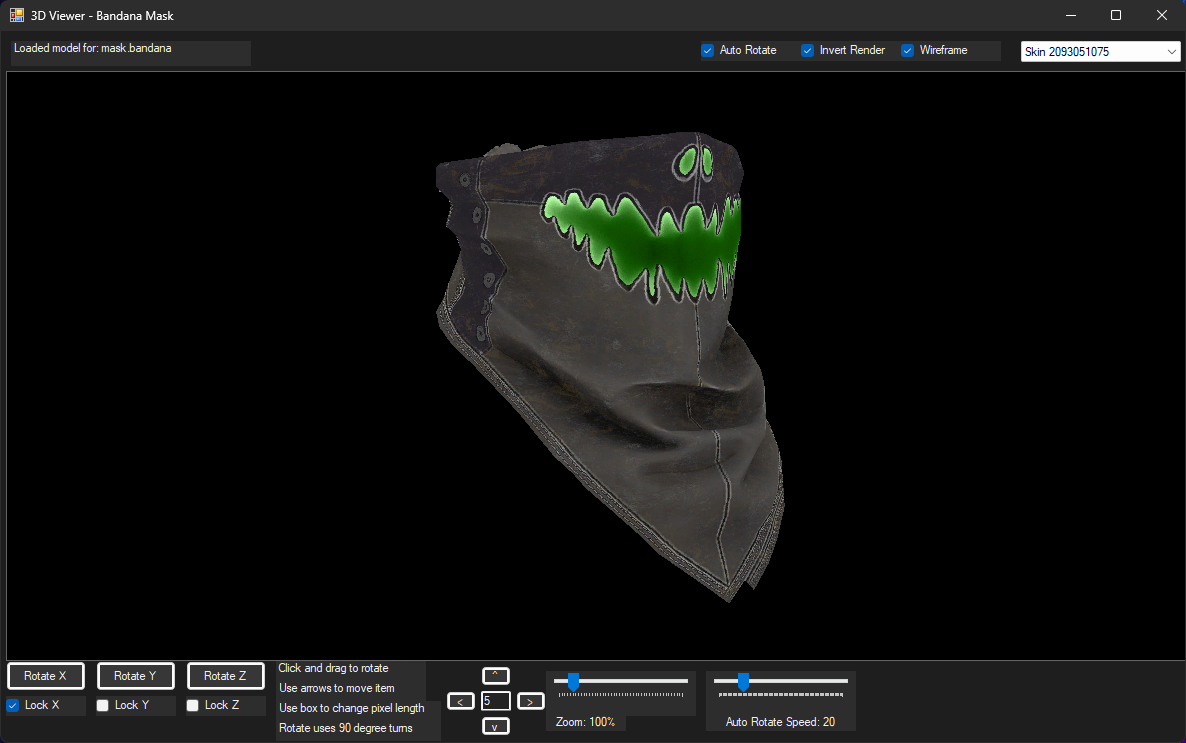
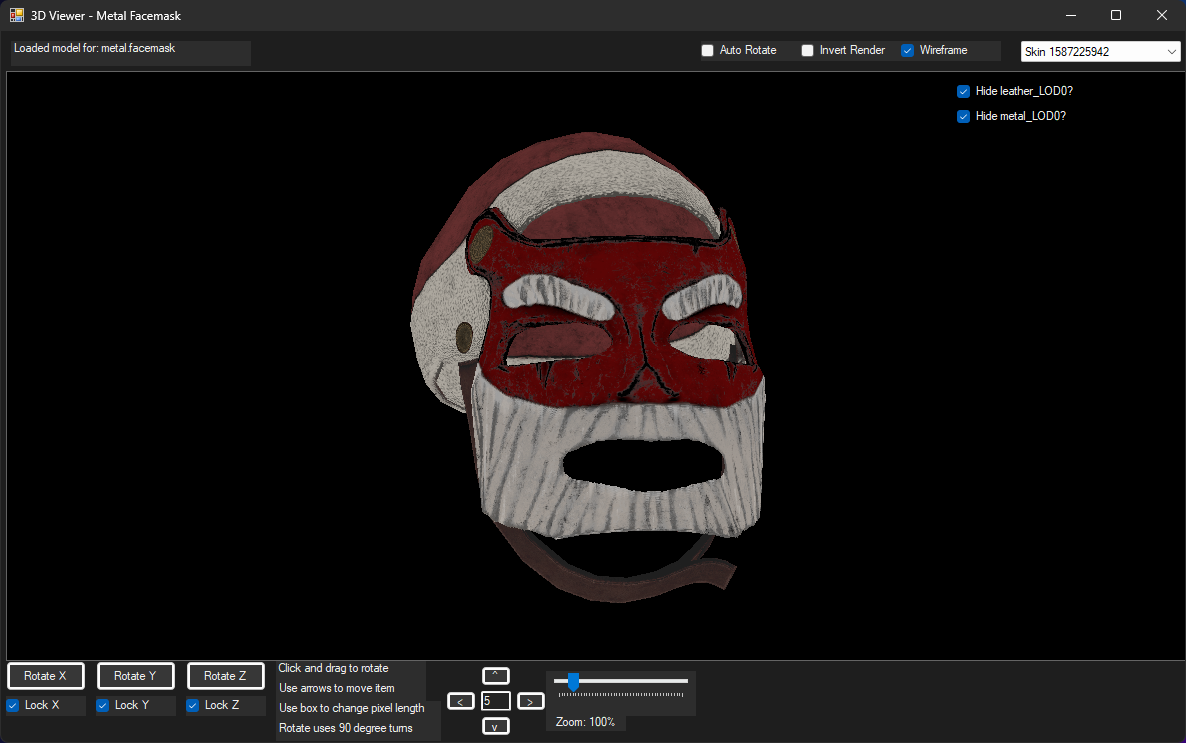
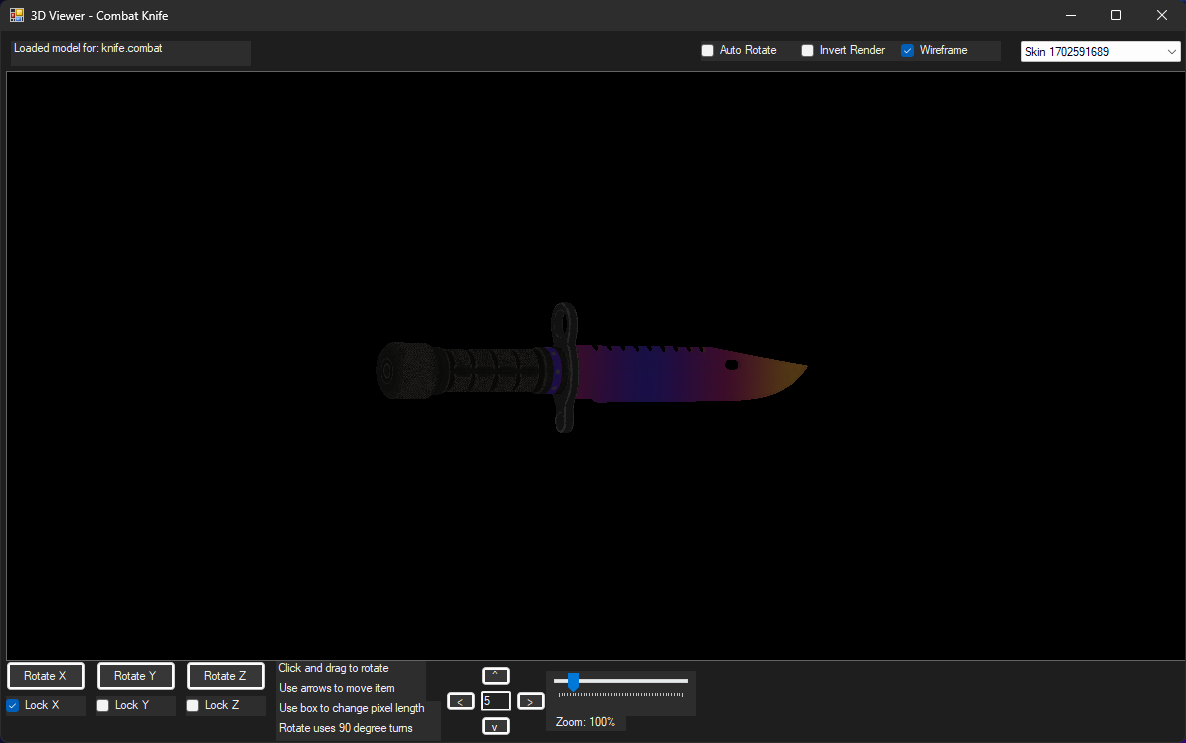
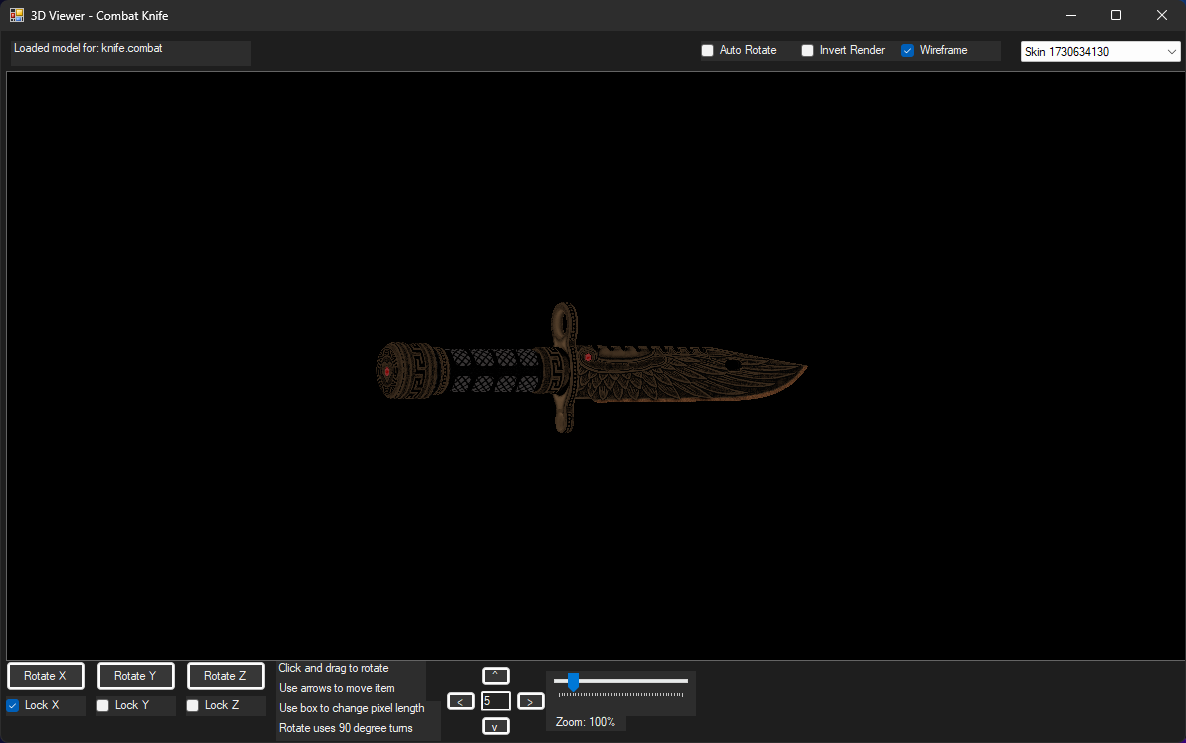
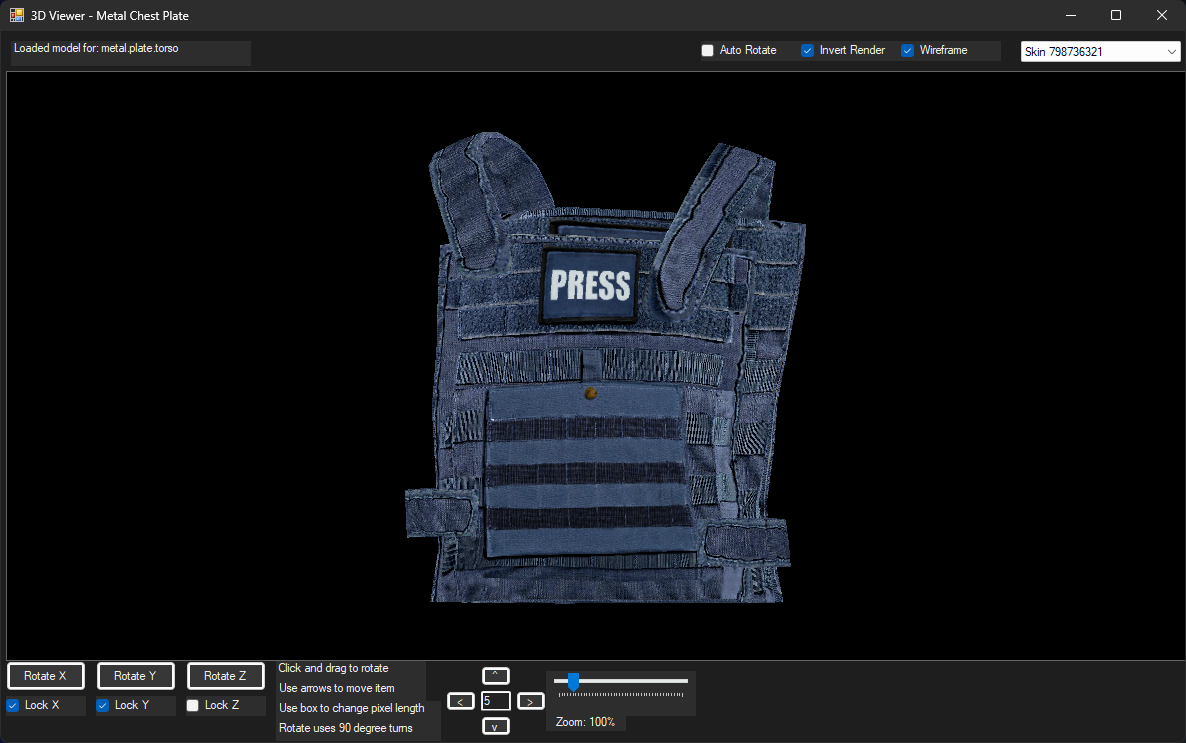
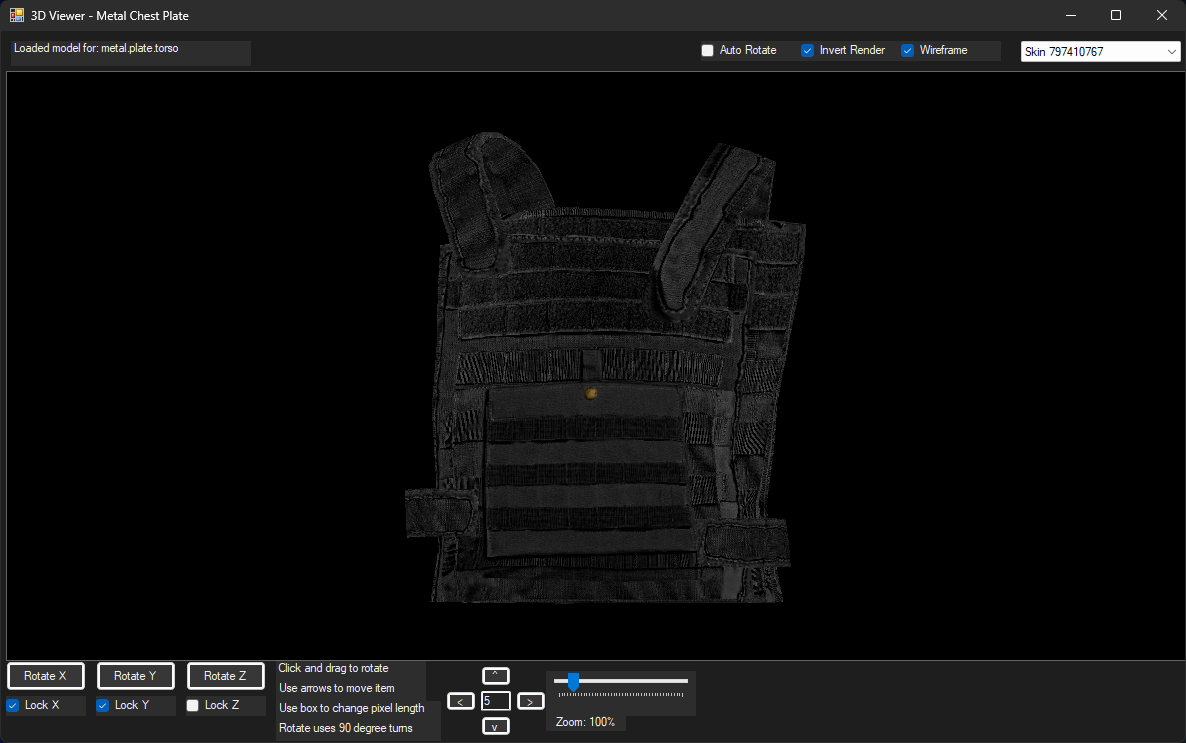
Render 3D Item + Skins
Allows skinnable items to be rendered, and shown with or without skins.
You have full control over the movement of the item, XYZ, pitch, yaw, axis and render options.
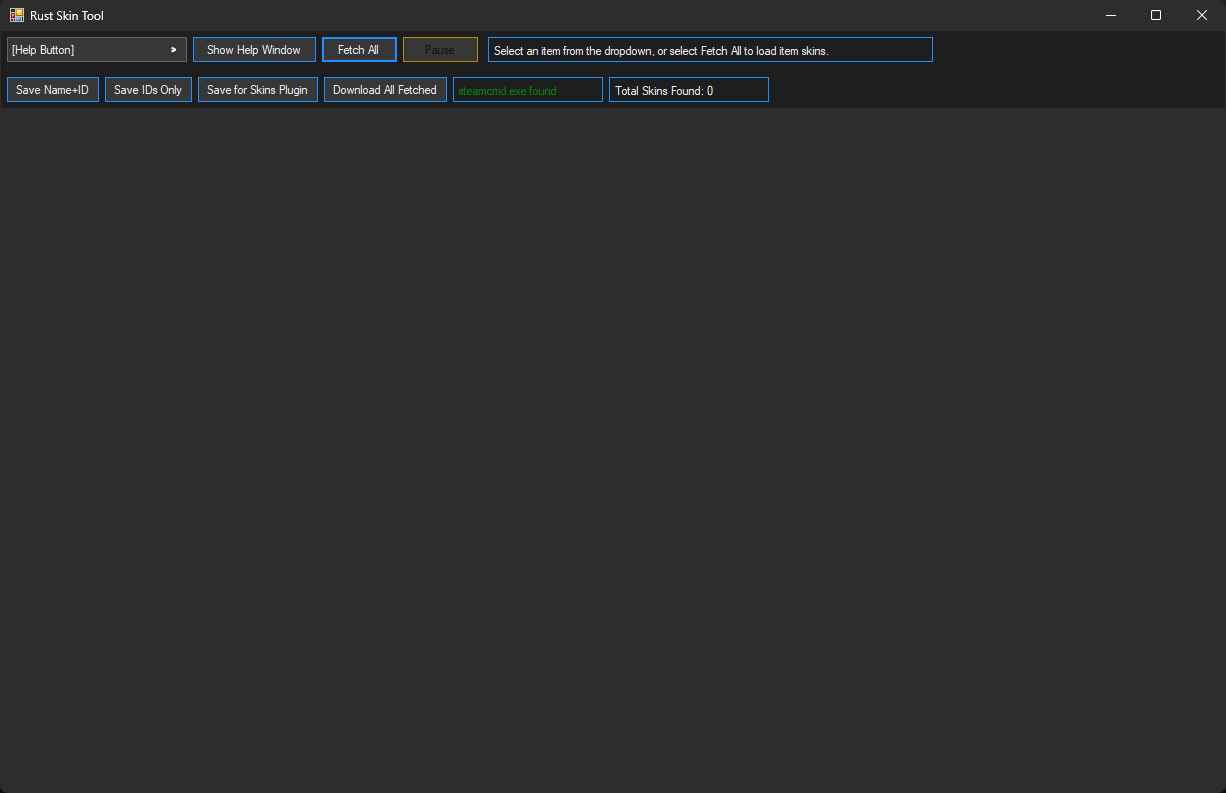
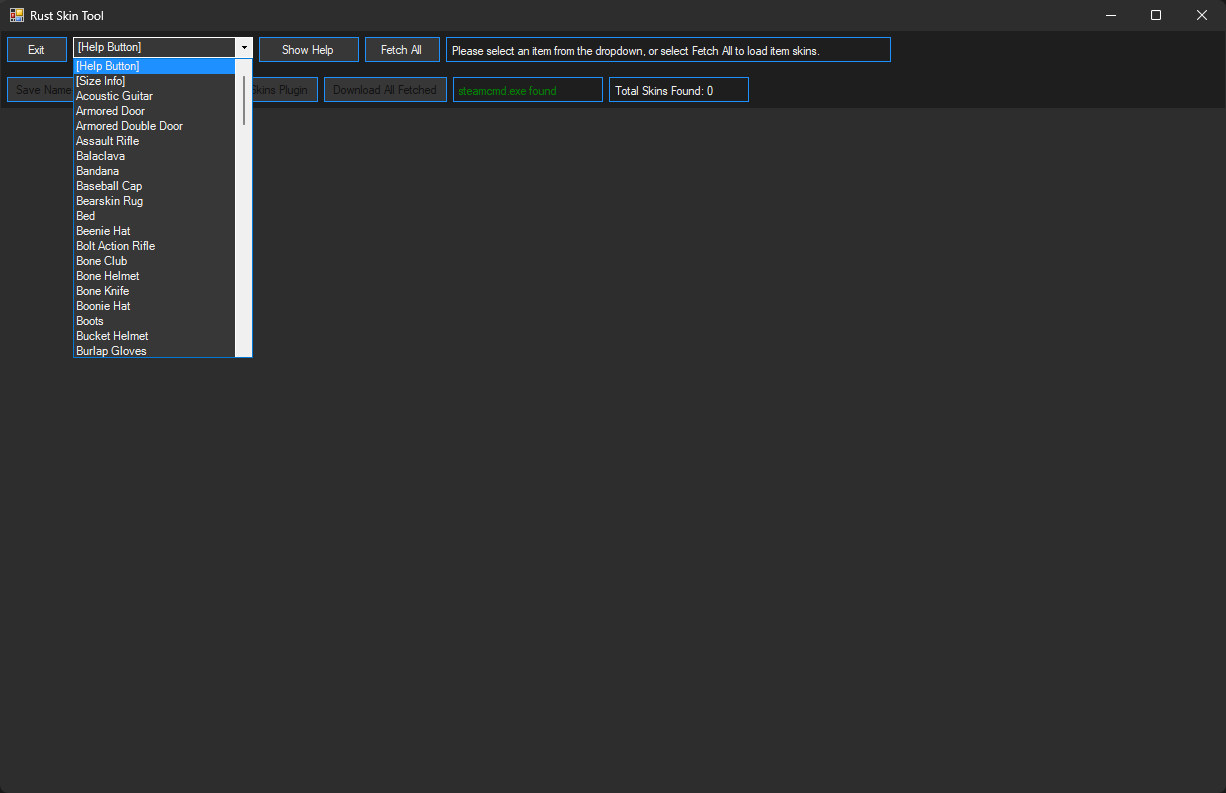
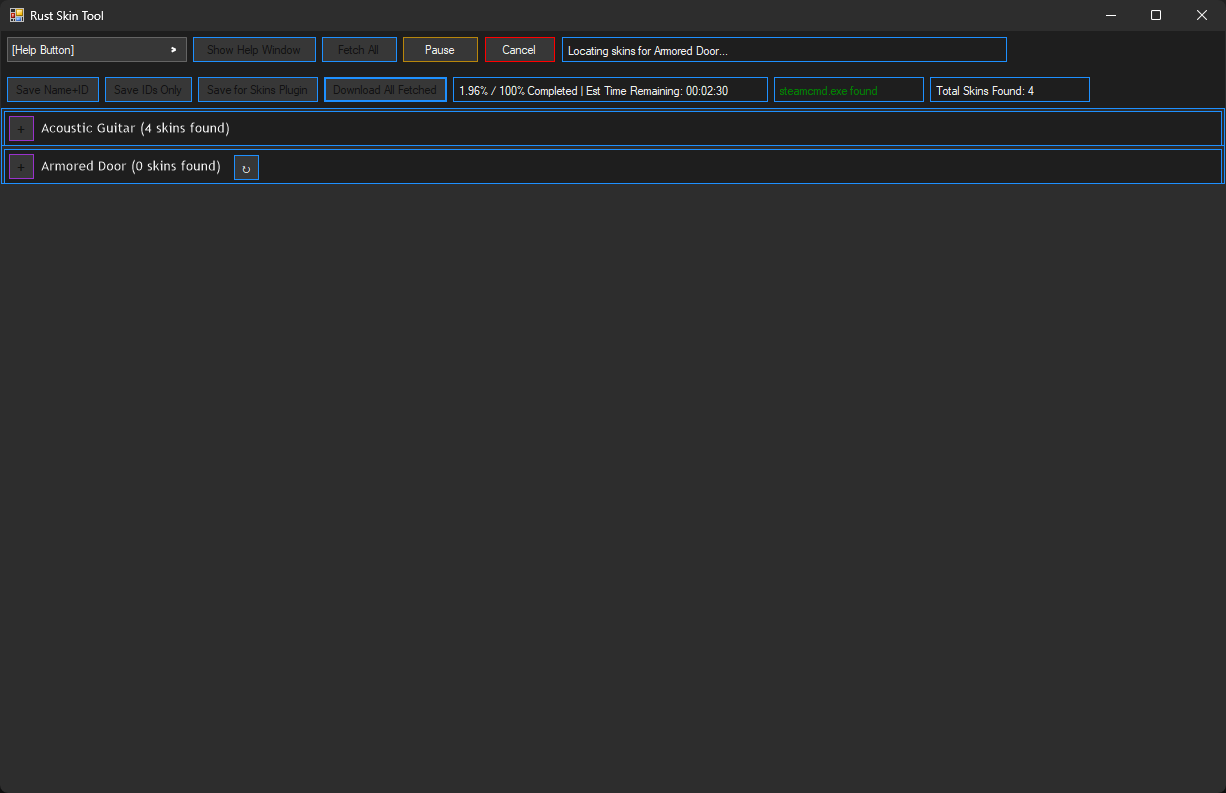
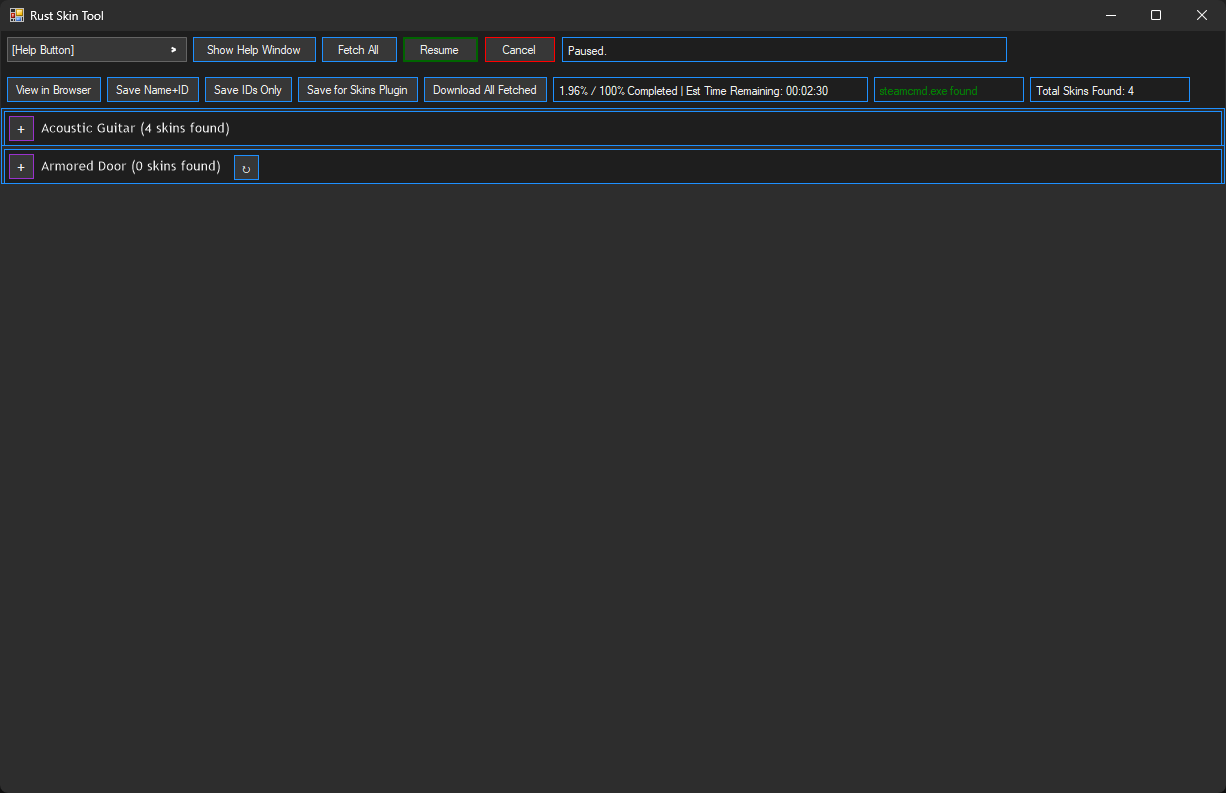
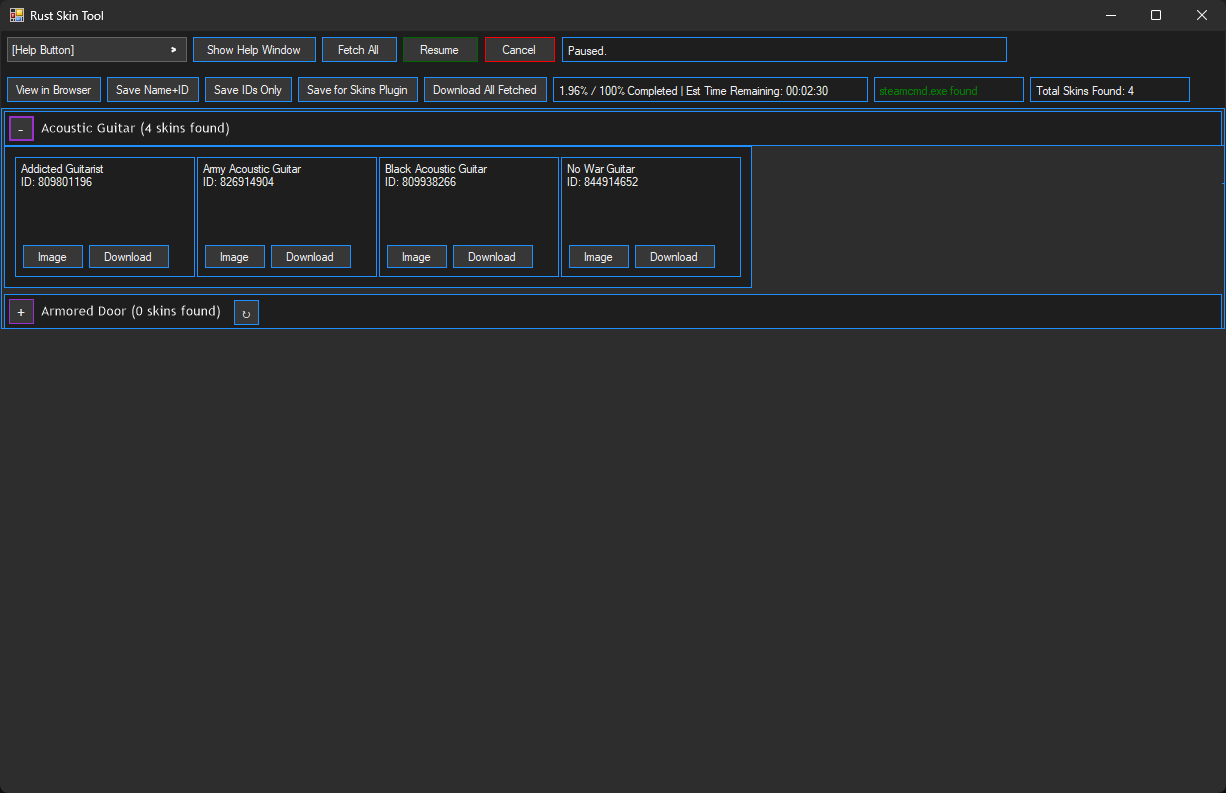
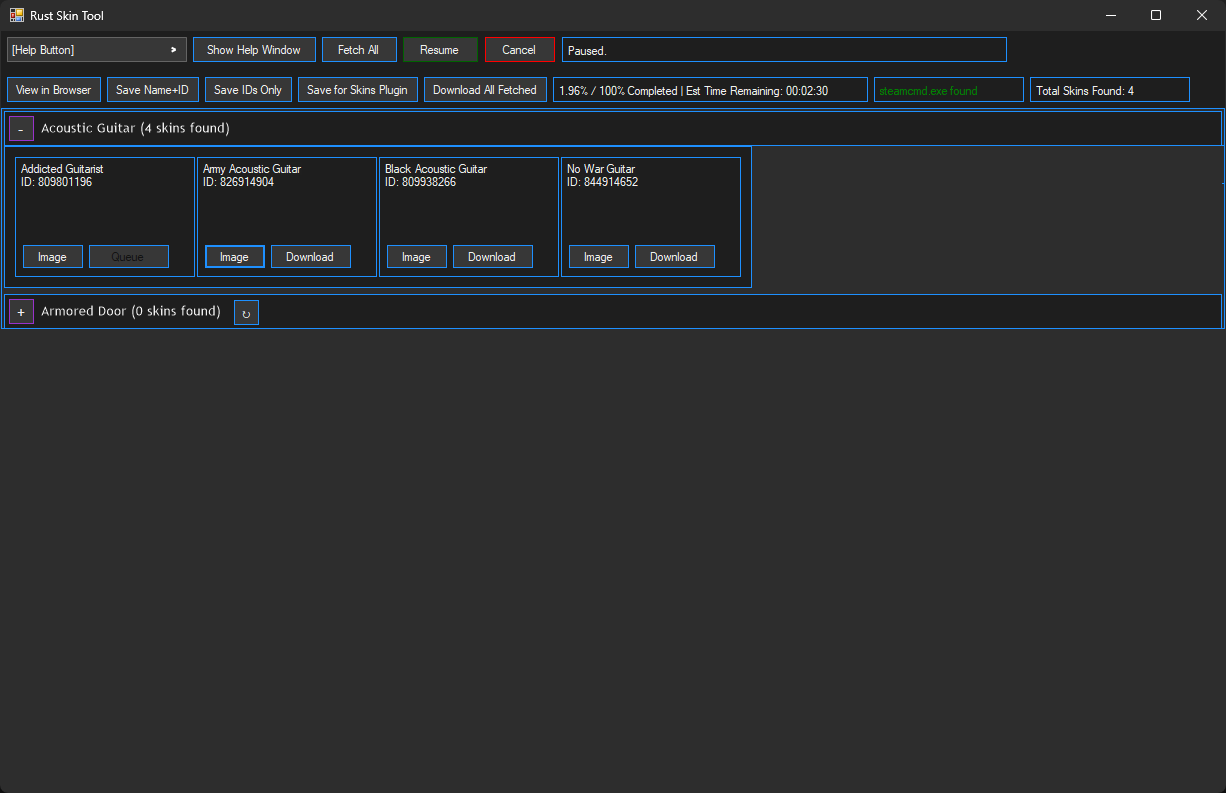
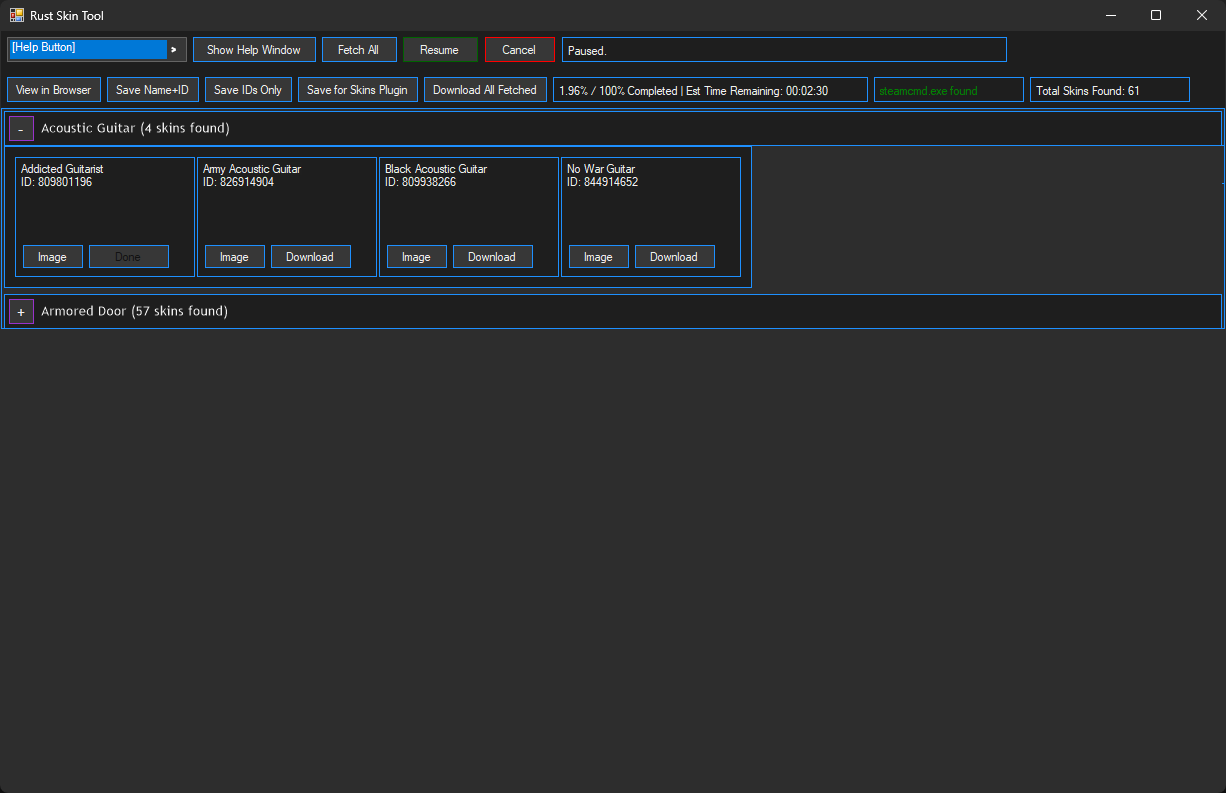
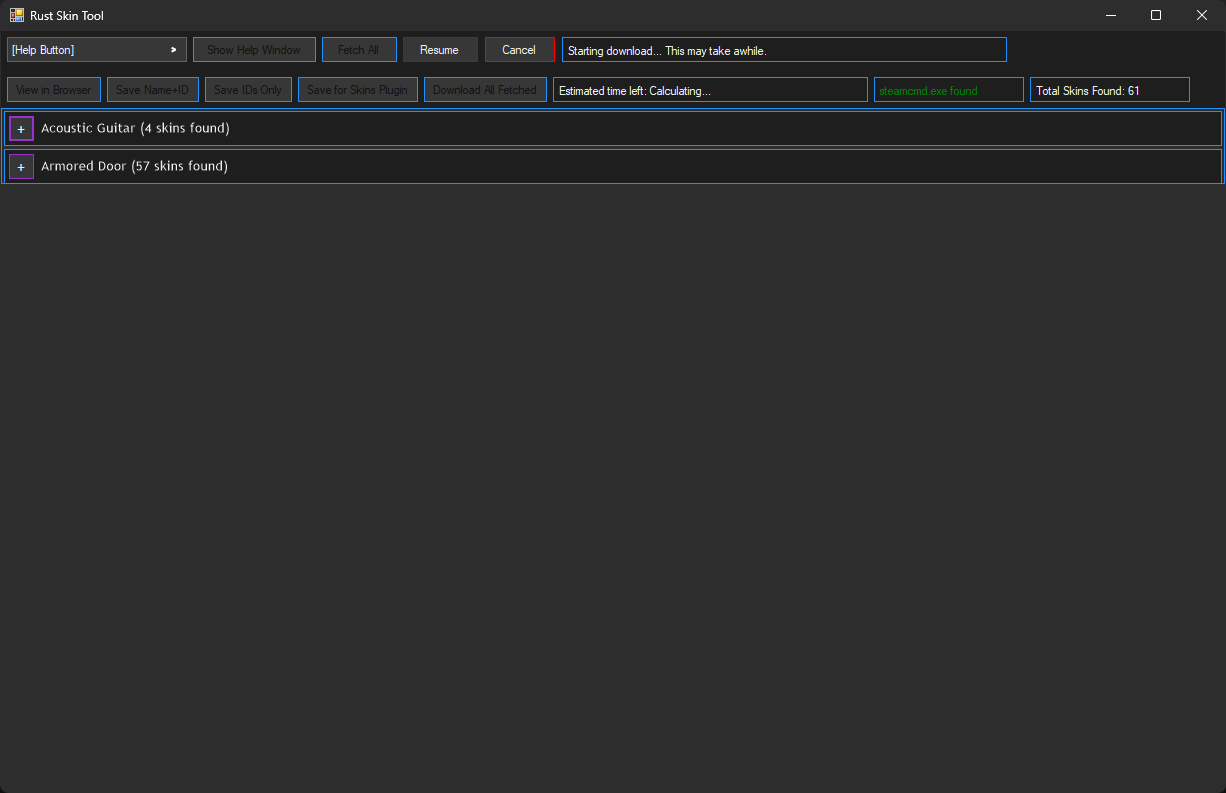
Skin Downloader
Utility for fetching and showing Skin Names, IDs, and downloading any Skin for any item in Rust.

Frequently Asked Questions
Common questions about the Rust Server Management Tool, its programs, tools, and features.
General Questions
Yes, absolutely!
The Rust Server Management Tool is completely free and user oriented. There are no hidden costs, subscriptions, ads, or premium versions.
The tool is developed and maintained as a free resource for the Rust gaming community.
No External Programs/Tools Needed. None required — completely standalone.
Rust Server Installation: 10–15 GB minimum for a Rust server installation.
Skin Downloads: Varies. (128 GB* estimated for around 17,500 Skins averaging 8 MB per skin.)
Windows Compatibility: Windows 7 (SP1 – Ultimate), Windows 10 (home + enterprise), Windows 11 (home + enterprise).
The tool itself is lightweight and runs on any modern Windows system capable of hosting Rust dedicated servers.
Yes, RSMT is completely safe and all downloads include VirusTotal scan results for verification.
The tool comes with multiple organized windows to maintain server control and hence the amount of detections.
Microsoft Defender may flag the application — you may need to disable Microsoft Defender or add RSMT to a whitelist.
The tool only makes legitimate changes to your Rust server files as shown by the image of the tool below.
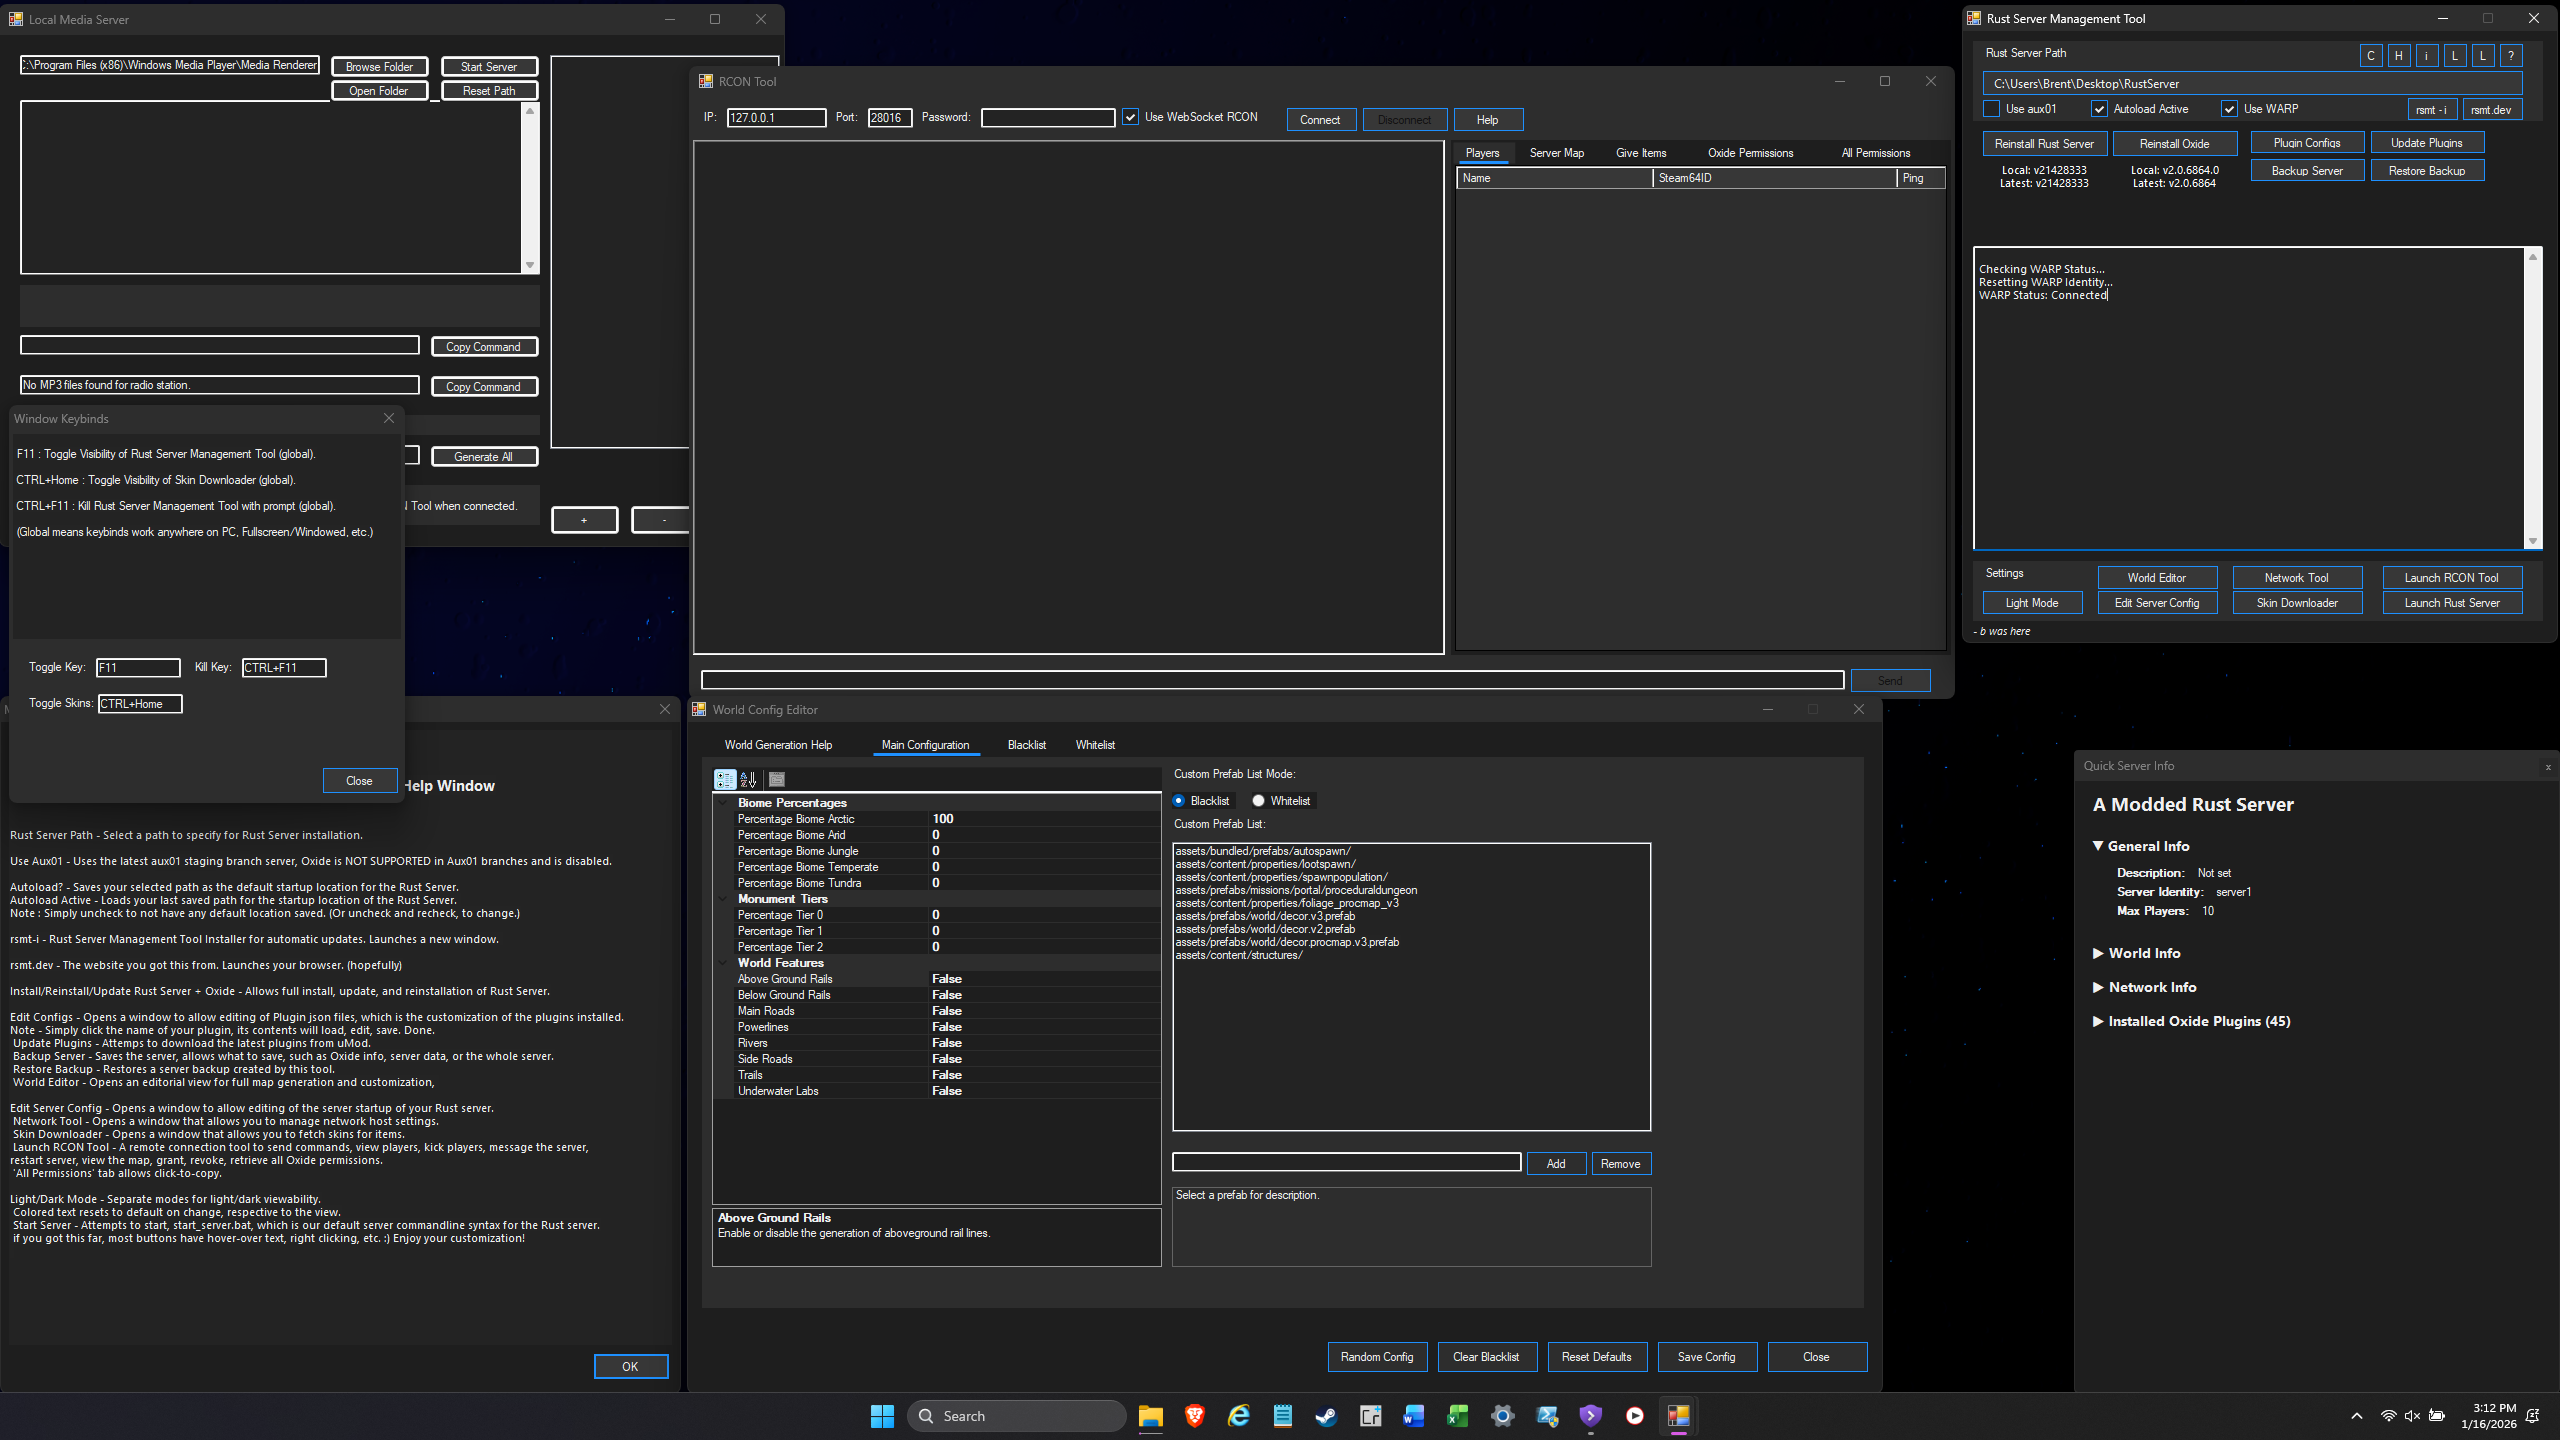
RSMT requires an internet connection for certain features: downloading or updating the Rust server via SteamCMD, fetching plugin updates from uMod, downloading skins, and checking for tool updates.
The core UI and local configuration editing work fully offline. The RCON Tool also functions offline as long as the server is running locally.
Key note: If your ISP blocks rsmt.dev, use the built-in WARP feature under the Network Tool to tunnel through DNS-over-HTTPS.
Installation & Setup
You can download directly from the website, or use iex (irm https://rsmt.dev/rsmt) in PowerShell to install the latest version without a browser.
Simply download the ZIP and extract to a folder — no external tools are required (besides SteamCMD, which is automatically installed for you).
Rust Server Management Tool is ready to go when you are.
Yes, of course!
RSMT can work with existing Rust server installations, AUX01 staging branches, and even outdated versions.
Just point the tool to your existing Rust Server Path at the top of the application, and it will integrate with your current server setup.
No — RSMT will not update your server automatically. It can update to the latest version on command, so be aware of mod support when doing so.
RSMT provides one-click server updates and installations, but the timing is always your choice.
You maintain full control over when updates are applied to your server.
RSMT includes a dedicated Oxide Install tool accessible from the main interface.
To install Oxide for the first time, click the Oxide install button — RSMT downloads and injects the latest Oxide build directly into your server directory. Your server must be stopped before installing.
To update Oxide after a Rust update, use the Oxide Update button. This fetches the latest uMod build and replaces the existing files.
Key note: Always update Oxide after each Rust server update, as outdated Oxide versions will cause crashes or plugin failures on a newer server build.
Tools & Features
The Skin Downloader allows you to view, save, download, and fetch information for skins in Rust.
Usage:
1. Open Skin Downloader from the main window.
2. Check Save to Client if you want skins saved locally for use in-game.
3. Click Fetch All and wait for the fetch to complete — this queries the Steam Workshop for all available skins.
4. Click Download All Fetched to save them to disk. Be aware this is a very lengthy process.
After downloading, run in client console: graphics.itemskintimeout -1
This forces the game to load your locally stored skins.
To spawn an item with a specific skin: inventory.giveto PlayerName rifle.ak 1 889710179
Key note: Skin Downloader does not have Steam backend access, so fetching all 17,500+ skins takes significant time. You can also use the SkinBox or Skins plugins as an alternative, as they include all Skin IDs by default.
RSMT includes a Plugin Update Tool that connects directly to the uMod API to download and update your installed Oxide plugins.
Usage:
1. Ensure Oxide is installed on your server.
2. Open the Plugin Manager tab in RSMT.
3. RSMT reads your /oxide/plugins/ folder and checks each plugin against uMod.
4. Click Update to pull the latest version of any outdated plugin.
Key note: There is currently no in-app plugin browser — you must already have plugins installed in your plugins folder for RSMT to update them. Only uMod is used as the source, ensuring reputable and verified plugin downloads.
The backup feature creates a snapshot folder of your server contents. You choose what to include:
Backup options: World data, player data, Oxide data, or the full server directory.
Usage:
1. Open the Backup tab in RSMT.
2. Select the components you want to back up.
3. Click Backup — a timestamped folder is created with the selected data.
4. To restore, select a previous backup from the list and click Restore.
Key note: After restoring a world, update the server to the matching client version or ensure both are on the same Rust build to avoid connection issues. Backups are also useful for archival in case of corruption.
The RCON Tool allows you to send commands to your running Rust server without being in-game, using WebSocket RCON.
Usage:
1. Start your server with +rcon.web 1 +rcon.port 28016 +rcon.password yourpassword.
2. Open the RCON Tool in RSMT.
3. Enter the IP, port, and password. For local use, set IP to localhost or 127.0.0.1.
4. Click Connect. The console shows live server output and accepts commands.
LAN access: Use your device's LAN IP (e.g. 192.168.1.x) — find it with ipconfig in cmd.exe.
New in v1.7.2: Auto-connect on launch, online map view of the connected server, and FTP support alongside RCON.
The Server Config Editor is a visual interface for editing your Rust server's startup parameters and configuration files without manually editing text files.
It covers: server name, description, max players, world seed, map size, tick rate, RCON and network parameters, and more.
New in v1.7.2: The Server Config now includes Deepsea server parameters following the Deepsea content update.
Key note: Changes are written to your server's startup batch file and server.cfg. Always restart the server after changes for them to take effect.
The World Config tab lets you set world parameters such as seed, size, and biome settings. The World Editor provides prefab management for placing or removing objects in the world.
New in v1.7.2: New Deepsea prefabs and road placement options are now available in the World Editor.
Key note: Changing the world seed or size wipes the existing map. Always back up your world data before making world config changes if you want to preserve player progress.
The Network Tool helps diagnose and manage your server's network connectivity. It includes port checking, verifying RCON and game ports are accessible, and the built-in WARP integration for ISP-level bypass.
WARP is a DNS-over-HTTPS service that encrypts your DNS queries through a secure tunnel. If your ISP blocks rsmt.dev or prevents the installer from downloading, enabling WARP resolves most connectivity restrictions.
Key note: The Network Tool runs elevated (as administrator) in a separate process to safely modify network adapter settings without affecting the rest of the tool.
Troubleshooting
Usually antivirus flags RSMT and deletes the executable. Ensure it is added to your antivirus exclusion list, or temporarily disable your antivirus and re-extract from the ZIP.
Try running the application as administrator, as some features (Network Tool, server installation) require elevated permissions.
If you receive a specific error message, please report it via the contact link so it can be investigated.
Certain ISPs block rsmt.dev or prevent the RSMT tool from downloading updates. There is always a solution.
Rust Server Management Tool includes WARP — a DNS-over-HTTPS service that encrypts your DNS queries through a secure HTTPS tunnel, bypassing ISP-level DNS blocks while preserving tool integrity.
Enable WARP from the Network Tool within the application, then retry the download or update.
After downloading skins with the Skin Downloader, you must tell the Rust client to load locally stored skins instead of fetching them from Steam in real time.
Run this command in your client console: graphics.itemskintimeout -1
This removes the skin loading timeout, forcing the client to use all locally downloaded skins.
To spawn an item with a specific skin ID: inventory.giveto PlayerName rifle.ak 1 889710179
Key note: Skins downloaded via the Skin Downloader are stored in the Steam skins cache folder. If you clear skin caches or reinstall, you will need to re-download.
After each Rust server update, Oxide typically needs to be updated as well, as the game's internal assemblies change and Oxide hooks break.
Steps to fix:
1. Stop your server.
2. Use the Oxide Update button in RSMT to pull the latest Oxide build from uMod.
3. Use the Plugin Update Tool to update all installed plugins to their latest versions.
4. Restart the server.
Key note: If a specific plugin is still broken after updating, it may not yet support the new Rust version. Check the plugin's page on uMod for update notes from the plugin author.
Status Updates
Live status of Rust Server Management Tool, for usage in-game.
Rust & EAC Client Status
Rust Server Management Tool
Static
v0.11Image SteganographySecure encrypted data inside images and animated GIFs using an unbreakable steganographic algorithm.
Designed as a one-time two-channel passKerckhoffs's PrincipleThe cryptographic scheme remains secure even if everything about the system is public knowledge.
The only secret is the generated key.
Without the correct key, the payload inside the image(s) generated, cannot be decrypted or deciphered by anyone without the key.
Features & Capabilities
A dual‑method steganography tool that encrypts your message before hiding it. Every image looks like random noise and carries authenticated, encrypted data — only the correct key reveals the hidden content.
Steganography for Static Images
Encrypted data embedded directly into pixel values with imperceptible changes. Unused capacity filled with random data, making detection extremely difficult.
Animated GIF Studio & Carrier
Create fully playable animated GIFs with custom dimensions, frame rate, and length. Each frame is random noise. Hidden data travels untouched inside a non‑visual block.
Strong Encryption (AES‑256)
Messages encrypted with AES‑256 in secure chaining mode, unique random IV per image. Identical plaintexts produce completely different outputs.
Integrity Protection (HMAC)
Cryptographic authentication tag prevents tampering. If image or key is altered, decryption is instantly rejected — never see corrupted data.
Key Derivation (HKDF)
Single master key (64 hex chars) derives separate keys for encryption and authentication. The master key is the only secret you need to share.
🌫️ Noise‑Based Carrier
Images generated from cryptographic random noise, not a natural source. No original exists for comparison, defeating the most powerful steganalysis.
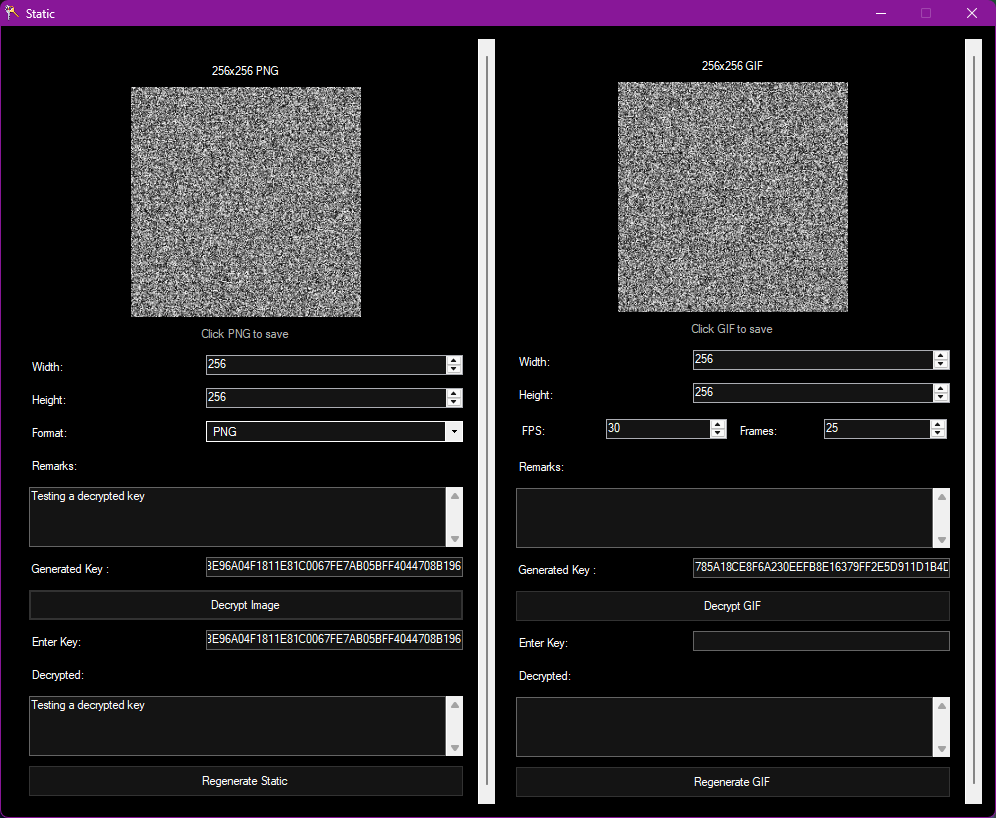
Application Images
Screenshots of Static in action — encoding, decoding, and the animated GIF studio.
Image Encryption
Set dimensions and format, enter your secured message, copy the generated key, and save the image and key.
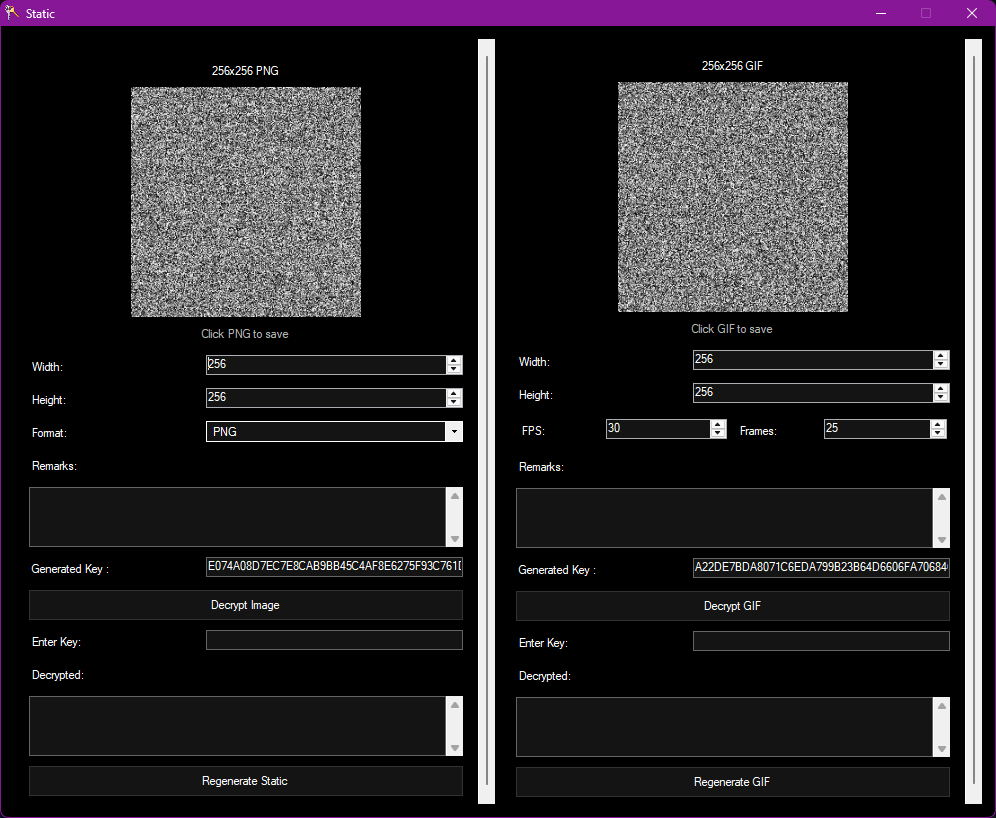
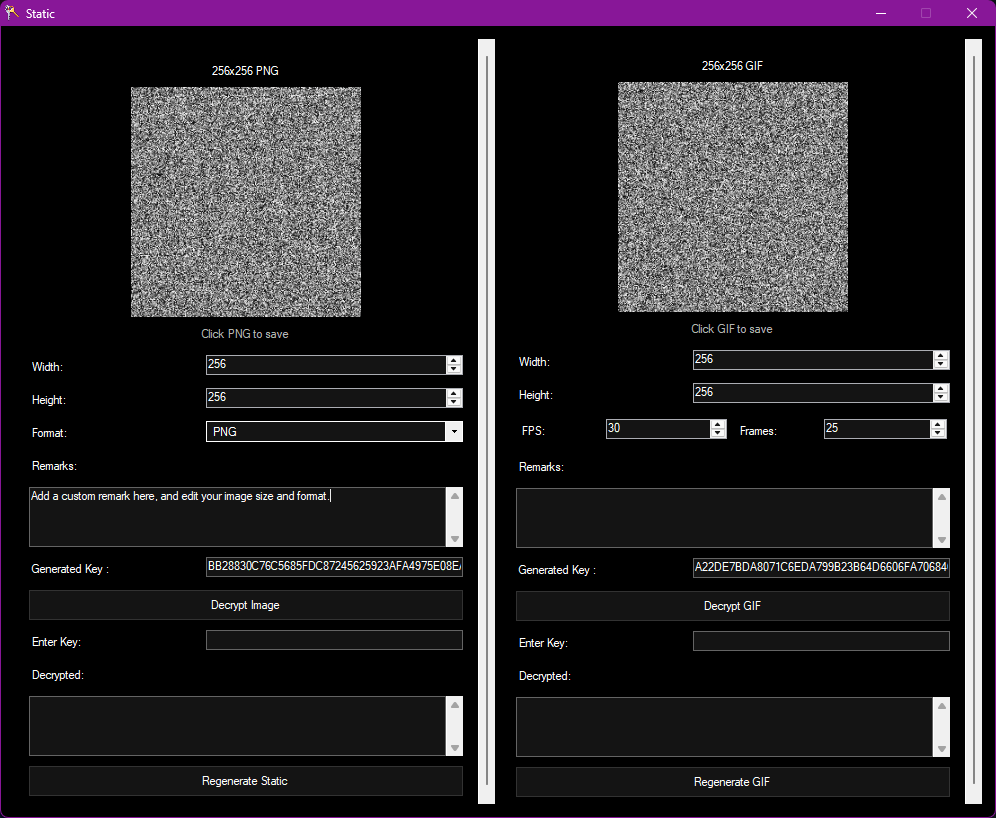
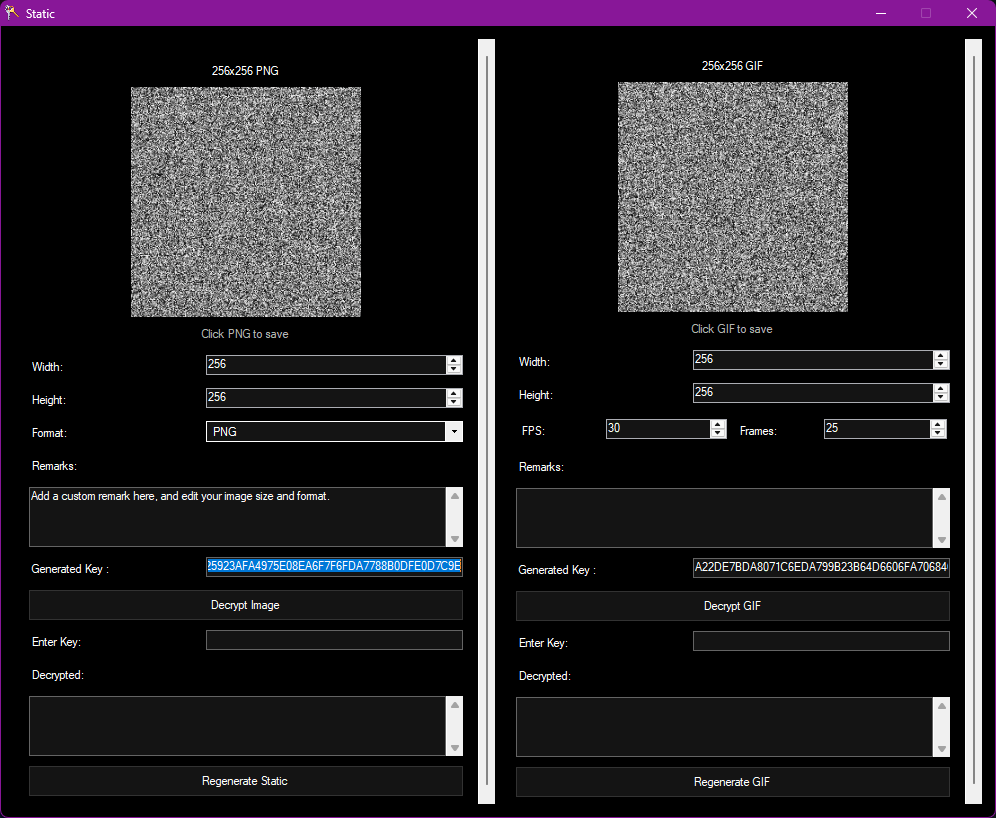
Image Decryption
Paste your key of the generated file in, then select that encrypted image, the program will decrypt the image if the key is correct and allow you to view the hidden string.
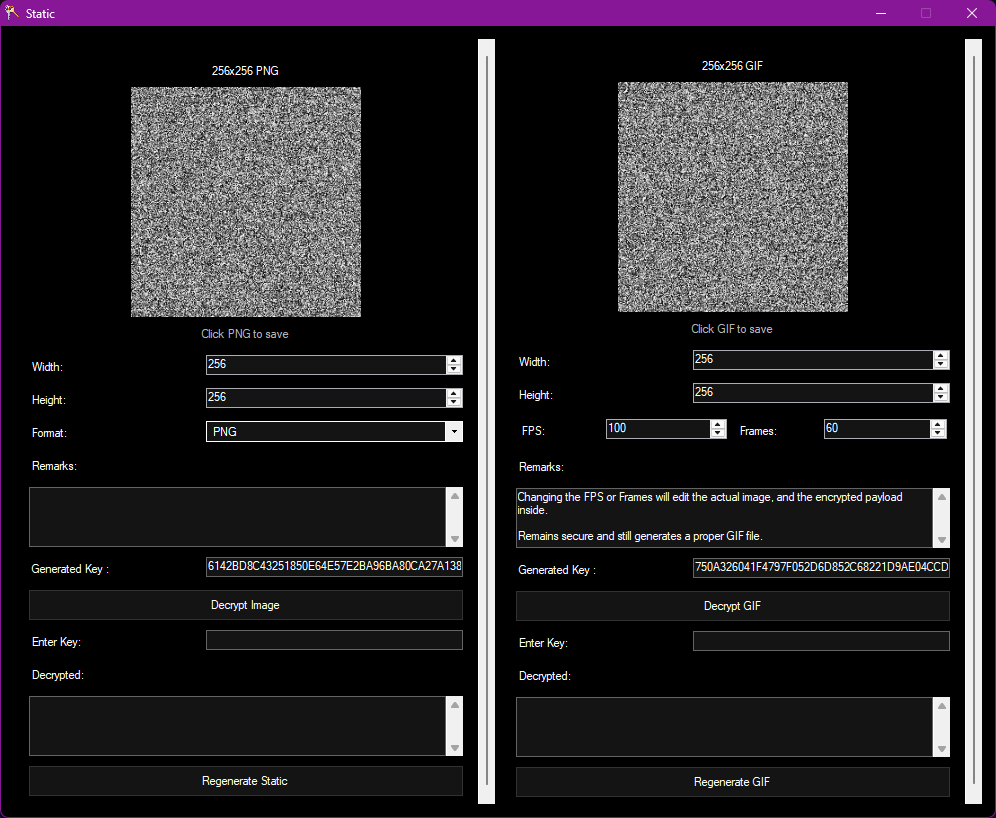
GIF Generation
Configure width, height, FPS, and frame count. The live preview animates in real time. The hidden payload is still encrypted and secured.
User Guide
How to hide a message inside an image and safely share it.
The Two‑Channel Concept
You produce two things: the image (carrier) and the key (hex string). These must reach your recipient through completely separate channels.
Example: Send the image via Signal or Discord. Send the key via SMS or email. Intercepting only the image gives random noise — no key. Intercepting only the key gives a meaningless hex string — no image. Both are required and neither reveals anything about the other.
Each generated image uses a unique, one‑time key. Never reuse a key.
Encoding a Static Image
Larger images hold more data. Use PNG, BMP, or TIFF for lossless results — JPEG will destroy the hidden payload.
Capacity grows with pixel count. A 512×512 image can hold roughly 96KB of hidden text.
Write any text in the Remarks field. The image and key regenerate automatically when you change settings.
The Generated Key field shows a 64‑character hex string. This is the master key. Without it, the message is permanently unrecoverable. Store it securely and send it separately from the image.
Click the image preview to open a Save dialog. Share the saved file through any channel that preserves the original bytes (direct file transfer, email attachment, etc.).
Decrypting a Static Image
Select the image file you received. The tool extracts the encrypted payload from the image pixels.
Enter the 64‑character hex key you received through the separate channel. If the key is correct and the image was not modified, your original message appears in the Decrypted field.
Encoding an Animated GIF
Set width, height, FPS (1‑100), and frame count (1‑250). The preview animates live. Each frame is generated as random noise.
Type your message, then click the animated GIF preview to save. The resulting GIF plays normally in any browser. Do not re‑encode or optimize the GIF — that will strip the hidden payload.
Decrypting an Animated GIF
Load the received .gif file, then paste the key. The tool extracts the payload from the GIF's metadata and decrypts it.
What Destroys a Secured Image
Static images: Saving as JPEG, taking a screenshot, resizing, cropping, uploading to social media that re‑encodes images, or applying any filter.
GIFs: Using any GIF optimizer/compressor, re‑encoding the file, or uploading to platforms that reprocess GIFs (Tenor, Giphy, etc.).
Safe sharing: Direct file transfer, email attachment, Telegram/Signal as a file, Discord direct upload — anything that delivers the original bytes unchanged.
Frequently Asked Questions
Concise answers about security, usage, practical limitations, and technical implementation of Static.
General & Usage
Basic tools hide raw plaintext — anyone who suspects a carrier can read the message directly. Static hides encrypted, authenticated ciphertext. Even if an analyst extracts the hidden bits, they see AES-256 ciphertext indistinguishable from random noise. Without the key, the message is impossible to recover.
Out-of-band key exchange means an attacker must compromise both channels simultaneously. The image alone is useless; the key alone is meaningless.
Example: Send the image via Signal or Discord. Send the key via SMS or email. Each channel independently reveals nothing.
No. AES-256 has no backdoor, and the keyspace is astronomical. Without the exact 64-character hex key, the encrypted data is permanently unrecoverable. Always copy and store the key before closing or regenerating.
No. Static is completely offline. It uses only built-in .NET cryptography and has no network telemetry, update checks, or external calls of any kind.
Security & Detection
Because the carrier is pure random noise (not a natural photograph), standard steganalysis techniques fail. There is no original image to compare against, and the payload itself is cryptographically random.
No — never. JPEG's lossy compression alters pixel values, corrupting the LSB layer where the payload is embedded. Use PNG, BMP, or TIFF only.
Static images: Saving as JPEG, taking a screenshot, resizing, cropping, uploading to social media that re-encodes images, or applying any filter.
GIFs: Using any GIF optimizer or compressor, re-encoding the file, or uploading to platforms that reprocess GIFs.
Safe sharing: Direct file transfer, email attachment, Telegram/Signal as a file, Discord direct upload.
Technical Implementation
Use the formula: (width × height × 3) ÷ 8 minus 36 bytes overhead.
256×256 — ~24 KB usable capacity
512×512 — ~96 KB usable capacity
1024×1024 — ~384 KB usable capacity
Possibly, due to its cryptographic operations and random data generation. The app has no installer, no registry writes, and no network activity. If flagged, add it to your antivirus exclusion list.
Downloads & Releases
Latest Static builds.
Static Updates
Breakaway
v0.103System UtilityBreakaway allows you to run as SYSTEM on Windows 10 & 11 as long as you are an administrator on your own device.
This is a project that allows the user to use the SYSTEM account for features such as live lockscreen customization, using apps on the lockscreen, and more.
Features & Tools
Advanced Windows process and privilege management.
Modern UI/UX
A carefully crafted C# 5.0 application built for Windows 10 and 11.
Features a left-hand side pane for tabs. Light/dark transition for theme.
Inside each tab, buttons have hoverable tooltips for assistance with features if needed. 💬
Run as SYSTEM
Utilizes available SYSTEM process tokens to borrow privileges, allowing the application to run as SYSTEM and providing the highest authority and control. You can view and delete any file or folder.
After all, you own your device. 🌳
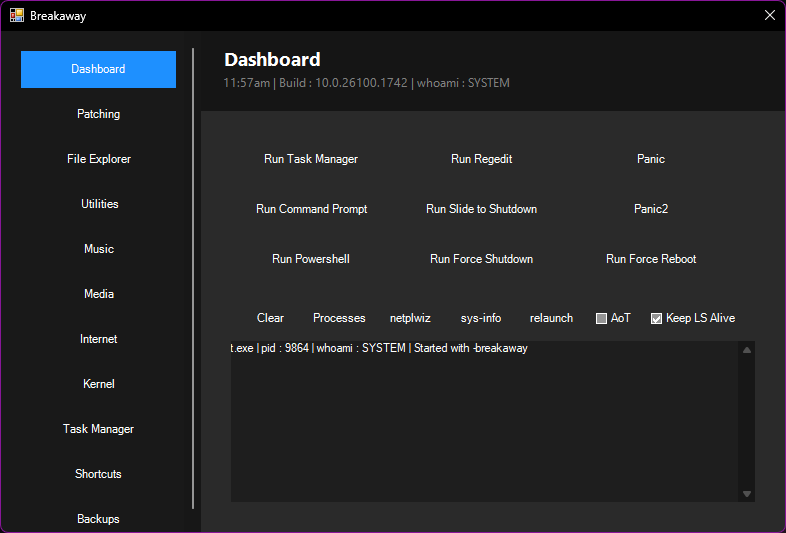
Dashboard Tab
Allows quick access to key features.
Task Manager, Command Prompt, Powershell.
Buttons for instant restart or shutdown usage.
One-click operations to launch programs.
Shutdown and Restart are instant as well. ⏻
Patching Tab
Modifies registry items to patch applications ran from the lockscreen, allowing you to run most applications on the lockscreen or displaying the SYSTEM Account desktop.
Original data is safely backed up internally, allowing you to restore at any time. ⚙️
File Explorer Tab
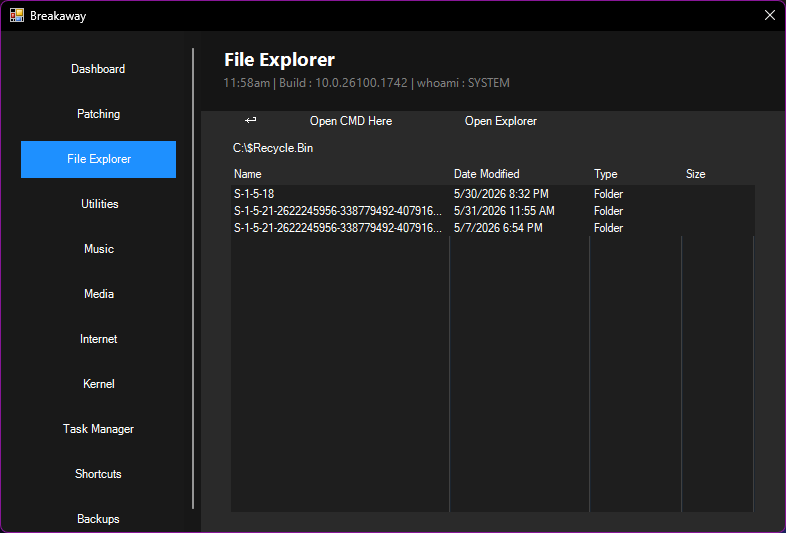
Allows you to view the file system with full unadulterated access. Rename, delete, move, copy and paste files/folders anywhere on the NTFS filesystem, system-protected or not.
Deleted contents are stored in : C:\$BreakawayScreenshots\BreakawayUndo 🗄️
Task Manager Tab
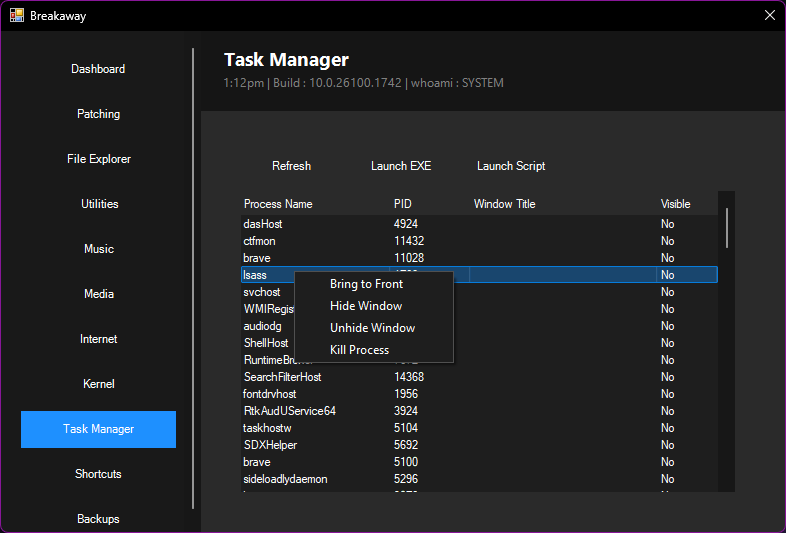
Launch applications, view them within this tab.
Applications can currently be brought to frontmost, hidden, unhidden, and killed.
Simply right-click on an application.
Locate programs with the Find Path option, navigates after to the File Explorer tab. 🔎
Applications Tab
Launch applications, or launch browsers both options work from the lockscreen.
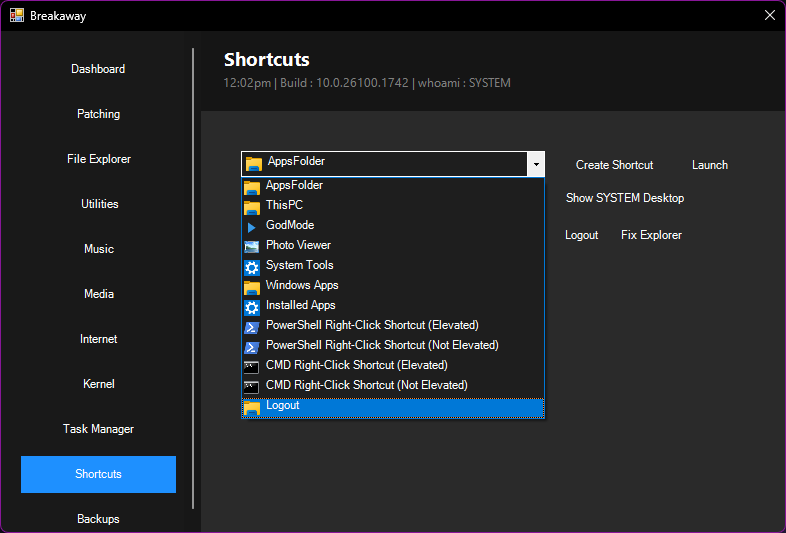
Run shortcuts, or create them, add right-click desktop context menu entries for ease of access to CMD or Powershell.
Apps and browsers can be run on the lockscreen when Breakaway is patched. 🌍
Utilities Tab
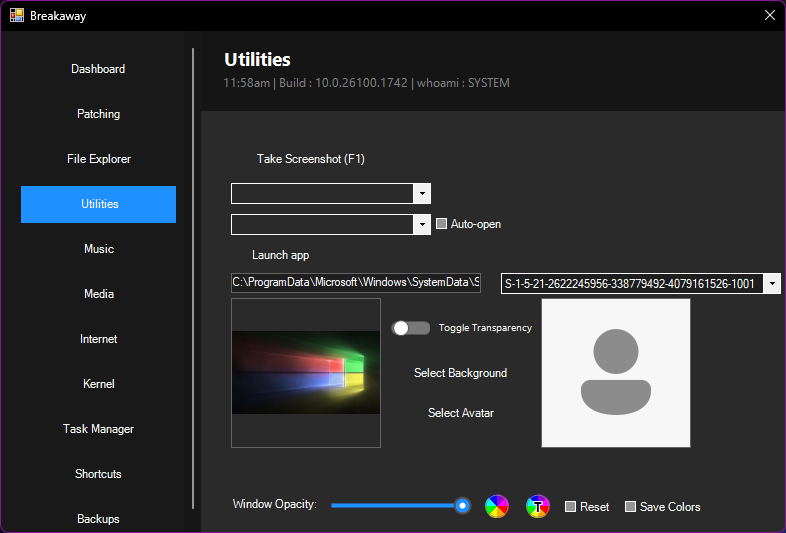
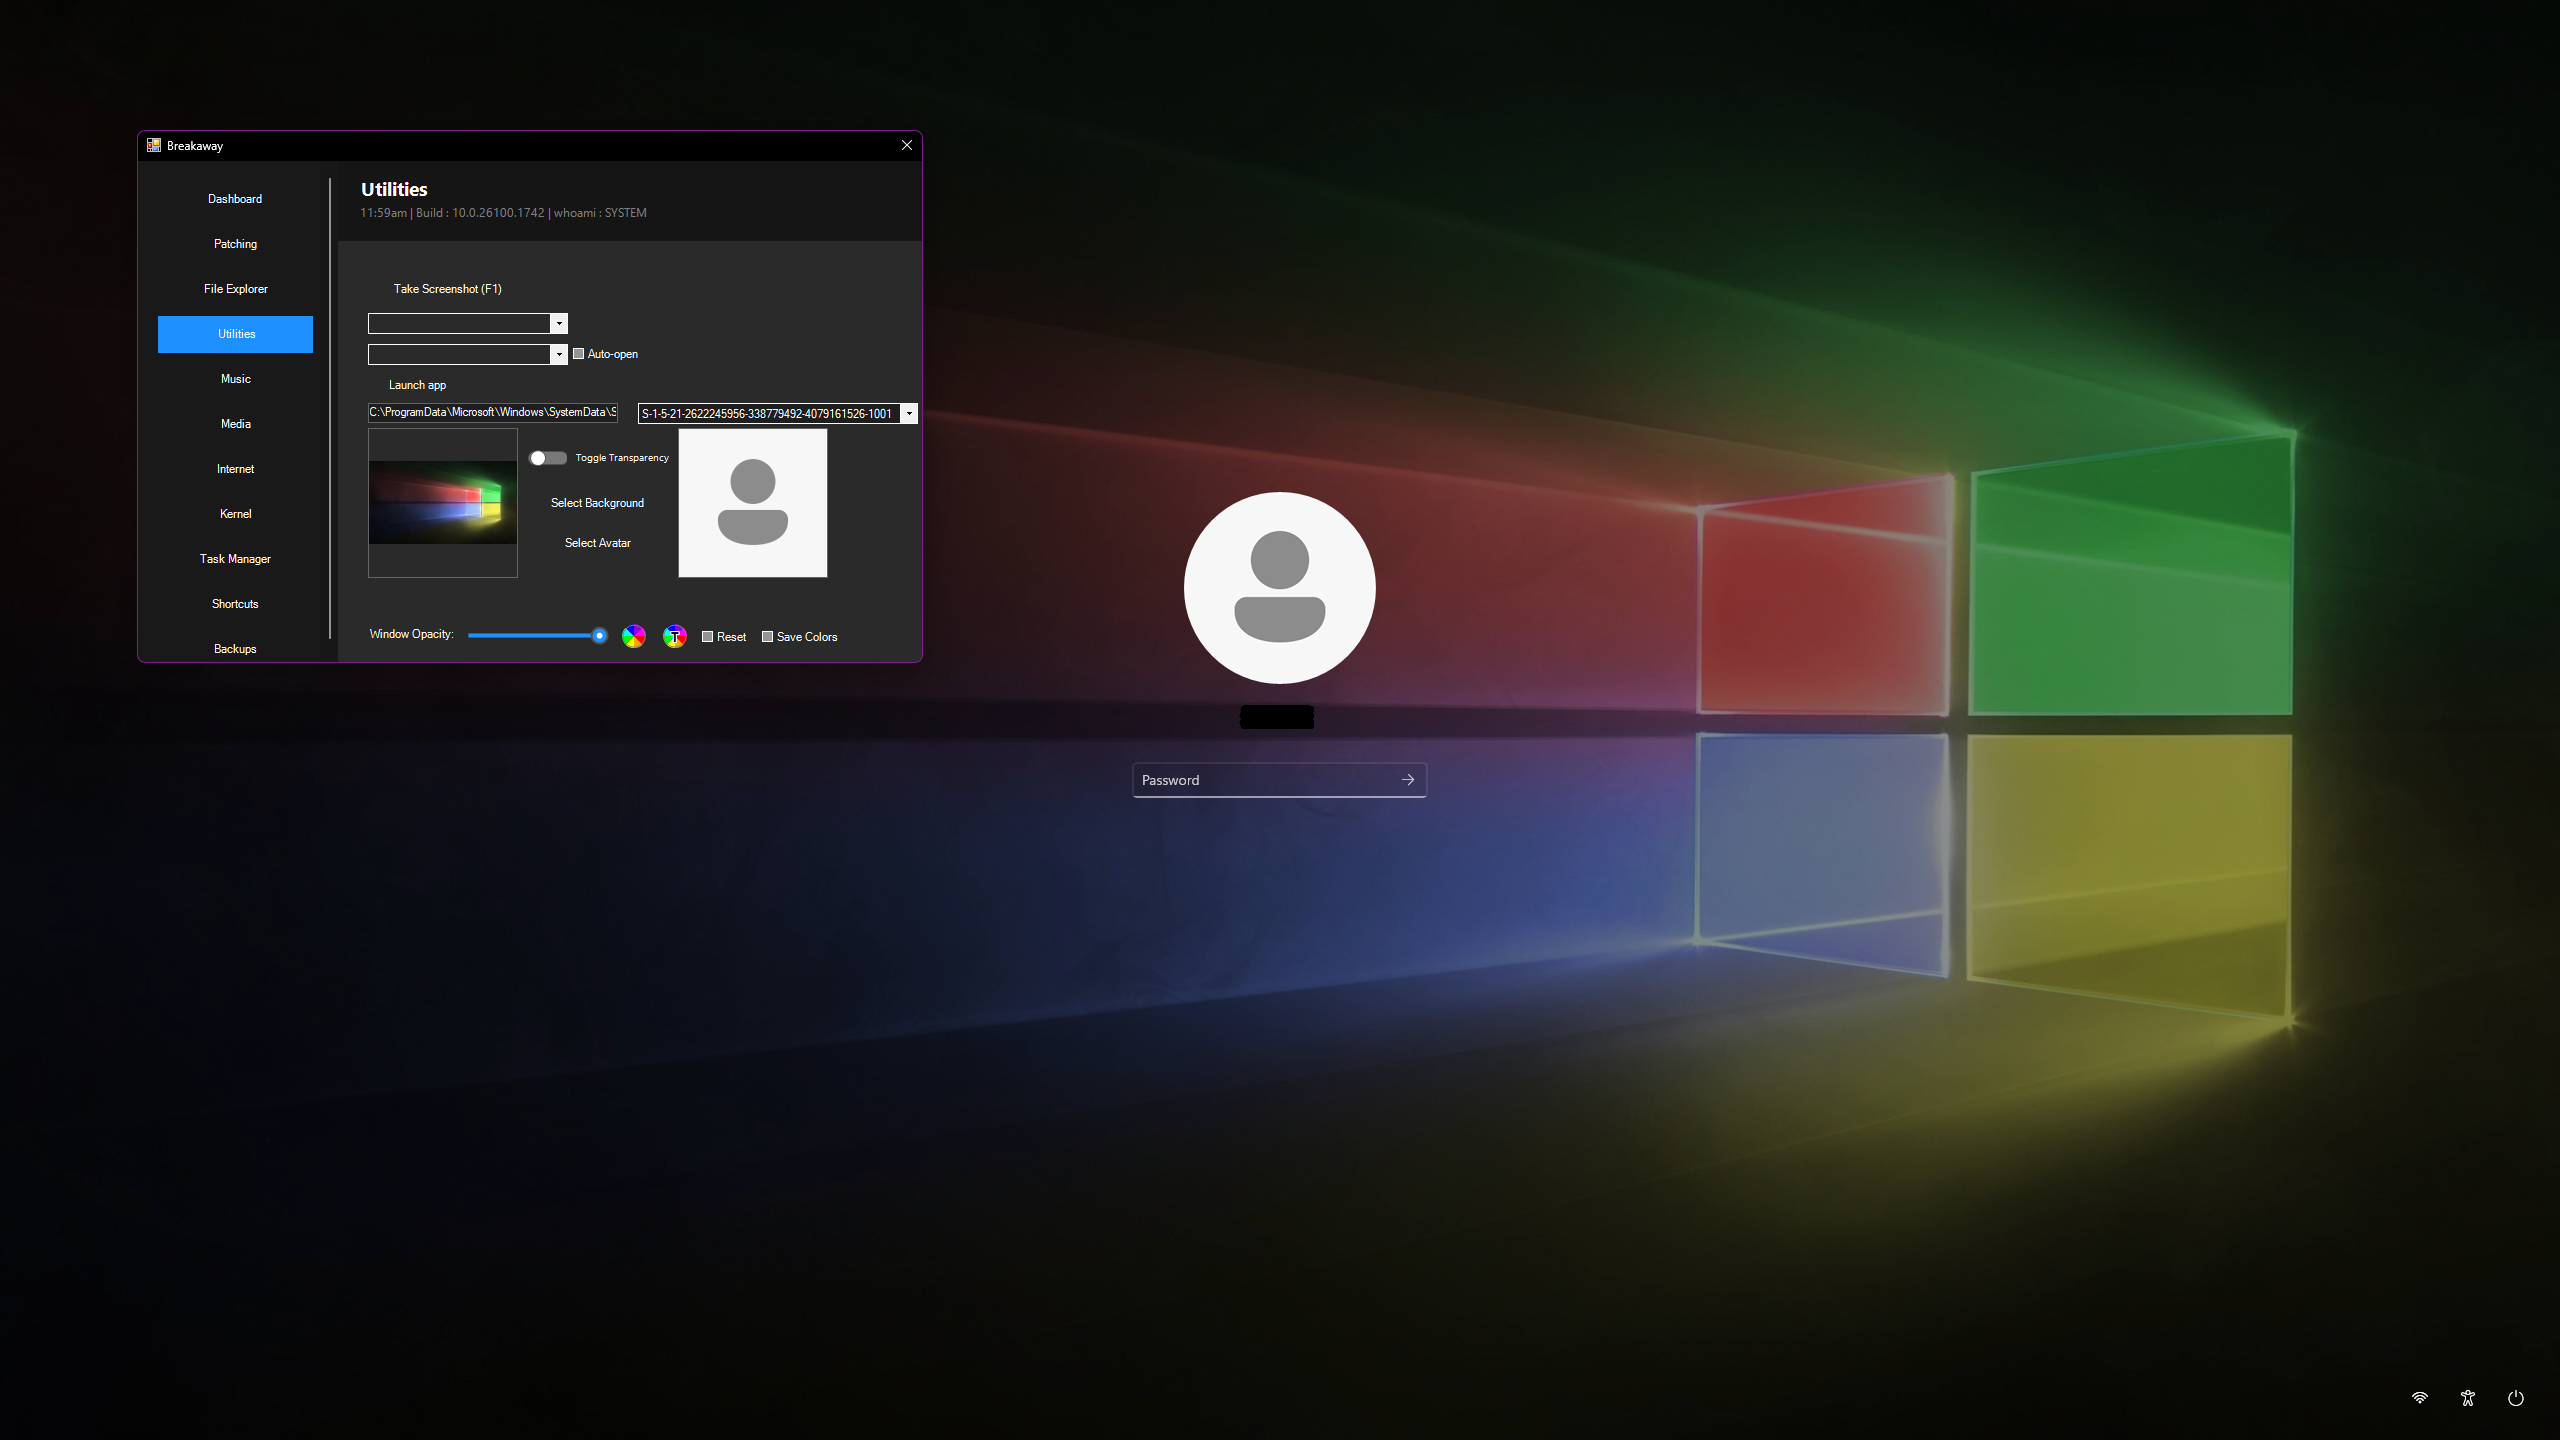
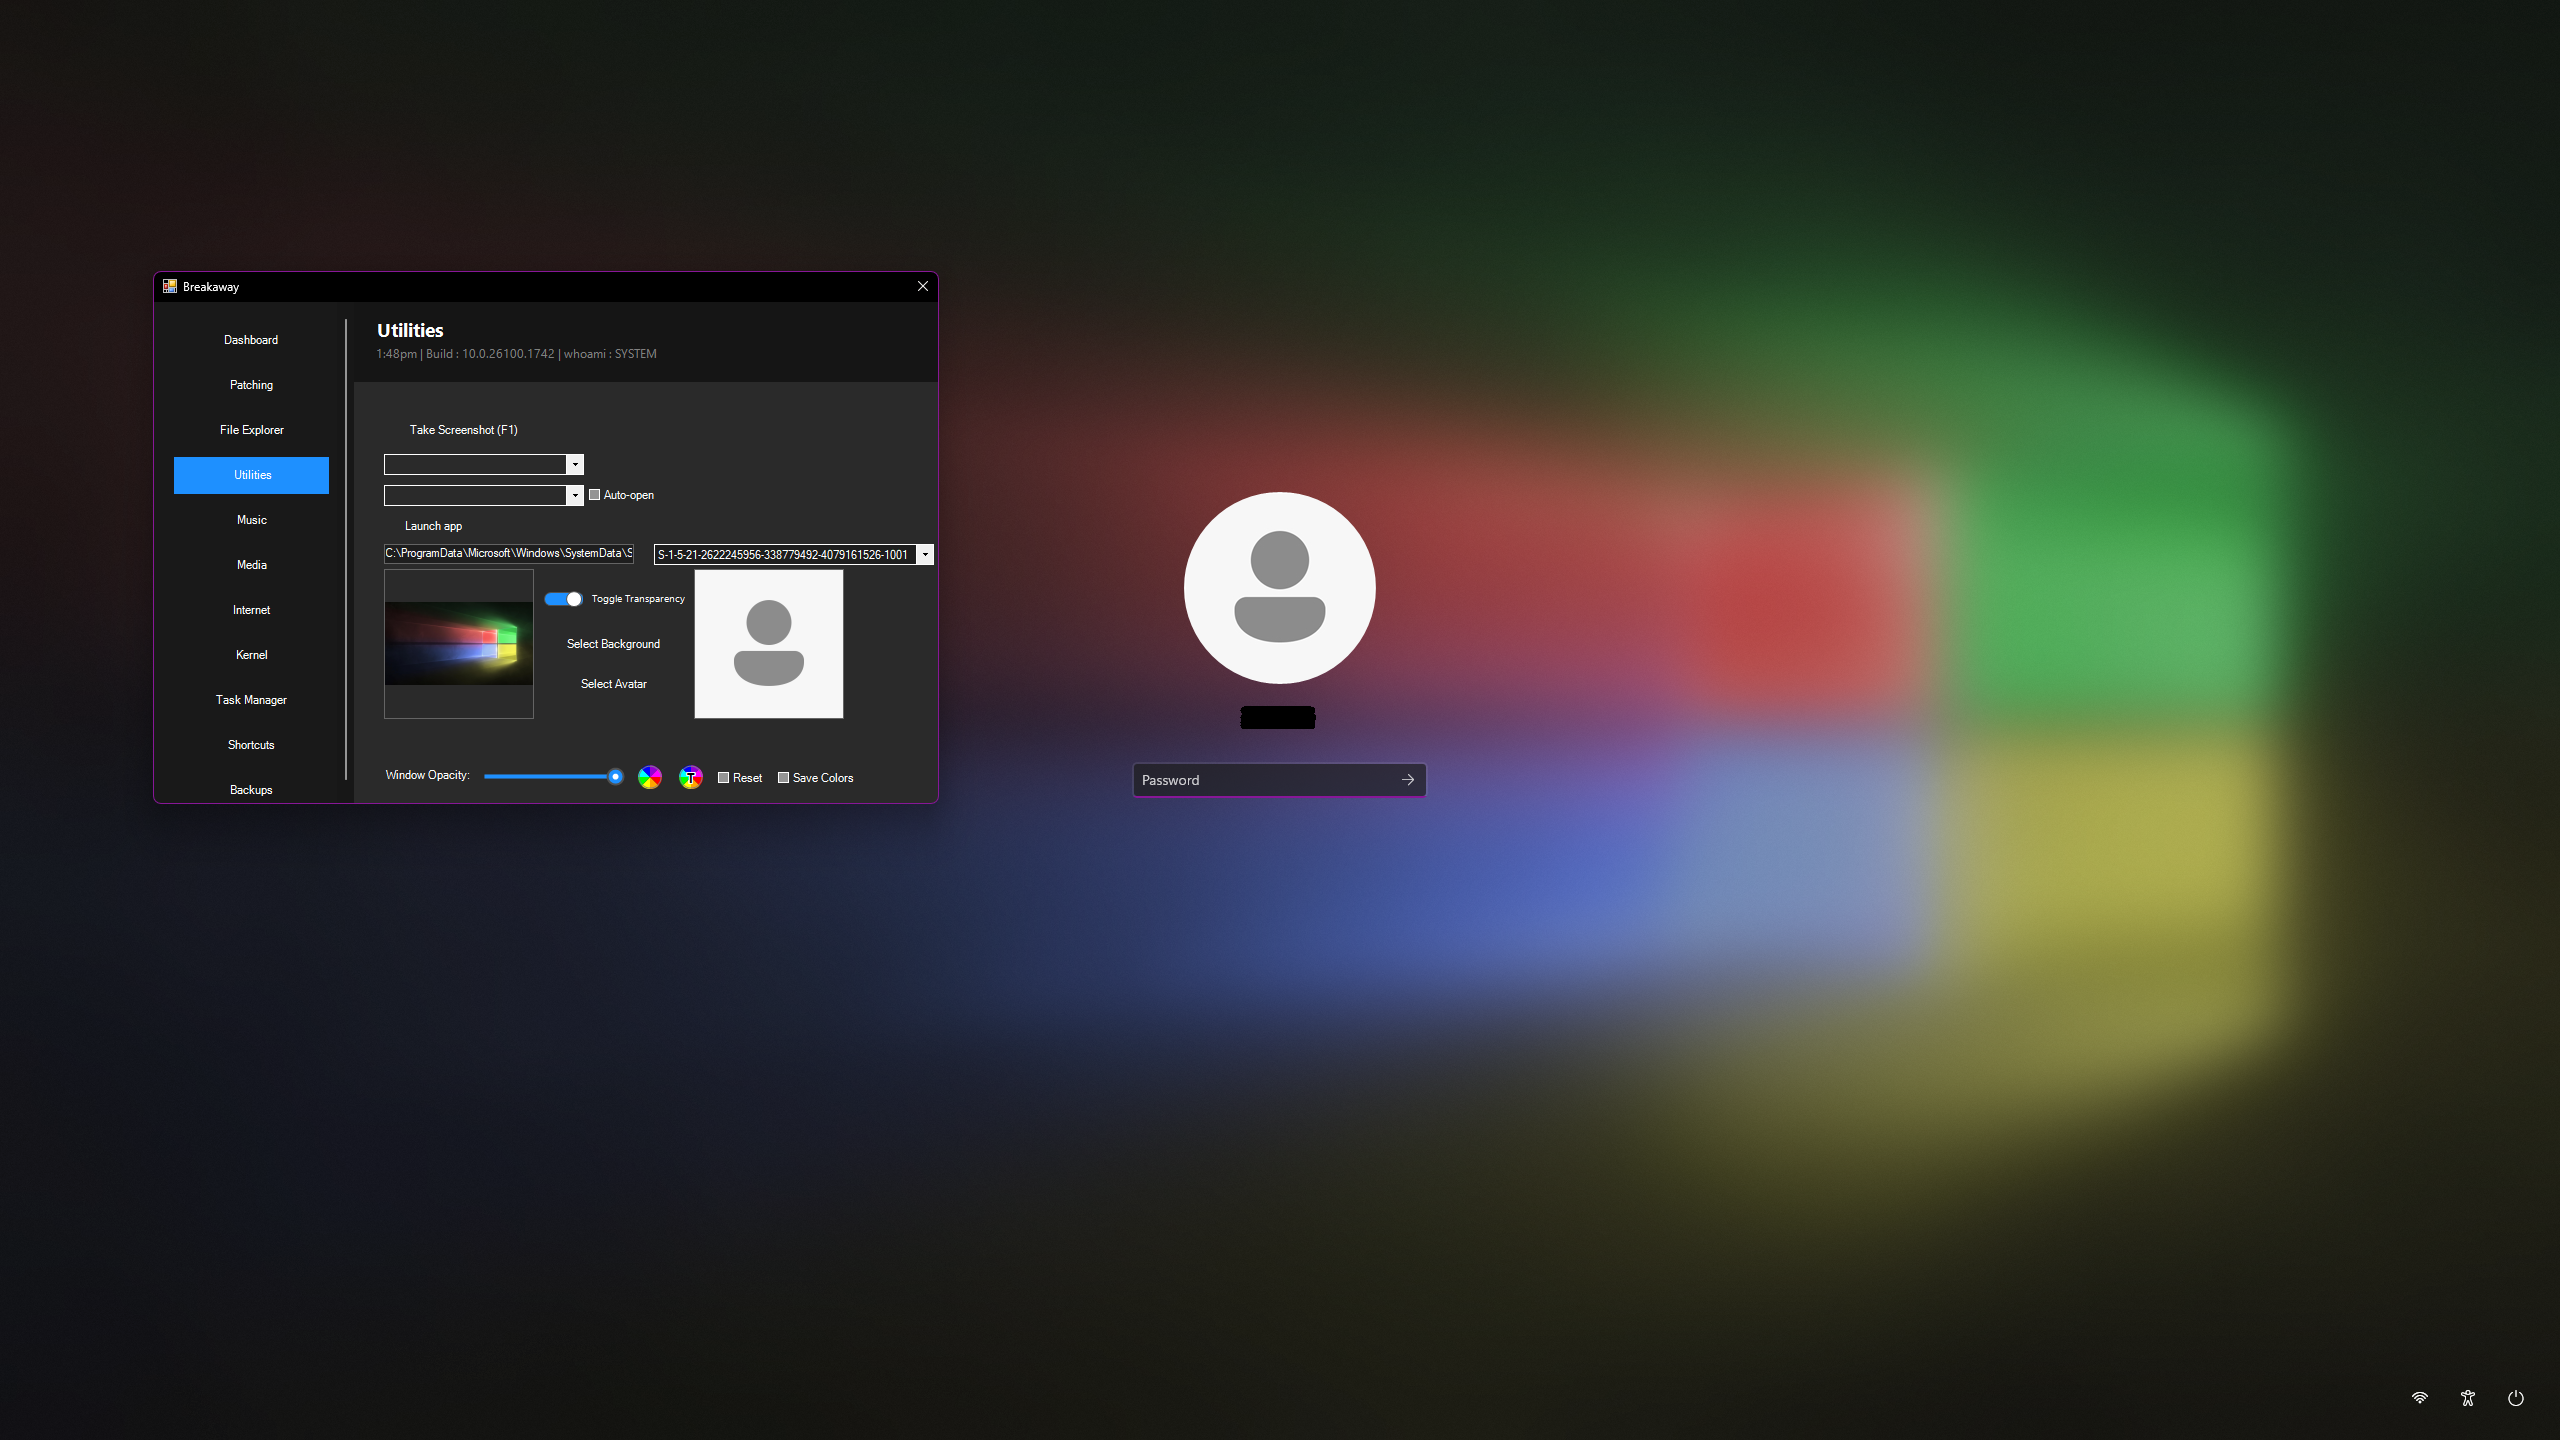
Take Screenshots system-wide, play screensavers, change Breakaways' priority.
Show SYSTEM Desktop (while locked), show a custom taskbar, and change user account backgrounds or avatars, change background tansparency.
Edit Breakaways' colorscheme. 🎨
Kernel Tab
Block or Restore Windows updates, change passwords on-the-fly, boot to different recovery environments and more.
Please use responsibly on your own machine.
Changing your own password is the intent. 😊
Not anothers. ⛔
Application Images
Screenshots of Breakaway's main interface, patching, kernel tools, file explorer, and lock screen usage.
Note* : Some images may be outdated.
Main Window & Navigation
The main Breakaway interface with left-hand tab navigation, modern dark UI, and system status indicators.
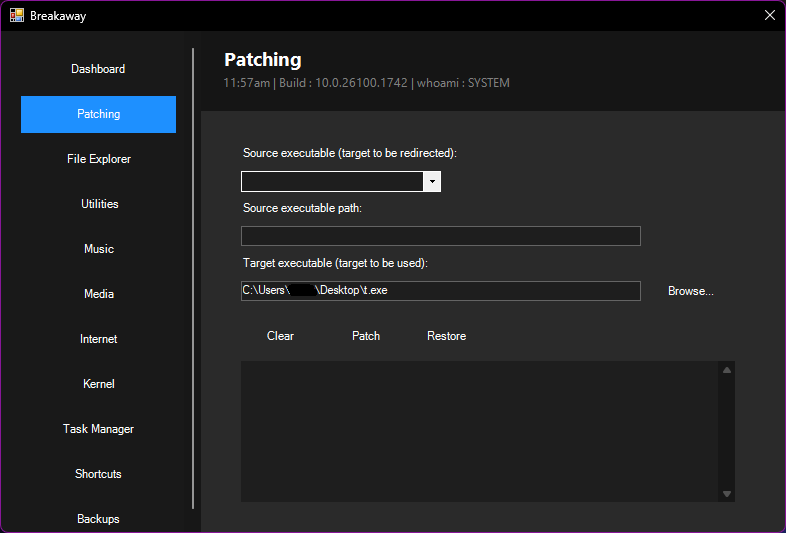
Patching Tab
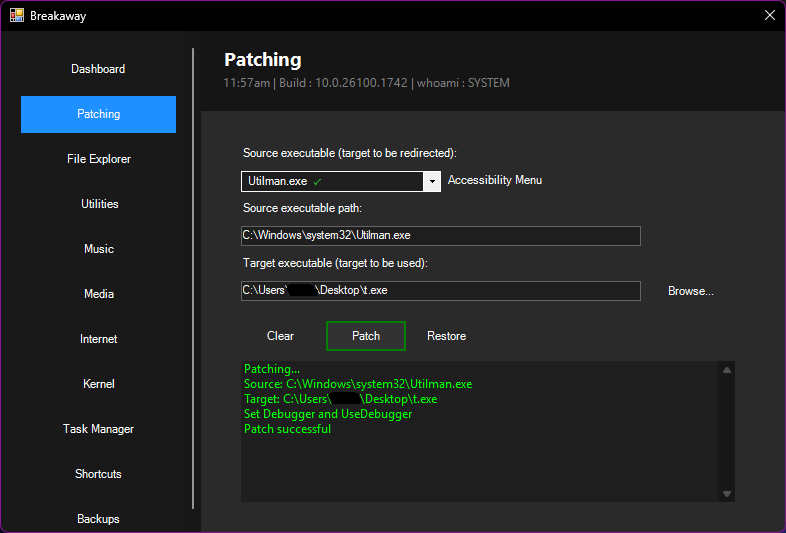
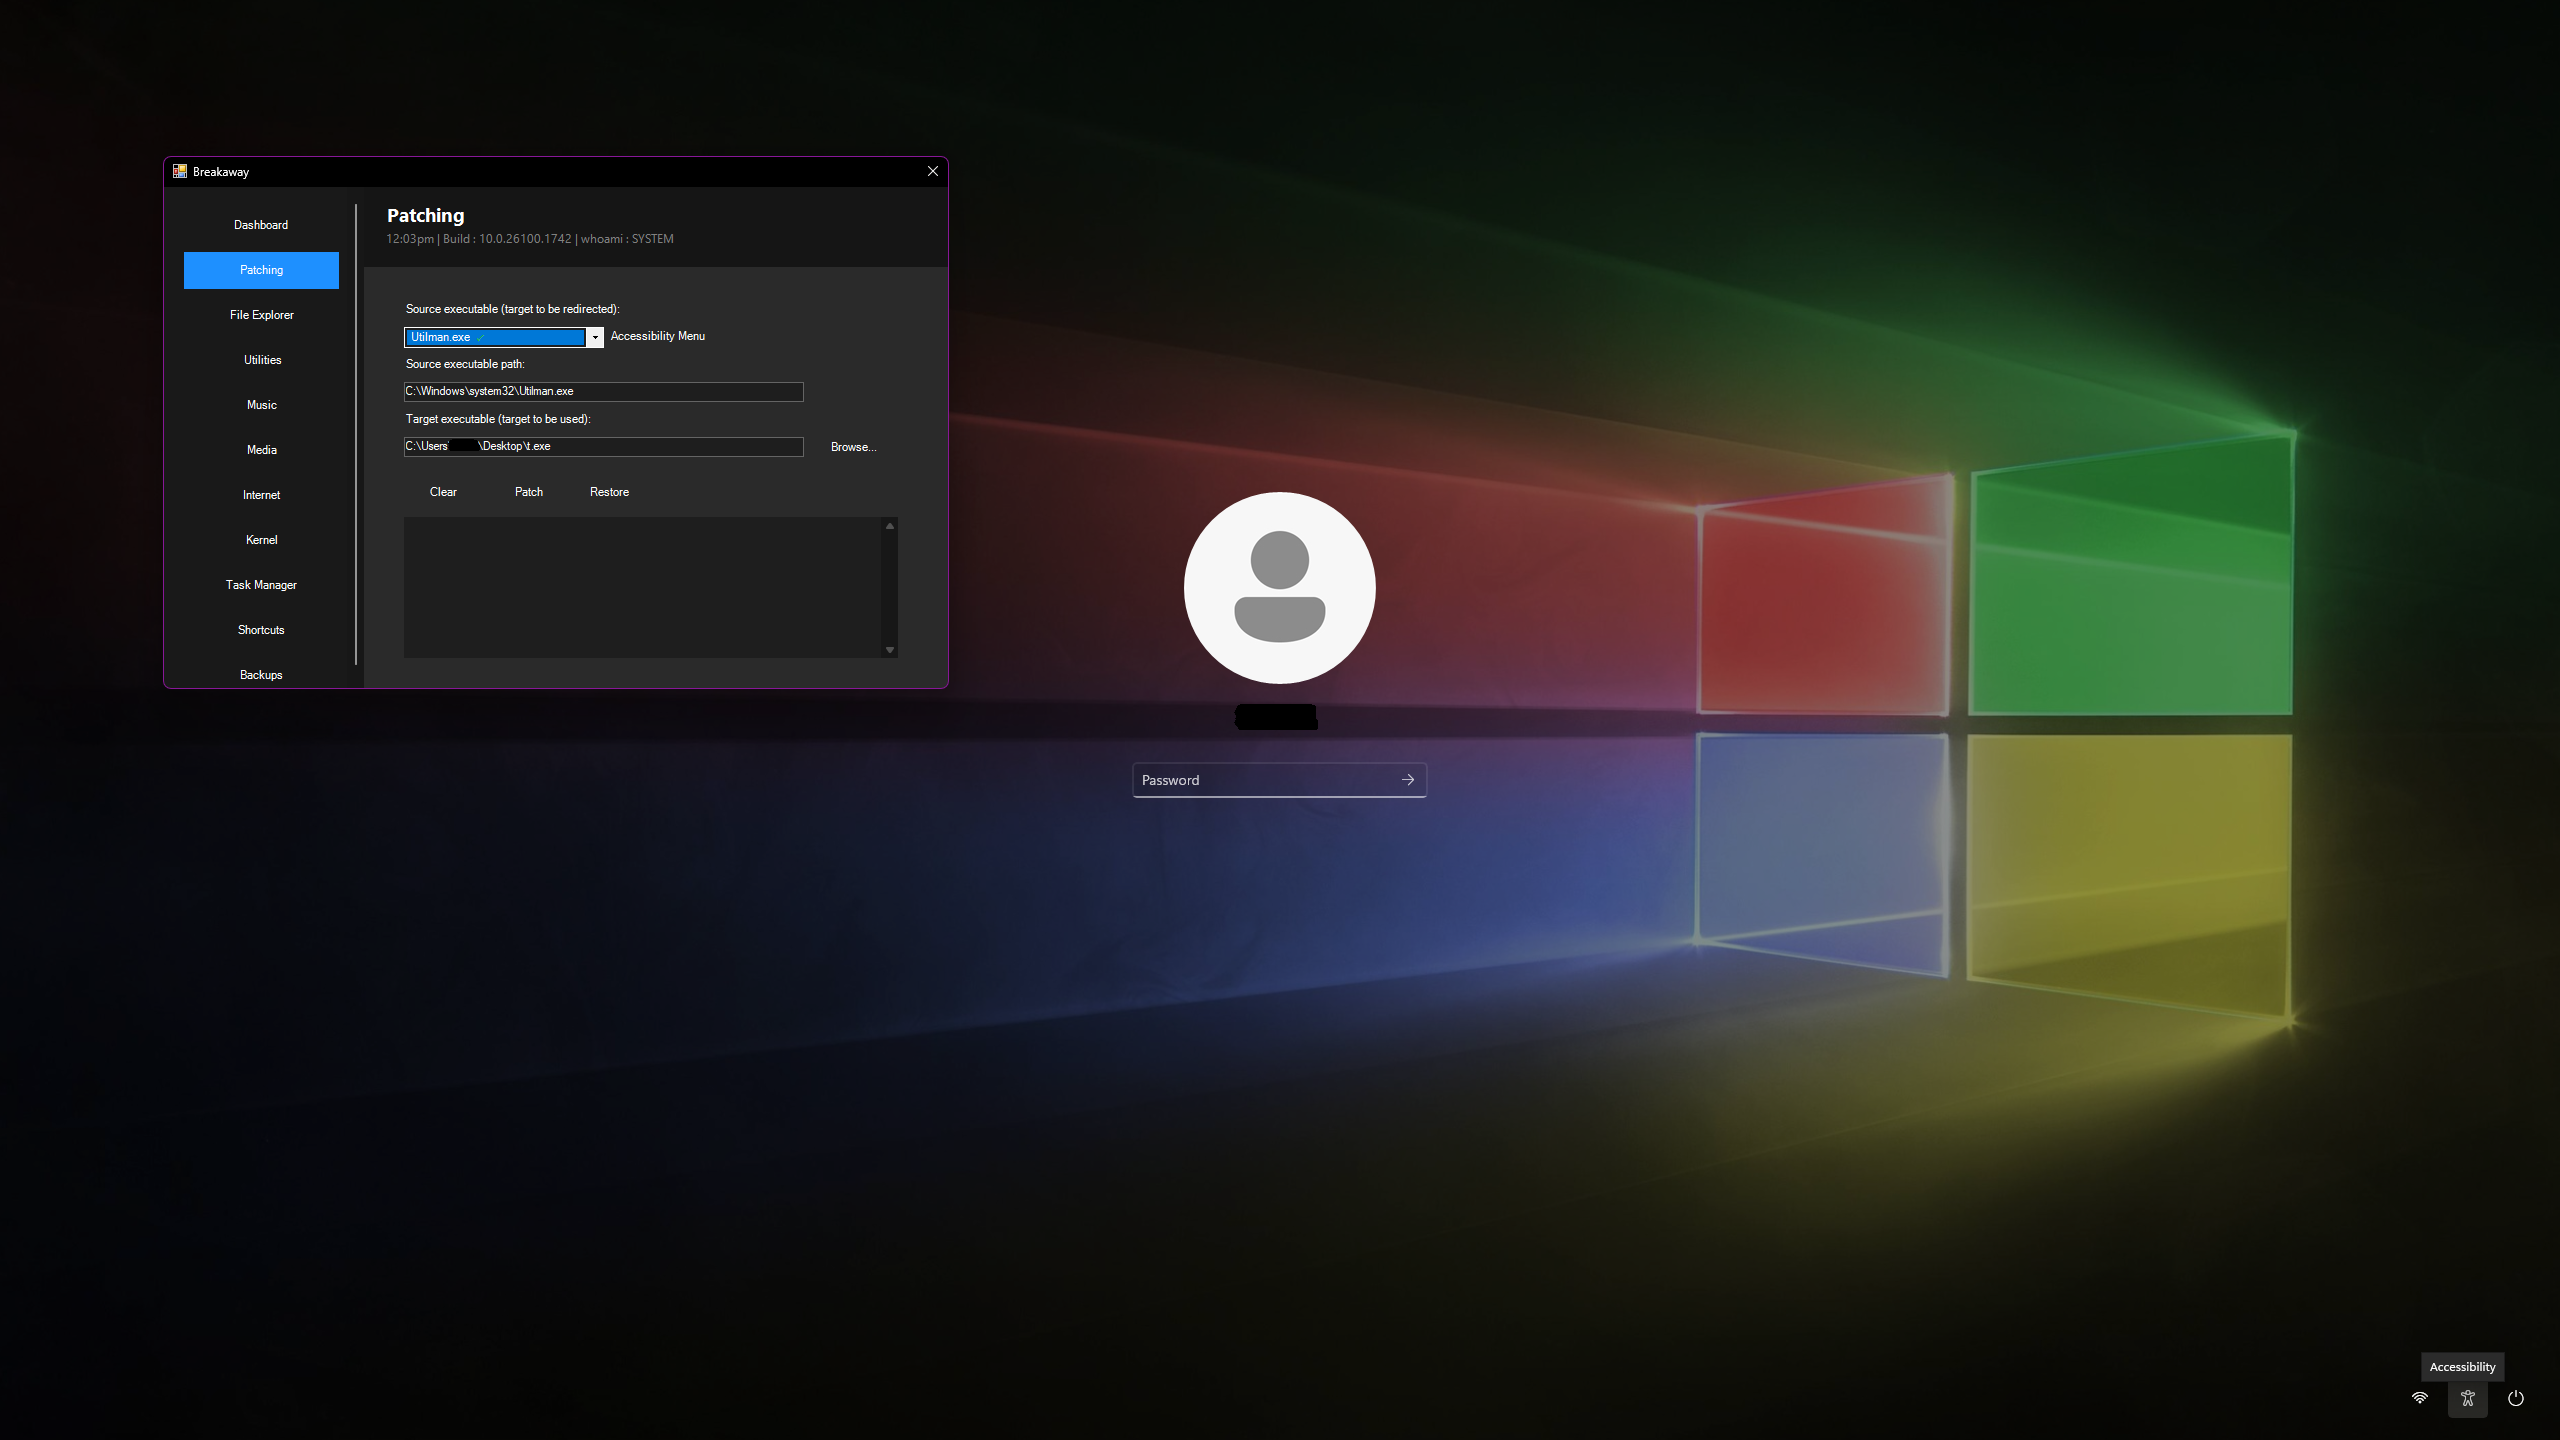
Select a source executable (Utilman, sethc, osk, Narrator), choose your target application, and apply the patch to run any app at the lock screen.
File Explorer & Utilities
Breakaway running on the Windows lock screen as SYSTEM. File Explorer opens as a dialog for full file system access when no normal Explorer window is available.
Music & Media
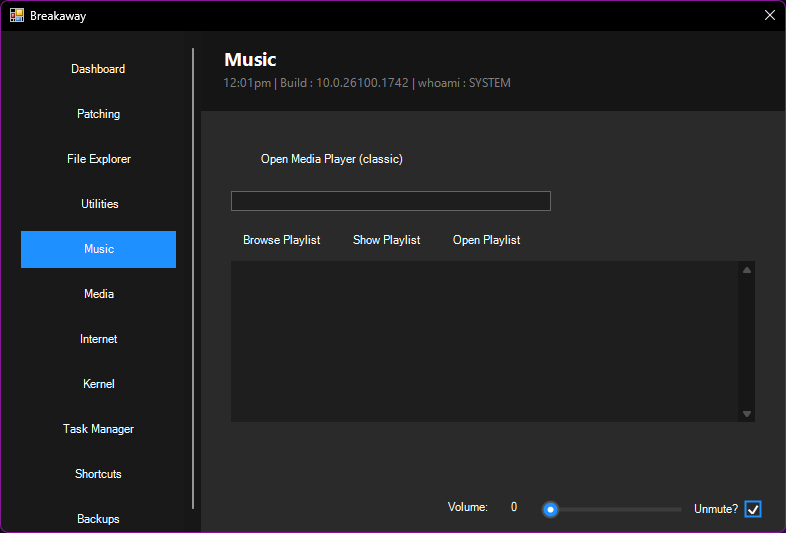
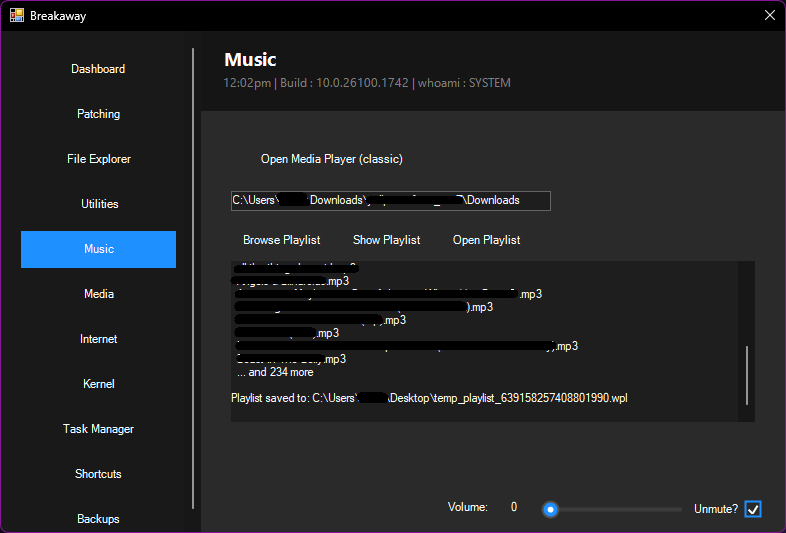
The Music Tab allows you to select a folder containing MP3s then convert them all into a WPL playlist, allowing you to play via the Music Player; a playlist or songs.
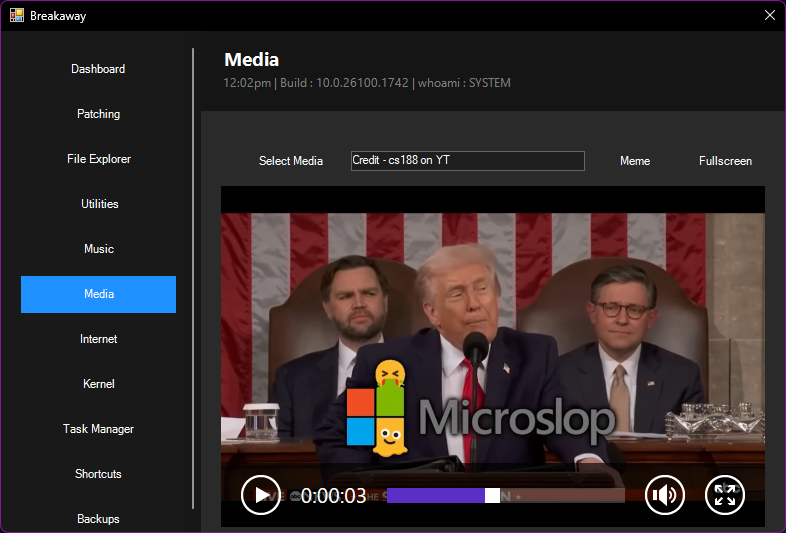
The Media Tab allows you to select video or images and view them in-app, especially useful on the lockscreen if Breakaway is patched there.
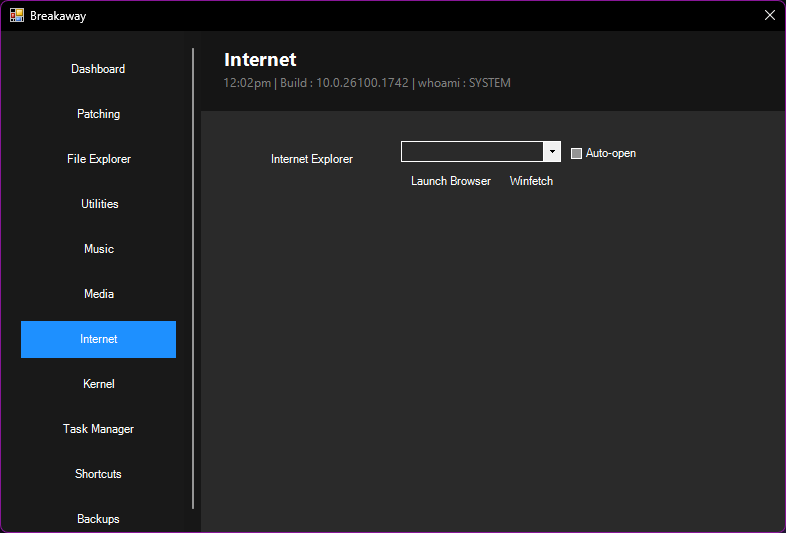
Internet Tab
You can open desired browsers directly, as well as on the lockscreen. This was implemented to allow ease of access to the browser directly without nuances.
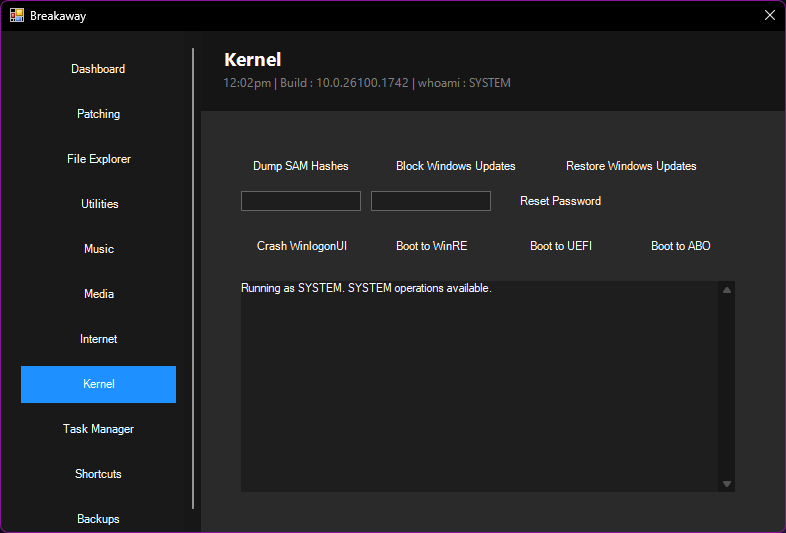
Kernel Tab
Restore patches, dump SAM hashes, reset passwords for accounts, and boot directly to WinRE, UEFI, or Advanced Boot Options.
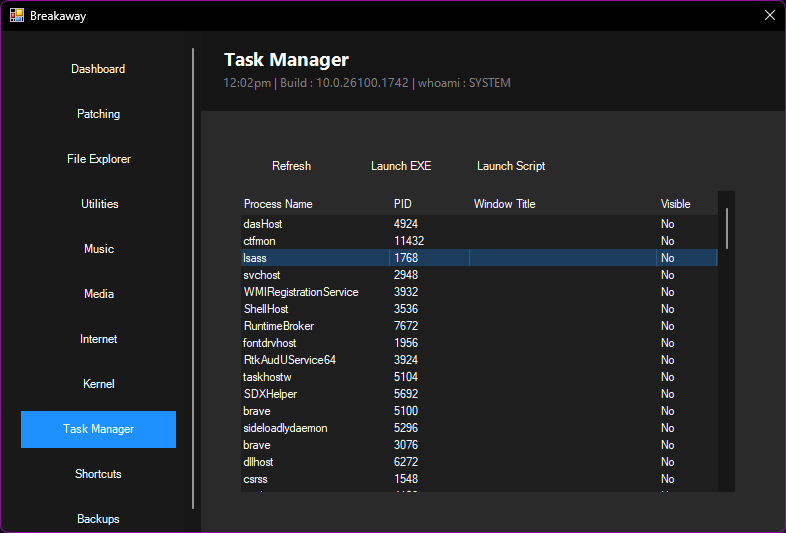
Task Manager Tab & Shortcuts Tab
View protected file system files and folders, you may also launch programs, scripts, images, and videos from paths as well.
Backup Tab
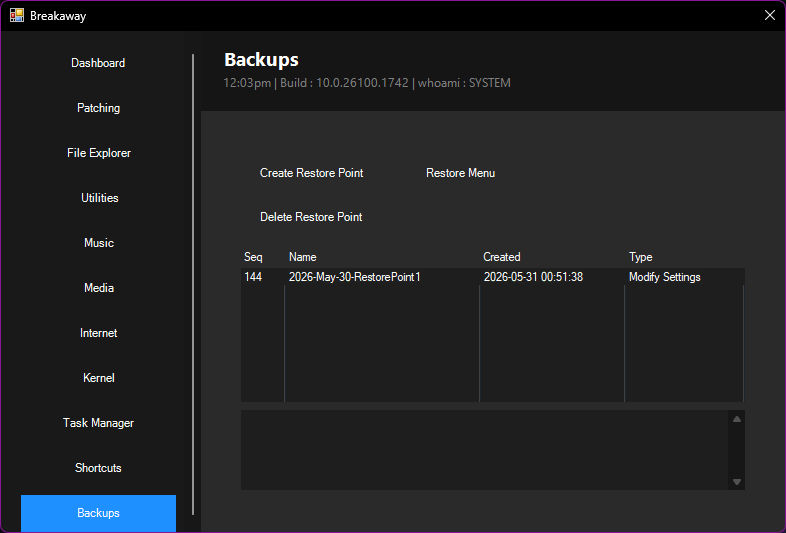
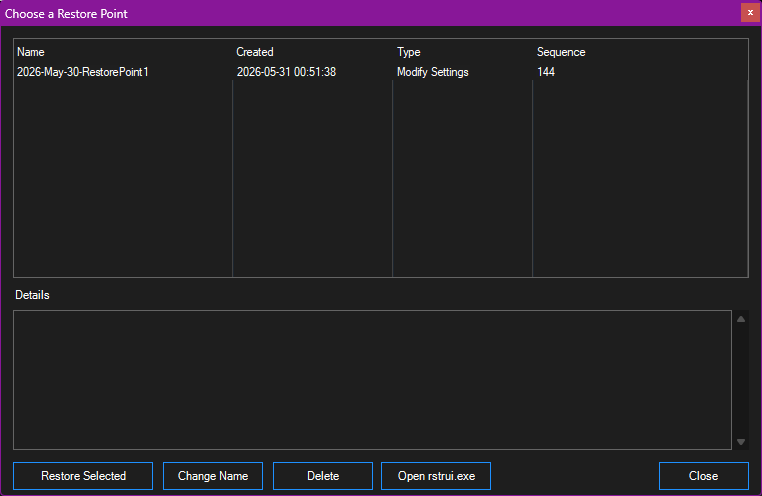
Create System Restore points on-the-fly, delete or rename current ones. The Restore Menu allows you to quickly load and run System Restores.
User Guide
How to use Breakaway, and what the first steps should be.
How to Run any Application on the Lock Screen
Under Source Executable, select one of the 4 options.
Note: When you select an item, text shows you what it is.
Recommended: Utilman.exe — it appears as the accessibility icon on the PIN/Password screen at the lock screen.
Choose which program to run on the lock screen by selecting 'Browse...' then 'Patch'.
Example:
Patching...
Source: C:\Windows\system32\Utilman.exe
Target: C:\Users\Username\Desktop\Breakaway.exe
Set Debugger and UseDebugger
Patch successful
Now when you trigger Utilman.exe (the accessibility icon), it will run Breakaway or your chosen app instead.
Making a Playlist
A dialog will open — select a folder containing MP3 or M3U files.
Click Show Playlist, then Open Playlist.
The Music Player will open — go to the top right where a four-box icon labeled 'Switch to Library' is shown, and your playlist will populate.
Bugs and Issues
Cause:
If Breakaway is patched via the Patching Tab and is actively running on the lock screen, changing the background, avatar, or transparency toggle while on the lock screen will cause the issue.
Effect:
The application will flash behind LogonUI and Lockapp.
Simply Alt+Tab back to the application, or keep the AoT checkbox enabled before editing those items.
Explorer is severely limited when running as SYSTEM on the lock screen or Secure Desktop Environment.
You can still browse, edit, rename, delete, and modify files and folders as the SYSTEM user through the File Explorer dialog, but a normal Explorer window will not work.
This is when you will see 'Server Execution Failure' errors, or 'An attempt was made to reference a token that does not exist.' error popups — for example when trying to start Explorer via cmd or PowerShell.
Even though explorer.exe does not run normally as a window in this context, it can run as a Dialog.
Try: Open Explorer via the File Explorer tab on the lock screen when Breakaway is patched.
Frequently Asked Questions
Common questions about Breakaway, its tools, features, and usage details.
General & Background
Breakaway is a C# 5.0 Windows utility that allows you to run applications at the Windows 10 and 11 lock screen, and perform elevated operations using SYSTEM-level privileges — all on your own device.
It is designed for white, grey, and red hat engineers who want full control over their own machine, including browsing the file system, changing passwords, updating backgrounds or avatars, watching media, and booting to recovery environments, all from the lock screen.
Key note: Breakaway operates entirely on your local machine using standard Windows APIs. It does not communicate over the network and leaves no permanent changes unless you explicitly make them through the app.
Windows 10 and 11 use anachronistic code. Core Win32 infrastructure from the XP era still underpins modern architecture, while newer layers such as UWP, WinRT, and modern UI frameworks are stacked on top. The lock screen is a separate Windows session (Session 0 / Secure Desktop) that runs independently of user sessions, which is why most user-mode applications cannot reach it without a specific injection or patch method.
Breakaway exploits the existing Debugger registry key mechanism and available SYSTEM process tokens to bridge this gap without modifying protected OS files.
The Patching Tab
The Patching Tab modifies Windows registry items to redirect specific system executables (such as Utilman.exe, sethc.exe, osk.exe, or Narrator.exe) to run a target application instead.
Usage:
1. Under Source Executable, select one of the four available system targets.
2. Under Target, click Browse and select the executable you want to run at the lock screen.
3. Click Patch.
Example output:
Patching...
Source: C:\Windows\system32\Utilman.exe
Target: C:\Users\Username\Desktop\Breakaway.exe
Set Debugger and UseDebugger
Patch successful
Key note: The original executable data is safely backed up internally. You can restore at any time using the Kernel Tab.
Utilman.exe — The accessibility icon (bottom-left on the PIN/Password screen). Recommended for most users.
sethc.exe — Sticky Keys, triggered by pressing Shift five times.
osk.exe — On-Screen Keyboard.
Narrator.exe — Windows Narrator.
The Kernel Tab
The Kernel Tab provides restoration and advanced privilege tools:
Restore: Undo patches made in the Patching Tab.
SAM Hash Dump: Extract NTLM password hashes from multiple local accounts for auditing.
Password Reset: Send a network-level reset command by entering a username.
Boot Options: Directly boot to Windows Recovery Environment (WinRE), UEFI firmware settings, or Advanced Boot Options.
Safety & File Modifications
Breakaway uses standard Windows APIs for elevation and process creation. Antivirus software may flag it heuristically due to token borrowing and registry modifications. If flagged, add it to your exclusion list.
Fix: Press Alt+Tab to bring Breakaway back to the foreground. To prevent this, enable the Always on Top (AoT) checkbox before editing background, avatar, or transparency settings while on the lock screen.
Downloads & Releases
Latest Breakaway builds.
Breakaway Updates
(UWP-ADU) - Universal Windows Platform Application Downgrade Utility
v0.32Version DownloaderDownload, install, upgrade and downgrade current, previous, and future versions of UWP applications on Windows 10 and 11.
Features & Tools
Find and install older or newer builds of Microsoft Store applications.
Version Lookup
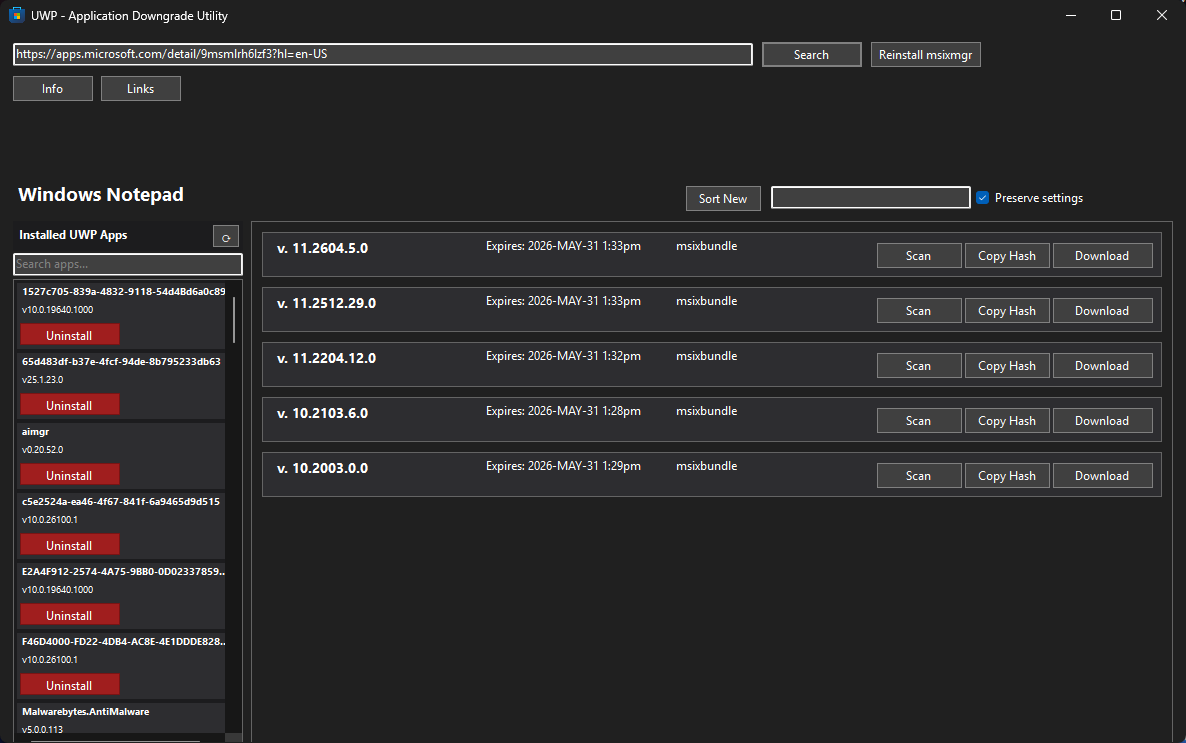
Search for any Microsoft Store application using its official store URL. Enter the URL into the search box and hit Search to load all available package versions.
Example:
https://apps.microsoft.com/detail/9msmlrh6lzf3?hl=en-US
Direct Package Download
Fetch the appx/msix package for any listed version directly from Microsoft's delivery servers. The tool downloads and installs just the package, bypassing OS update mechanisms entirely. 🎯
Sorting & Search
Sort results oldest-first or newest-first, sort alphabetically, and filter the version list with live search to find the exact build you need. ↕️
MsixMgr Integration
Detects whether MsixMgr is installed and offers a one-click install so packaged apps can be unpacked and deployed properly. 📦
Developer Mode Helper
Checks if Windows Developer Mode is enabled and lets you enable it directly — required for sideloading and AppX package deployment. 🧰
Keep Settings Option
Choose whether to preserve existing application settings when reinstalling or downgrading, so your configuration survives the version change. 💾
Application Images
Screenshots of UWP-ADU's version lookup, package list, download flow, and installed app management.
Note* : Some images may be outdated.
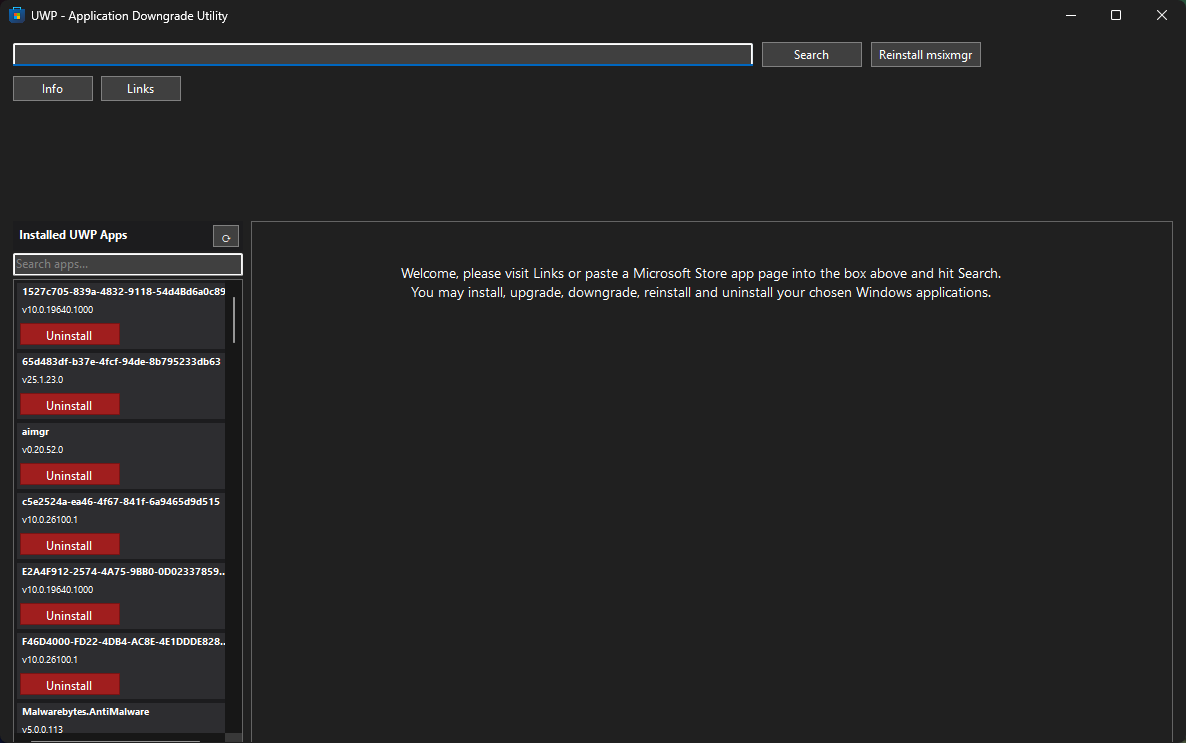
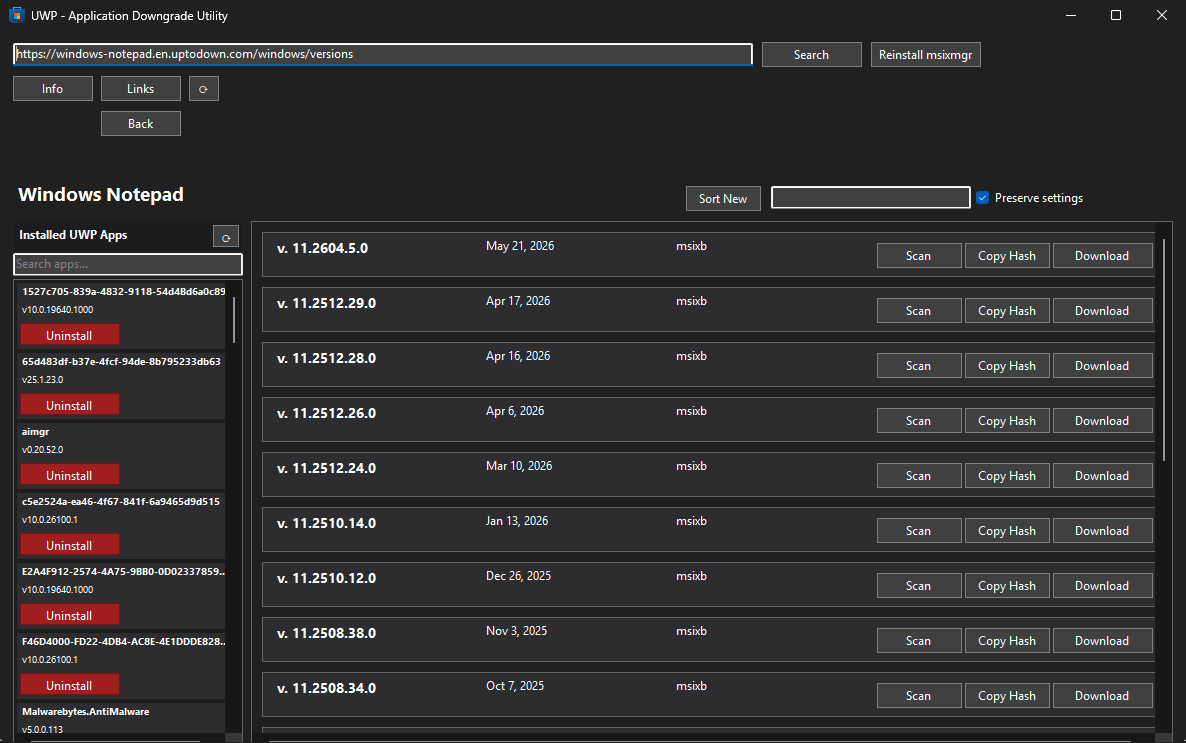
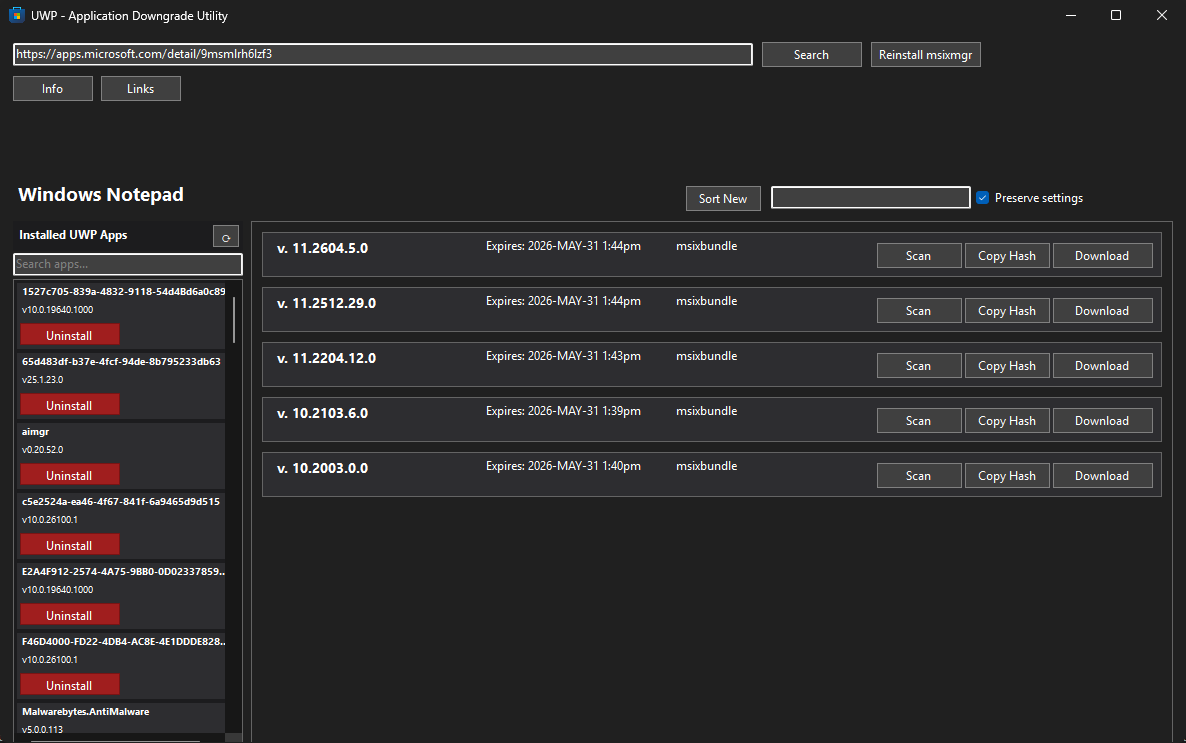
Main Window & Version Lookup
Paste a Microsoft Store app URL and hit Search. All available package versions load in the right pane with version, date, and file type.
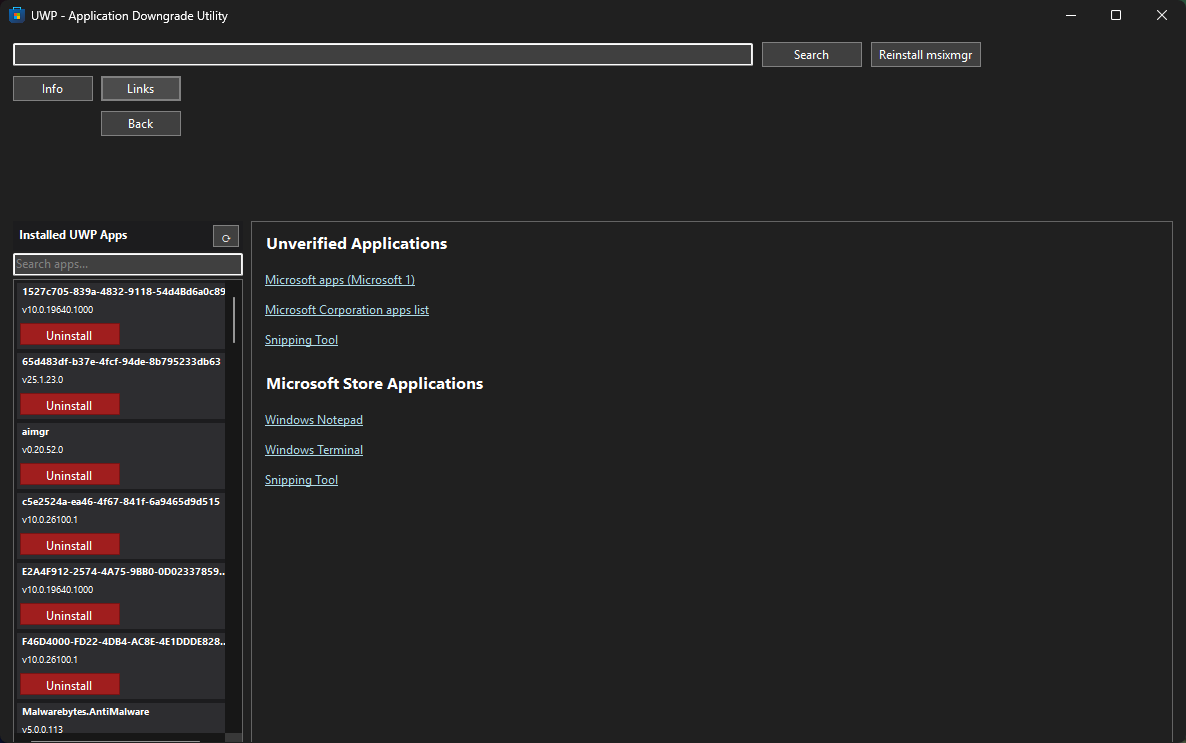
Or visit the Links button and use unofficial links, then search for the desired package to install.
Links Tab & Current Applications
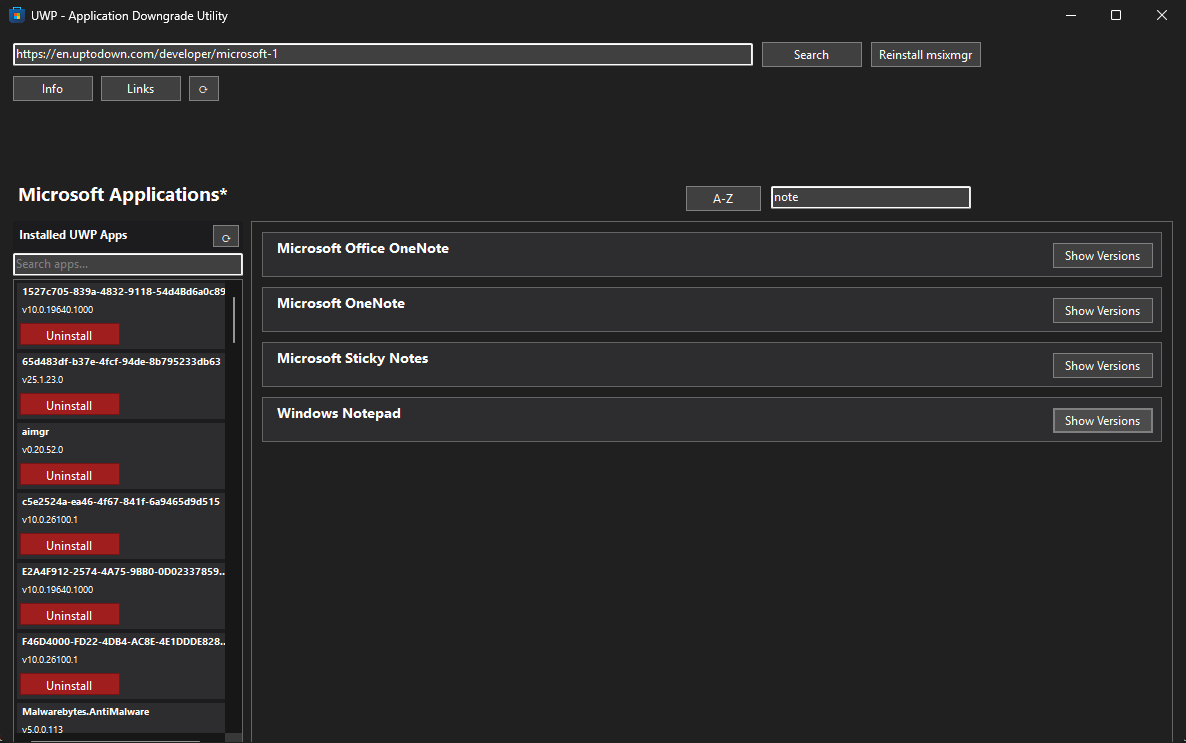
Easily navigate the Links tab for UWP applications, or parse a MS Store link in above to load the package information.
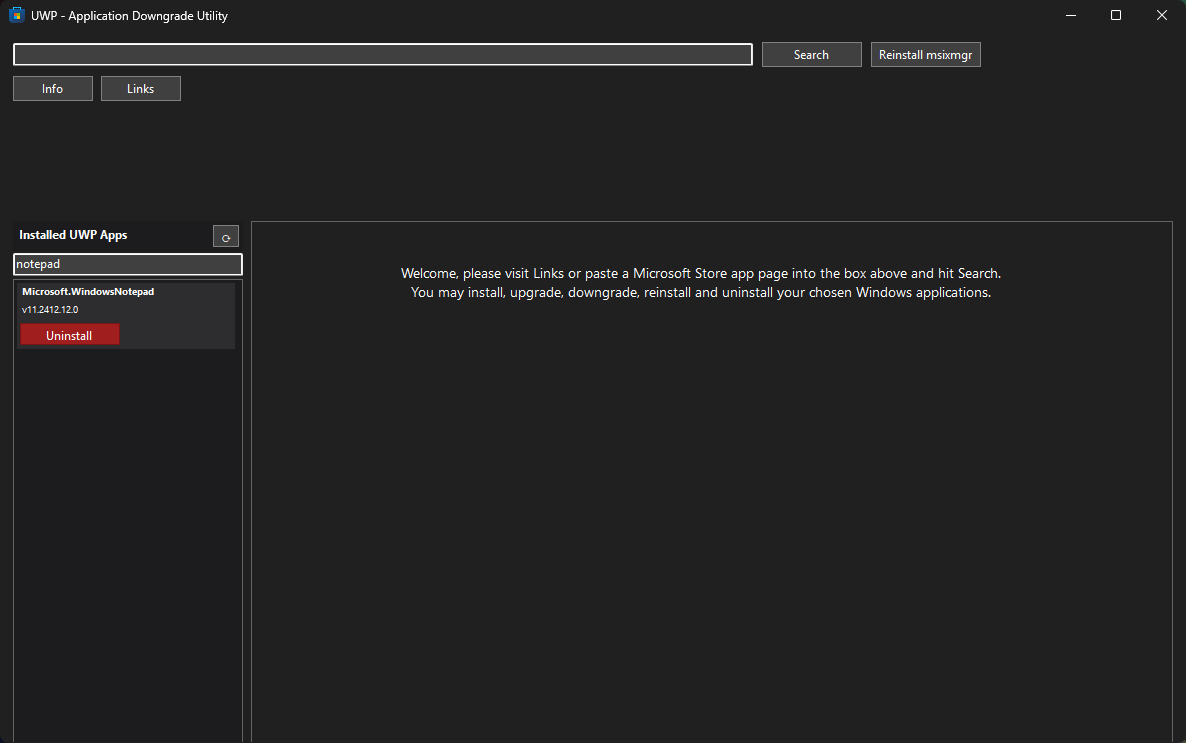
Installed UWP Apps & Developer Mode
Developer-Mode and Msixmgr are automatically installed to upgrade and downgrade UWP apps.
You can simply upgrade and preserve settings as is, or downgrade by uninstalling and installing your target version.
Note :
Uninstalling causes you to lose application defined settings. Upgrading an application allows you to keep your saved settings.
Additionally : Ensure the application you are upgrading/downgrading is closed before un/installation.
User Guide
How to find and install a previous version of an app.
Targetting a UWP Application Version
Paste a Microsoft Store app URL into the search box and hit Search.
Example: https://apps.microsoft.com/detail/9msmlrh6lzf3?hl=en-US
Searching this Notepad link will load the last few available versions.
Alternatively, browse the built-in 'Links' button tab, then click on Notepad for example.
In the same Links button tab you may click on the first or second result, and items will appear. Most items do not have many versions, but some may.
You can then click 'Show Versions' to load that program's versions.
'Back' will go back to the previous list you were looking at.
After clicking 'Show Versions' you will see multiple buttons to Copy the hash, Scan on VirusTotal, and Download.
Please be sure to scan it with your anti-virus, first and immediately.
I am not responsible for damages if the files downloaded are embedded with malware or other harmful content.
The application can install various files such as, .exe, .msix, .msi, as well as some Windows Installer operations.
Alternatively you may go to your Downloads folder, which the files downloaded will be located there.
Frequently Asked Questions
Common questions about UWP-ADU, its tools, features, and usage details.
General
UWP-ADU (Universal Windows Platform Application Downgrade Utility) lets you download, install, downgrade, restore, reinstall, and version-target Microsoft Store applications on Windows 10 and 11.
It fetches app packages directly from Microsoft's delivery servers, bypassing the Store update mechanism entirely. This lets you install older builds, restore a working version after a bad update, or install newer builds on older Windows versions.
Key note: UWP-ADU must be run as Administrator for installs to succeed. Developer Mode must be enabled and MsixMgr installed for sideloading packaged apps.
Newer updates sometimes remove features, change behavior, introduce bugs, or silently update without notification. Common reasons to downgrade include a feature you relied on being removed, visual or functional regressions, or unwanted major updates.
UWP-ADU prevents and mitigates forced UWP application updates by allowing you to install and stay on any specific version you choose.
For sideloading and deploying packaged Store apps outside the Microsoft Store, Developer Mode generally needs to be enabled. MsixMgr helps unpack and install .msix and .appx packages correctly.
UWP-ADU detects whether both are present and offers a one-click install for each if missing.
To enable Developer Mode manually: Run ms-settings:developers in the Run dialog or Settings.
Installation & Deployment
UWP-ADU handles installing the following file types:
.msix — Modern packaged app format.
.appx — Older packaged app format.
.msi — Windows Installer packages.
.exe — Standard executable installers.
After downgrading, the Microsoft Store may detect the version mismatch and auto-update the app back to the latest version.
To prevent auto-updates:
1. Open the Microsoft Store.
2. Click your profile icon (top right) and select Settings.
3. Toggle App updates to Off.
Downloads & Releases
Latest UWP-ADU builds.
UWP-ADU Updates
Live Chat
ask questions hereLive Support & DiscussionConnect with others, ask questions about the programs, and share your experience or issues.